Today the plan was to get some more construction lumber and build the dividing wall so I can do the last of the wiring... the storage area is going to have its own light and switch, and I can't install it until the wall is framed, so off to Menard's I go.
I don't know what it is about that drive to Menard's, but I always have new, better design ideas during that 7ish mile drive. I thought up a new, better stairs design. Considering that I am meeting the CAD engineer tonight at about 7, I better hurry up with this post and get to sketching out the new design I thought up.
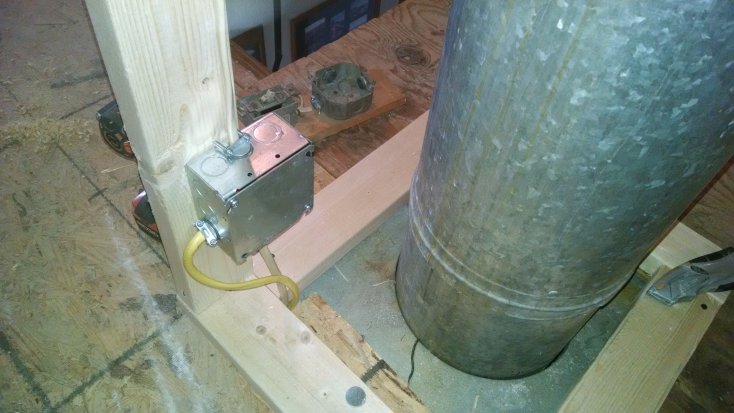
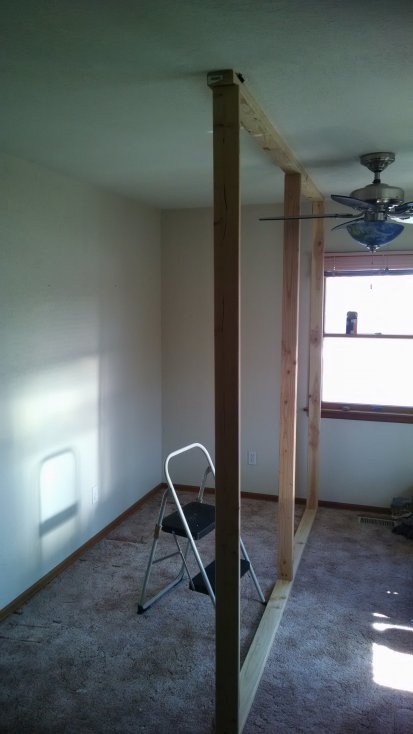
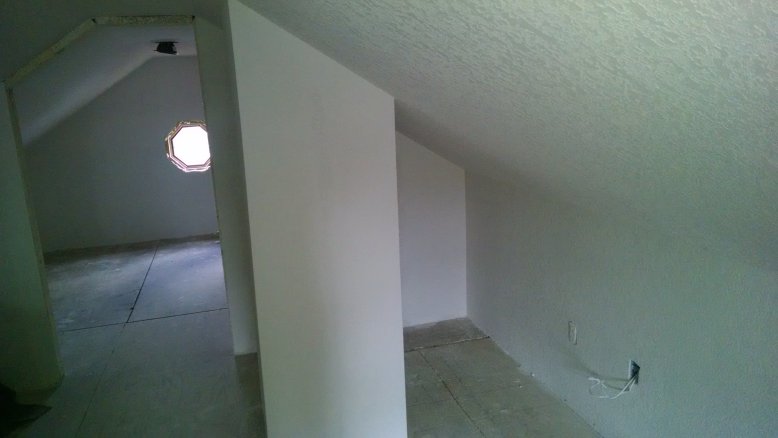
First step is to frame up the wall. I last-minute decided to frame up the vent pipe too, in order to clean up all the temp wiring we did at the base of it when we wired in the new circuit (Right now all the new lights and outlets are sharing the circuit with half the upstairs bedrooms, the way it was originally wired. New NEW circuit will be pulled from the breaker box when the upstairs bathroom is installed. I just don't have a good existing wiring path from basement to attic... when floors and ceilings have holes in them for new upstairs plumbing, that is a good time to run a new electric line)
There used to be a wiring mess right here, now there's not. I removed the stuff that is sitting on the floor behind the new stuff. Light switch is now on the wall near the top of the steps that don't yet exist.
New switch and outlet.
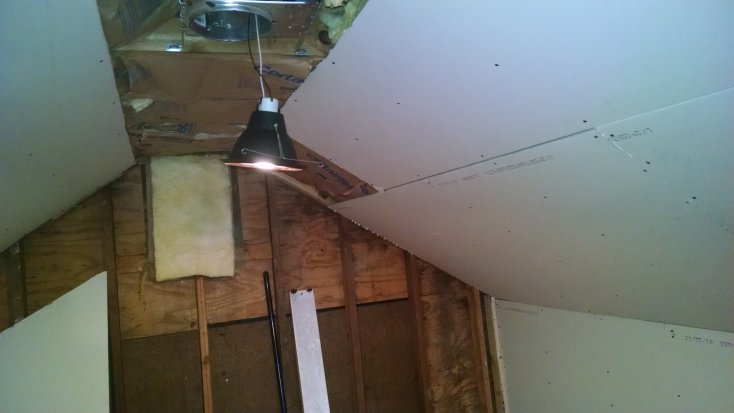
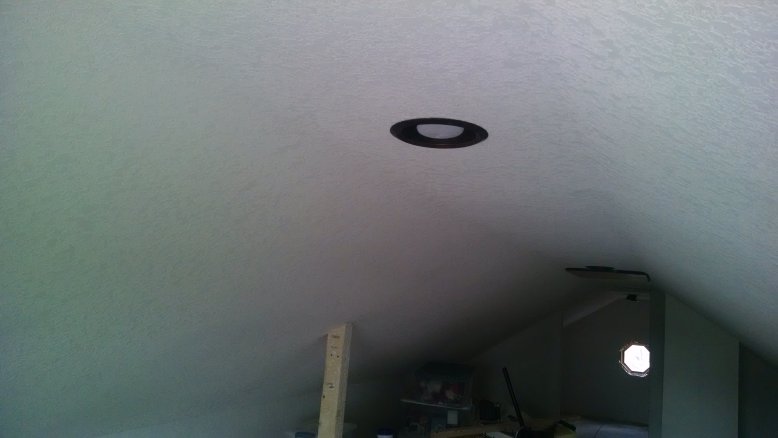
And the third and final light is installed and working.
Good times.
"Be bold, and mighty forces will come to your aid."
TheCatt wrote:Yeah, the more I think about it the more I'd love to live somewhere more rural with land... if I could find a place like that which was still convenient to work, shopping, amenities, fast internet, etc.
Too many trade-offs.
I live in a small, unincorporated town, but I am still 20 minutes from downtown Toledo, for what THAT'S worth.
I am curious as to why you are so well versed with your local building codes.
Edited By GORDON on 1424123377
"Be bold, and mighty forces will come to your aid."
GORDON wrote:I don't know what it is about that drive to Menard's, but I always have new, better design ideas during that 7ish mile drive. I thought up a new, better stairs design. Considering that I am meeting the CAD engineer tonight at about 7, I better hurry up with this post and get to sketching out the new design I thought up.
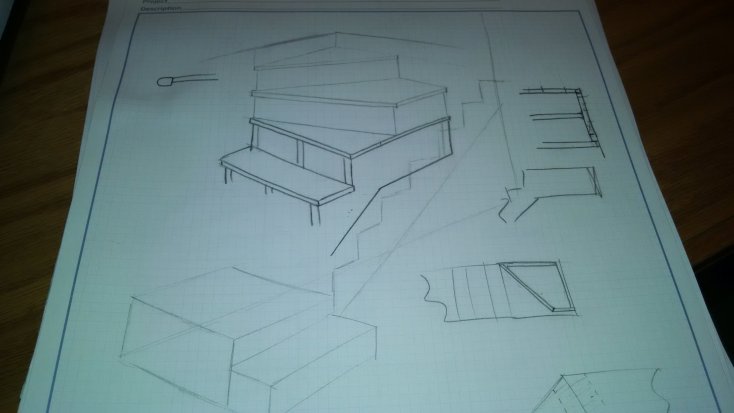
I sketched it out and went to his place for a bit and in about 3 hours we had a working plan.
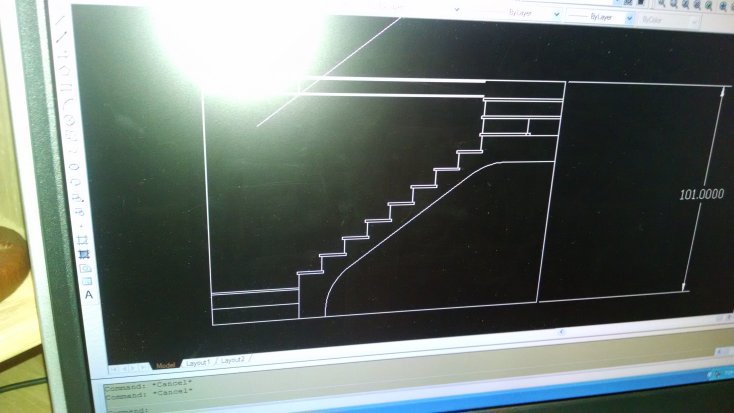
His particular CAD program couldn't save it to a jpeg, and I don't have the program on my PC with which to display the file, so I just got a pic of the screen. Nice, gently 7.5" rise, 10.5" steps, and a landing so the bottom of the stairs doesn't just stop at a facing wall. It was the landing at the bottom that was the new idea that fixed all my concerns.
He drew this freehand. He's pretty good.
I am buying the materials this weekend, we are building them this week in his basement woodshop, and the plan is to cut the hole in the ceiling at in about 10 days. It's going to look pretty good.
+++
Otherwise, attic is completely insulated and drywalled, and holds heat pretty well. I don't have the insulated cap over the retractable attic stairs in place at all, and I can't feel any cold air coming down from the attic even in these sub zero temps. So that's good.
Moving right along. Will probably get stair construction pics.
Edited By GORDON on 1424464702
"Be bold, and mighty forces will come to your aid."
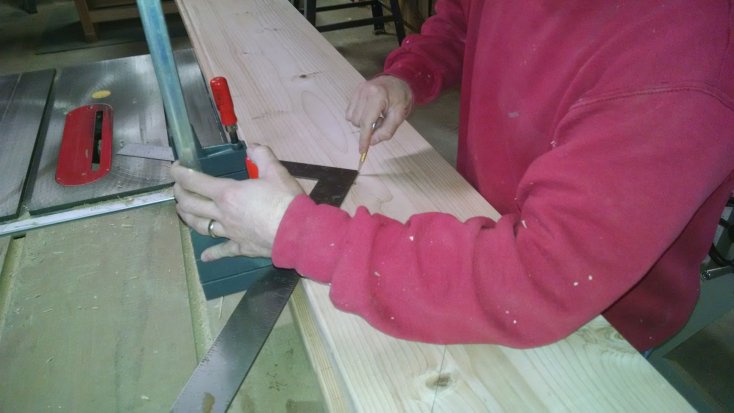
We didn't get a super-lot done because we went back to design for about a half hour to adjust one of the design aspects, but we got the first stringer (the pieces that go up and down and the treads are nailed to them) marked and cut.
Once the first stringer was cut we were able to use it as a template for the others.
Tomorrow morning we are cutting the ceiling hole, and hopefully tomorrow evening we are building the lower and upper stairway landings. The stringers go in between them.
Edited By GORDON on 1425951948
"Be bold, and mighty forces will come to your aid."
Got the studs measured and marked to cut, and cutting has begun.
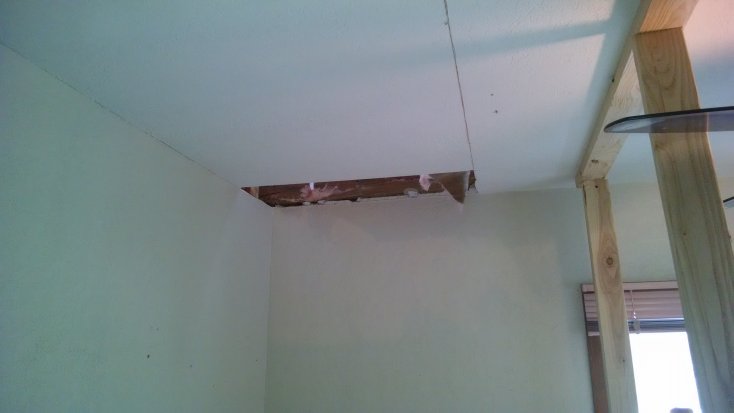
This is a load bearing beam, ensuring the majority of the weight of the stairs will be transmitted to the roof rafters, and thus the outside, load-bearing walls, instead of down through the middle of the house. Basically, we cut the bedroom ceiling/attic floor joists, and transferred the weight to the roof rafters.
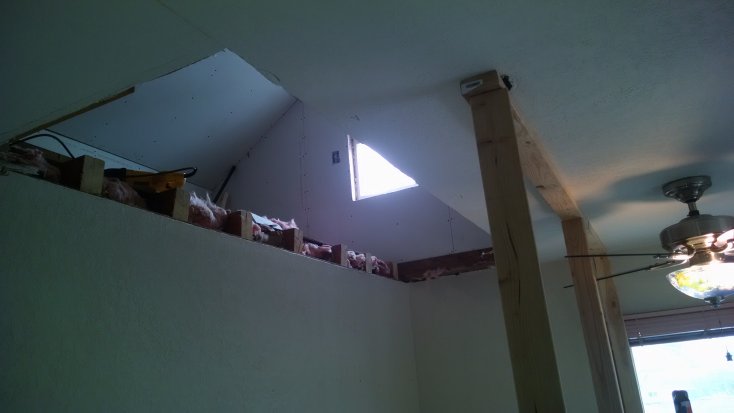
First cut into the bedroom. It was so novel being able to see up into the attic from there I had to take a picture.
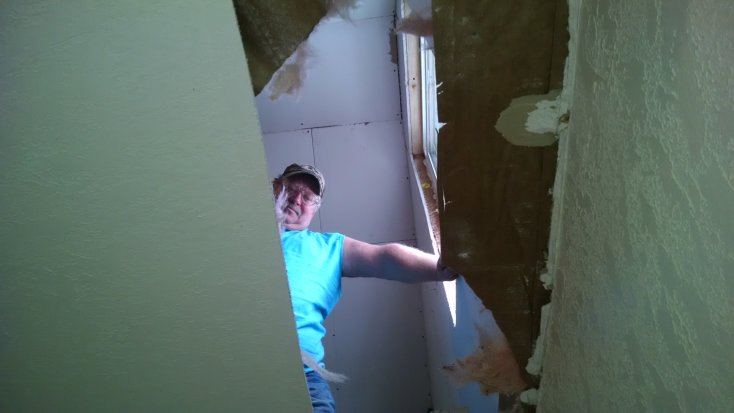
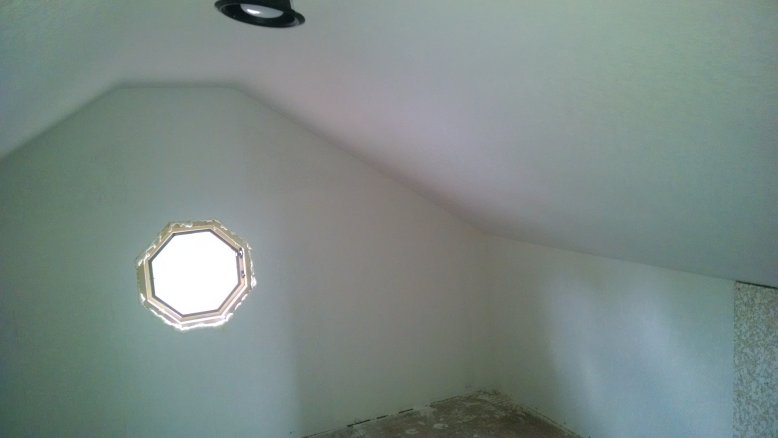
Hi, UnkBill! He's up there standing next to the new attic window.
And here's the general sightline you will have when you enter that bedroom... I love how you can see up into the room. Most of that will not be masked, just some open railing at the top ledge. Should be able to see that second high window. Will look a lot more interesting that just a plain old flat room.
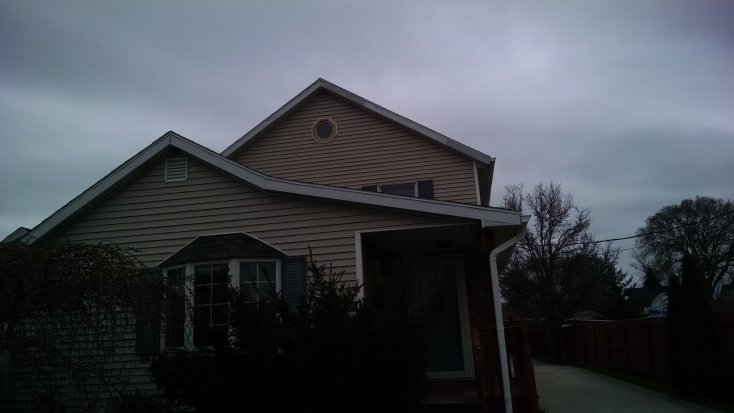
Actually have the hole framed up and the first two landings built, but I forgot to get pics and my feet are killing me from standing on ladder rungs all day. Will post more pics tomorrow. I believe Unk is planning on installing the octagonal window in the opposite wall now that the snow and ice is gone from the front roof.
"Be bold, and mighty forces will come to your aid."
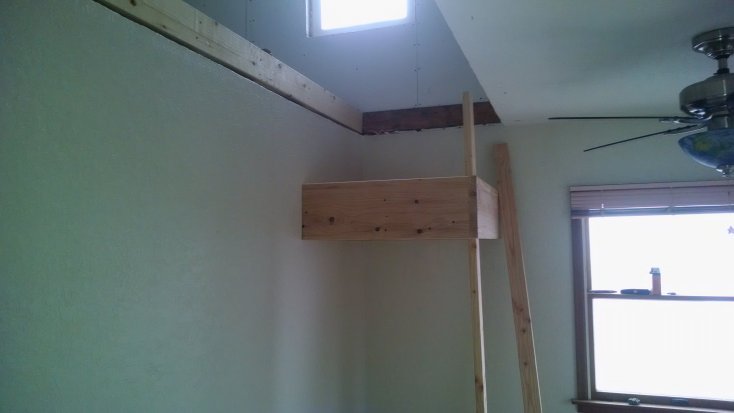
Here's what was already done last night when I was too tired to go get pics.
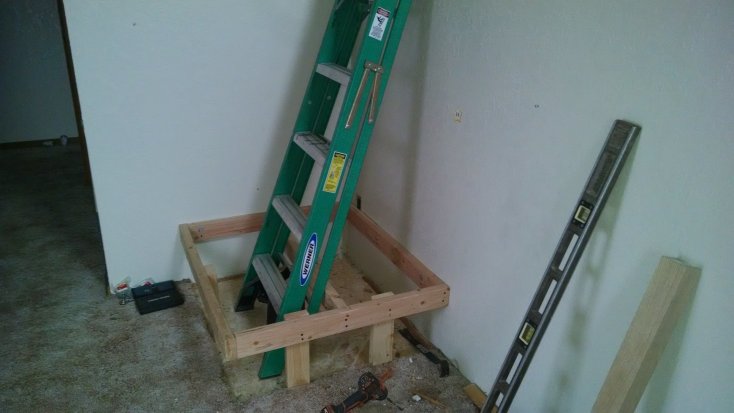
Bottom landing begun.
Top landing begun.
Stringers will run between them.
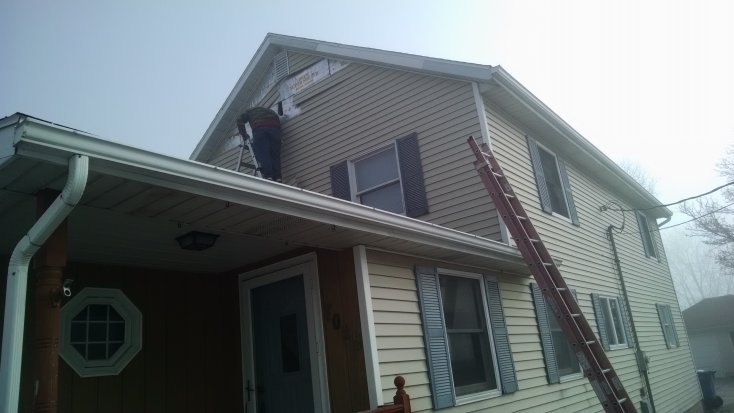
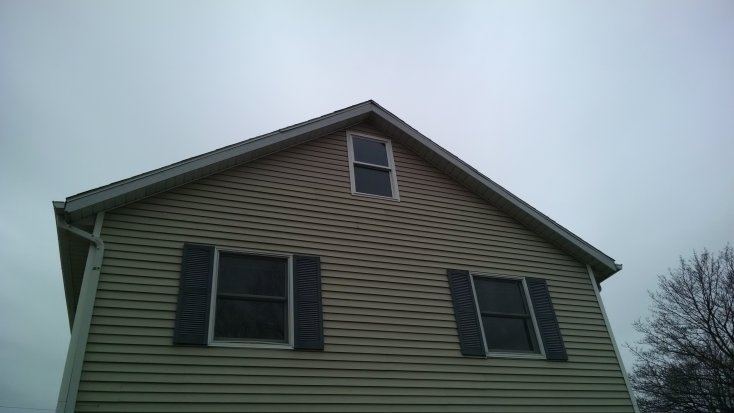
Too much fucking busy today, starting with a 2 hour delay for fog (seen in the background of the next picture), taking my MIL to goddam doctor appointments, another Menard's run, and then a showing of a dead person in advance of tomorrow's funeral. But anyway, here's Unk prepping the front of the house for another window. The window is actually in, but again, too lazy to go out and get a picture of it right now.
"Be bold, and mighty forces will come to your aid."
Have been doing plenty, just nothing picture worthy.
I pulled up every floor plywood and added more insulation to keep wind from blowing side to side through the floor.
The front window is in and the siding is done... I just noticed I don't have an outside view of that. I'll get one next time.
I decided to outsource the drywall finishing. It would take me a month to get it done, and I don't want to wait a month, so fuckit. I'll hire a pro and not worry about it. He's coming tomorrow.
Had to get a new batch of siding... floppy-ass shit.
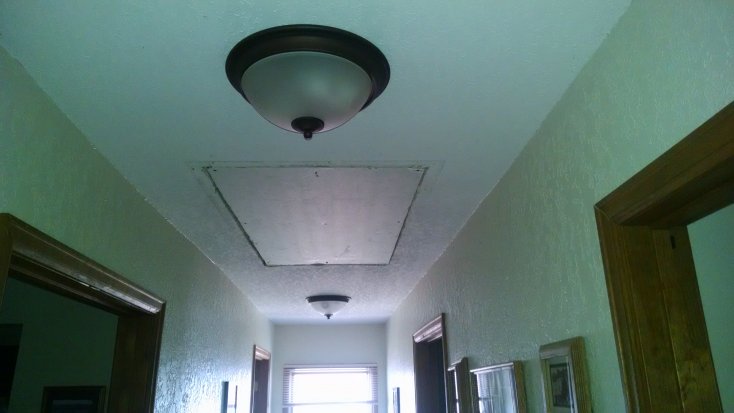
The ladder to the hallway has been removed and that hole filled up, so the drywall guy can match it to the existing ceiling. That is something I wouldn't have been able to do.
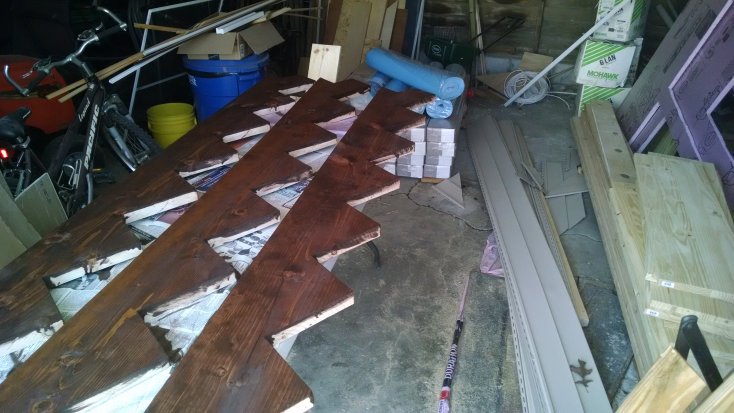
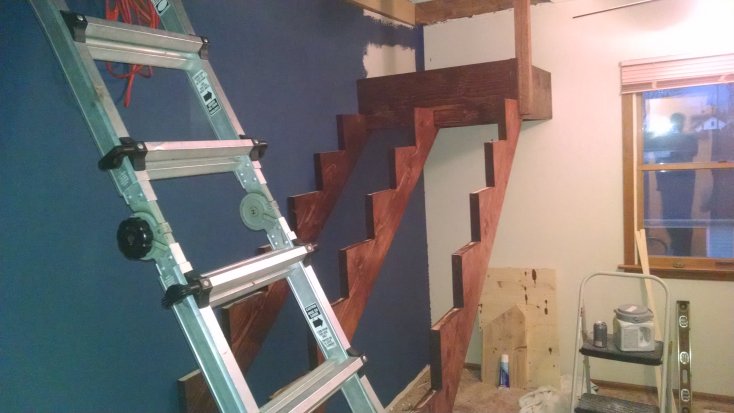
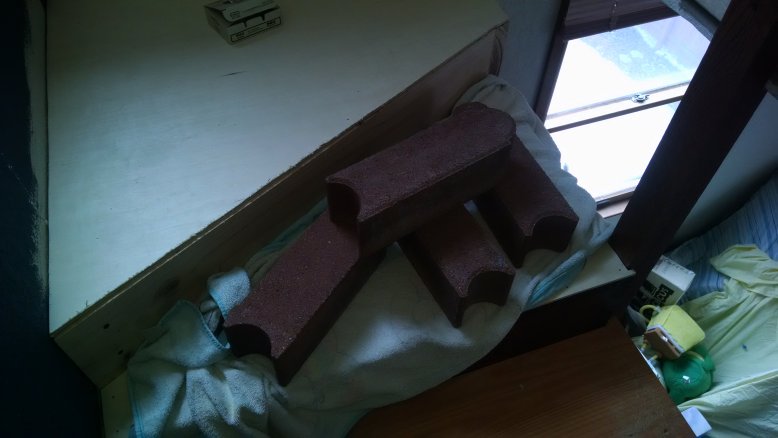
Staining wood REALLY causes a lot of stink that lingers for 3 days, so I did the stringers outside. This actually delayed me a few days because when I wanted to do it we had a late season cold snap so it was too cold, then it was rainy and I didn't want to do it out in the damp air, then on the nice days I had other shit to do.... but I finally got it done. BTW, that's the new flooring in the background. Turns out that a 12x37 foot attic is a lot of damned square footage.
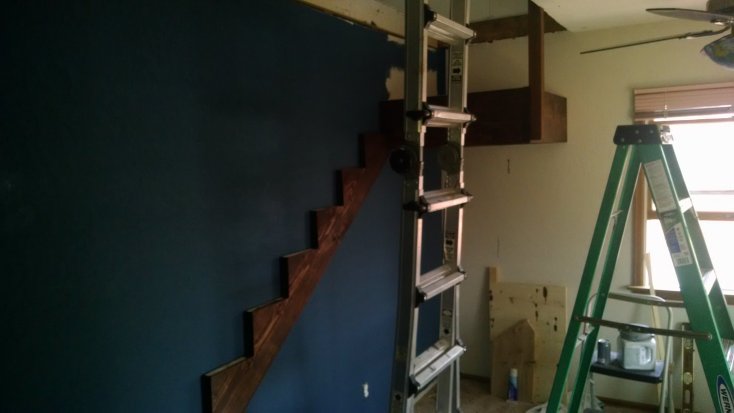
I also decided to paint that wall before I started putting up the stringers, so I did that. Now I don't have to do a ton of trim-taping around the stairs in order to paint.
I am doing a two-tone stain job. The treads and landings will be that lighter shade, and the stringers and risers will be the darker. Since I stained them before assembly there won't be any bleeding of the colors and it will look sharp.
Right this second that metal ladder is the only attic access. I have other errands to run tomorrow while the drywall guy is working, but I hope to start the actual stair tread installation this weekend, if I can get over to the carpenter's house and have him cut them to size.
You may notice the 2x4 temp support is gone, the weight is now hanging from that newell post. Goddam wood was so hard that I actually broke a 3inch lag screw I was putting into it. Head twisted right off. Yes, there was a pilot hole.
"Be bold, and mighty forces will come to your aid."
Aaaaaaand the drywallers just left for the last time, so that is done. I will probably get up there tomorrow when it is dry for some pics... don't want to go up now and stumble into a wall and mess up the still-wet knockdown texture on the walls.
As soon as it is dry the painting will start, should be a 2 day project as long as only 1 coat is needed. I have discovered the "premium" paints usually only need one coat because they are as thick as pudding.
As soon as the paint is dry the flooring will start going down. It is laminate and I did laminate in the basement so it shouldn't take me too long this time. The first time I did it I spent about 3 days starting it and taking it up and restarting it and hitting youtube for how-to videos. This time I know what I am doing.
As soon as the flooring is down, new furniture and the kid can move his shit up there.
As soon as the new furniture is in I can build the railings around the stairs hole so no one dies. Furniture probably wont fit once the railing is up.
I got the first 8 steps cut to size yesterday. As soon as the weather stops being shitty (hello April in Ohio) I will get them stained out in the garage and start getting them in place.
"Be bold, and mighty forces will come to your aid."
Furniture probably wont fit once the railing is up.
Maybe build collapsible railing for future moving of furniture?
The thought certainly occurred to me, but I don't know if I have that kind of skill and I don't want to put my carpenter buddy to work TOO much because he is too polite to say no.
Yes you do. Abuse the Flanders.
Diogenes of Sinope: "It is not that I am mad, it is only that my head is different from yours."
Arnold Judas Rimmer, BSC, SSC: "Better dead than smeg."
Rather than collapsible you could do removable without too much added skill. Build the whole thing with slightly longer baluster to slot into holes in the floor, then secure them with some sort of cotter pins. After pin removal the whole thing comes out in one piece to move out of the way of furniture being moved.
Edited By TPRJones on 1428537247
"ATTENTION: Customers browsing porn must hold magazines with both hands at all times!"
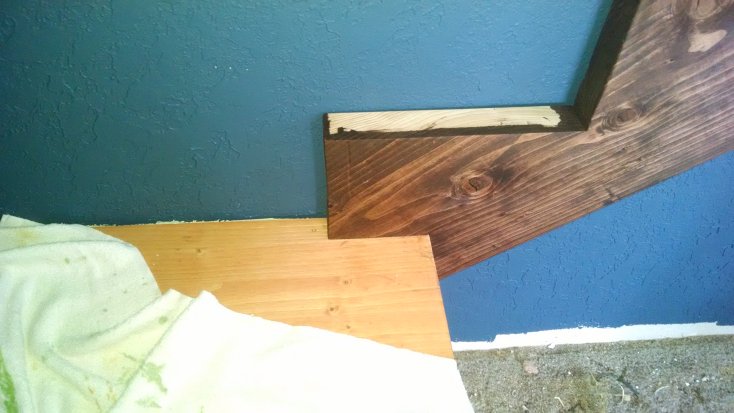
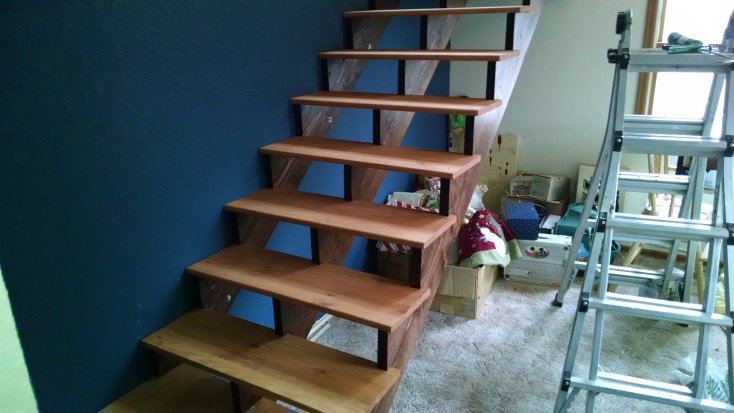
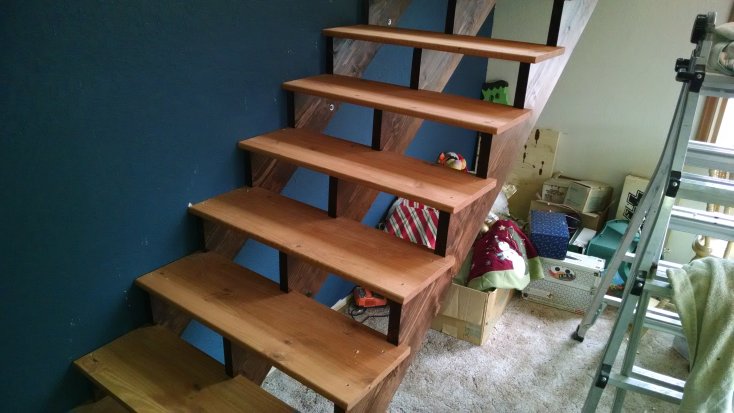
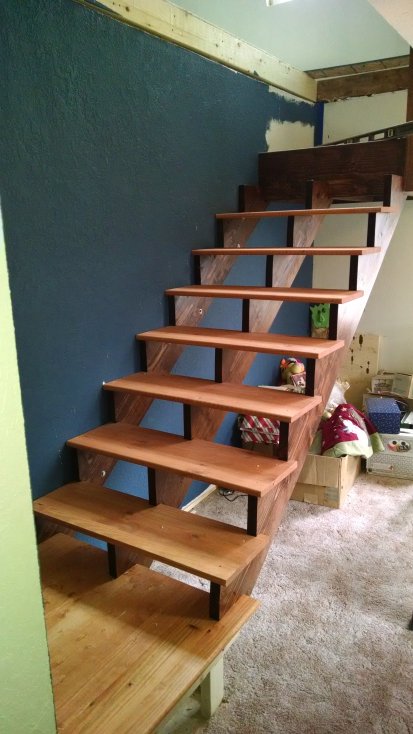
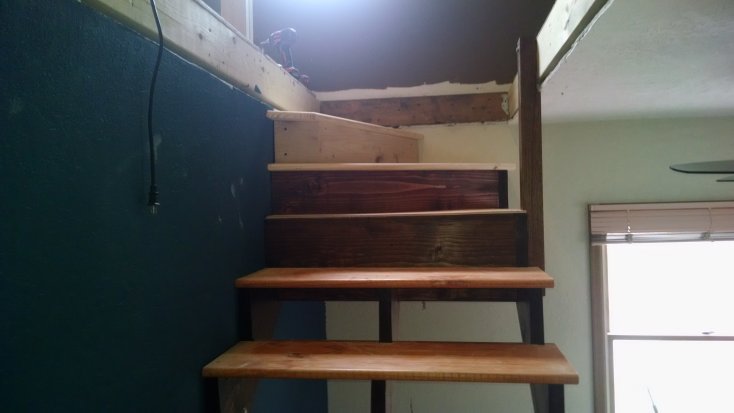
Here are the first 7 steps, dry-fitted. I did a C+ job cutting the notches out of them so they would sit 1" back into the stringers, but for the most part I think no one would even notice it unless it was pointed out to them. You can also see the bolts I used to secure the wall stringer directly to the wall studs. Between that and the supports I put up to the roof, there should only be a small percentage of the overall weight of the stairs being translated to that bedroom floor. Also, the stringers already have been sanded and are under 2 coats of polyurethane. I'll give them 1 more coat later to seal them to the treads. Good thing Menard's was recently having a sale on poly, and I bought 3 quarts.
Here are the steps actually glued and screwed down... look closely you can see the recessed screw holes. I'll be putting wood plugs in those later. A tiny bit of the glue squished out from between the tread and stringers, so tonight after that dries I will be applying the first coat of poly to the treads. I'll probably put at least 4 coats on since that will be the walking surface.
Notice the drywall up there above the steps... all done. I'll get upstairs pics once I get it cleaned up. Painting phase is starting really soon because the furniture has been ordered and it all needs to be done in less than a month.
Next "step" of the stairs project is to get the last 3 up there on the upper landing built. Whole new set of challenges.
"Be bold, and mighty forces will come to your aid."
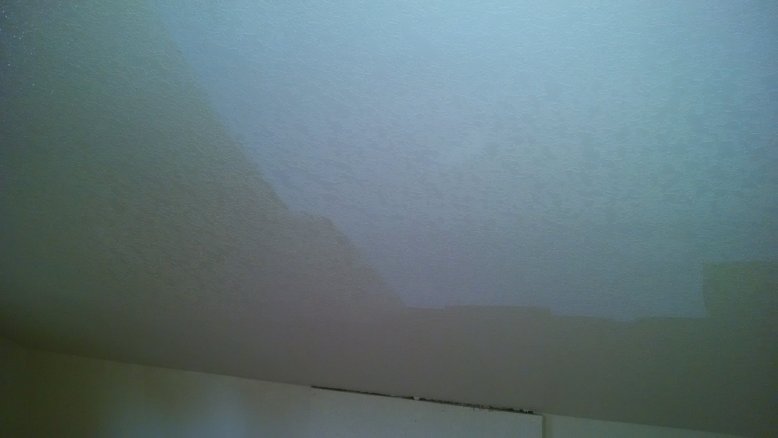
So here's the finished drywall. Started painting and took some pics first. The contractor did a good job.
Going to clad the beam in nice wood for painting or staining, not sure which, yet.
Light fixture is pulled down for painting.
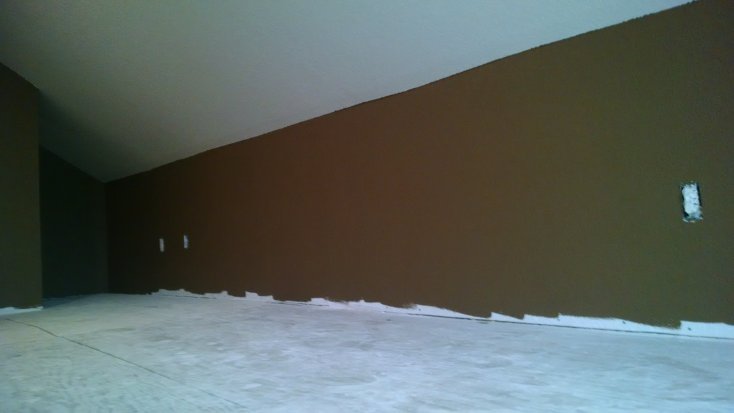
So I told my wife the color scheme I was going to do, and she argued. The ceiling was going to be white, or very close to it. She argued. In order to placate her a bit, I took her to the color sample area where the different "whites" were... one tinged slightly blue, one slightly pink, etc, and I allowed her to choose which white I would use. She chose the tinted slightly brown version, which worked for me, so we bought that.
That shit is fucking tan. I'm going back tonight to get some fucking straight white paint, and redoing it. This is the paint on the bare drywall.
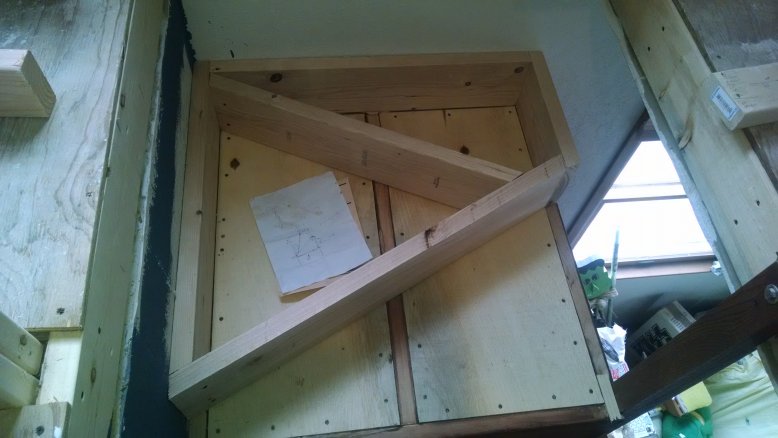
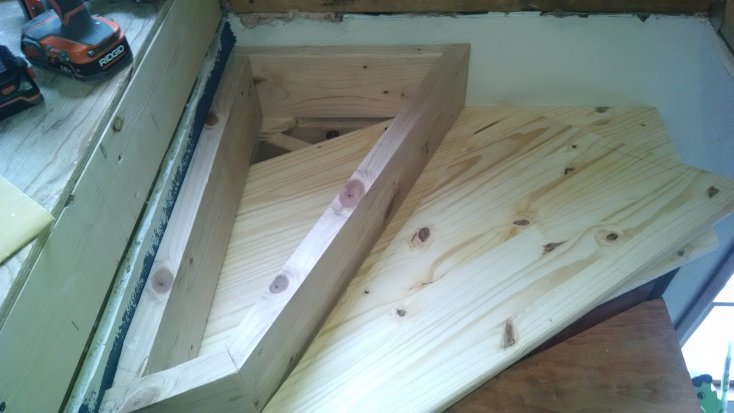
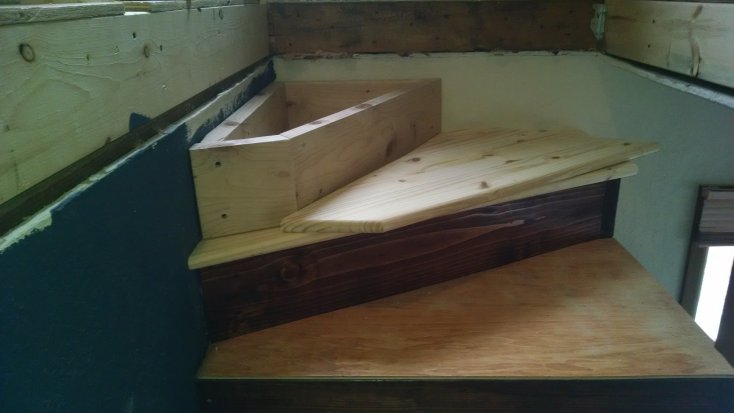
And here's that third-to-last step. Somehow we made an error on the height of the landing, and it ended up being a .75 inches too high. This means every other rise would be 7.25", and this one would be 8 if I put the same 1" tread on there that I used on every other step. I solved this by recessing .75" plywood to be flush with the top of the landing frame, using nice thick cleats underneath to hold it up. You can see this under the frame of the first angled step.
Then I put down a furniture-grade piece of .25" plywood over the top of that. Then I traced a line where that frame is....
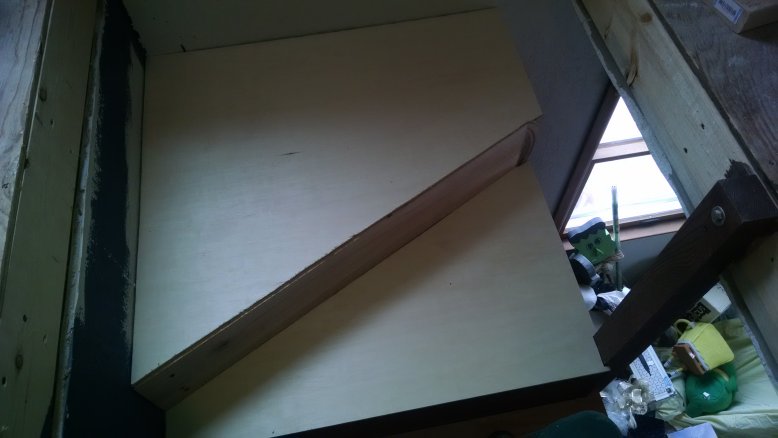
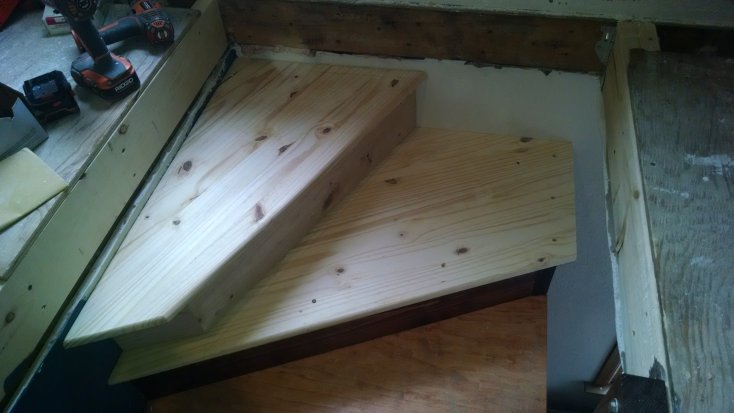
...so I would be able to make a perfect cut with my jigsaw (the piece that was under the frame is now on top of it. I threw the cut piece of quarter inch up there on the frame for no good reason) .The .75" plywood underneath is the support, obviously the quarter inch would not be load bearing. And at this point, I have a perfect 7.25" rise for that step. A nice finish nose will be added later so it matches. There will be a regular 1" tread up there now that the elevations are corrected.
I put down a shitload of construction adhesive under the quarter inch, and put the blocks on while it cures. It should be pretty much a solid piece of 1" tread at this point.
Tomorrow will be sanding and staining those new pieces, and painting/repainting the attic. Once the painting is done I can begin the flooring, which, with luck, I can begin on Sunday.
"Be bold, and mighty forces will come to your aid."
Repainted the ceiling with proper-white, and decided it needed another coat so I went this morning to get one last gallon of paint. TODAY they started the paint sale, the sons of bitches.
The pics above of the steps are now painted and poly'd, and I am ready to cut the wood for the last step tonight in the woodshop.... but my obligations for the next two days are numerous and I may not have time to get to anything until Sunday.
"Be bold, and mighty forces will come to your aid."
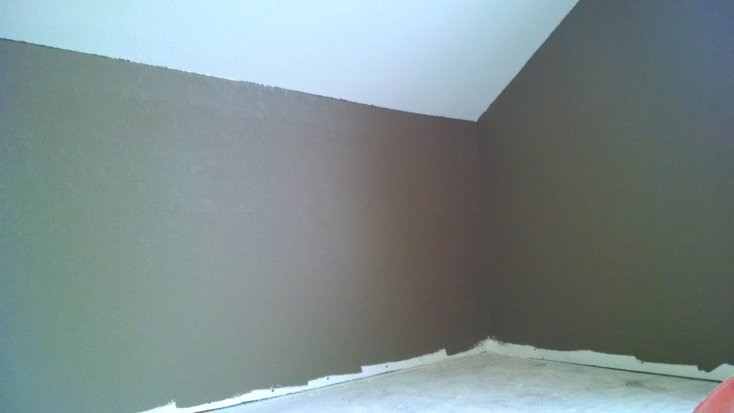
Painted. Two coats of the ceiling white, and one of the brown.
One thing that sucks about textured walls is that even when using painter's tape at your edges, the shit still bleeds down through the ridges and valleys of the texture. When you aren't close up you don't really notice this, so I'll be leaving it alone. Tired of painting.
And today I built the top step. I really don't have much to say about it except that I need to take an inch off the smallest side because I guess we reckoned wrong... the top tread was cut last night and I built the frame in-place this morning.
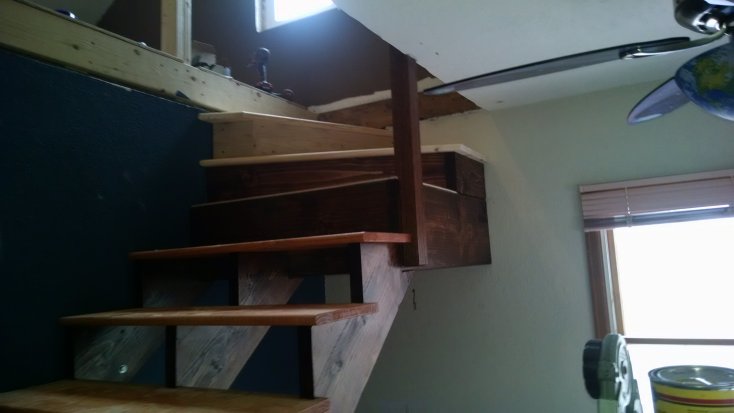
You may have noticed that the 3 top steps are not coming together at a common vertex, like the original plans showed. I decided to be a little artistic and offset the inside angles... a bit of personal flair in an otherwise straightforward stairs design.
Top step is already stained, just waiting for it to dry.
Will cut the top tread tomorrow and get it screwed down.
I hope to build the bottom, and last, step tomorrow.
I have brought in 12 boxes of flooring, approximately half, from the garage so it can start acclimatizing to the house atmosphere.... you're supposed to give it three days. I will give it two, I want to start flooring on Wednesday.
After flooring is down all that will be left is trim - baseboard, window, and the rough stuff around the stairs. And oh yeah, I wanted to build a prettier attic fan access panel.
After the big furniture is moved in in a few weeks I will take down the temp railing... which I just realized I never got a pic of.... and put in the permanent railing.
After this... building an upstairs bathroom. This is going to be the year of construction.
"Be bold, and mighty forces will come to your aid."