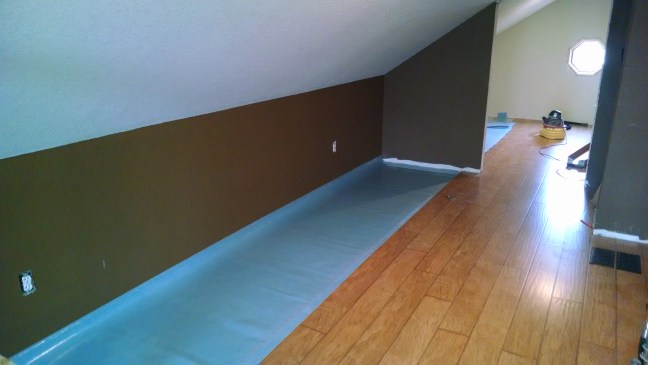
Worked on it ALL goddam day today on the attic and I am exhausted and my knees are killing me... and I don't typically have knee problems.
Did all the little things that had to be done prior to flooring.... mainly shored up a couple spots where the plywood was saggy because it missed the floor joist. Can't do it after the floor is put down.
Finished the last two steps... this involved building the frame for the bottom step, staining it all before it was put in place, then actually placing it and putting a coat of poly on it before I start walking on them. I'll put on coats 2-4 at the end, but I got the first protective layer on there so my sweat droplets don't absorb into the wood.
Did the staining as early in the day as possible so that while it was drying I could start putting down flooring. Got 3 boxes (out of 22) put into place. My goal for tomorrow is 9 boxes. I forgot what a pain in the ass this was... you are tapping the current one into place, and it knocks one 2 rows back out of place. Fucking fuck shit.
Too tired to go up and take pics. Will get some tomorrow and post lots of pics. i know y'all can't wait.
Finishing my attic
Kid was home sick today so that cut into my attic time. Only finished 5 cases out of the 9 I wanted to put down. Here's some pics.
Bottom step built and functional. I will be adding a decorative riser later in order to hide the dead space under the landing.
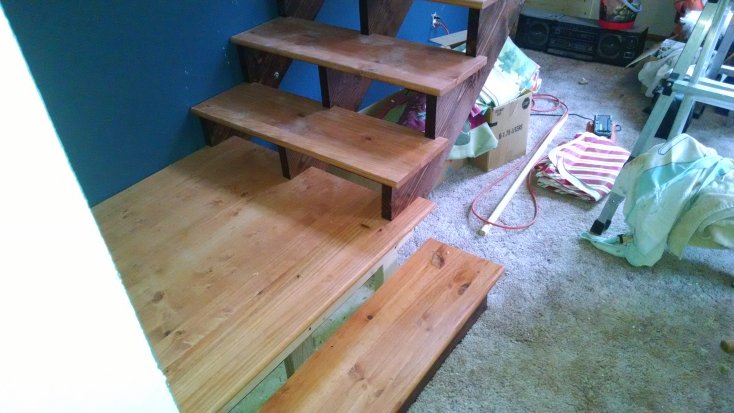
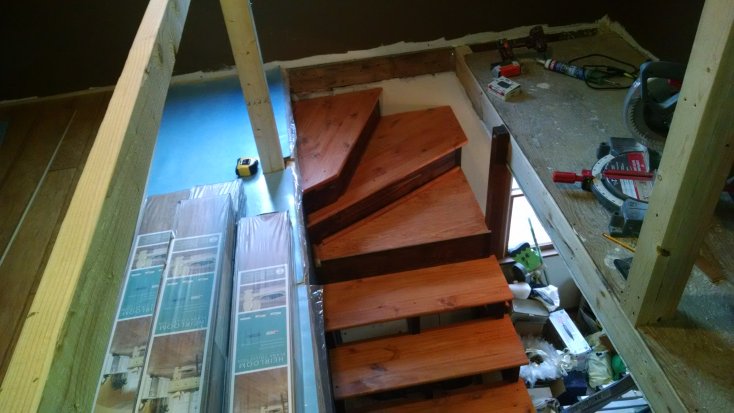
Top view of the steps. That shit looks good and whoever designed the top landing is very creative and deserves some type of interior design award.
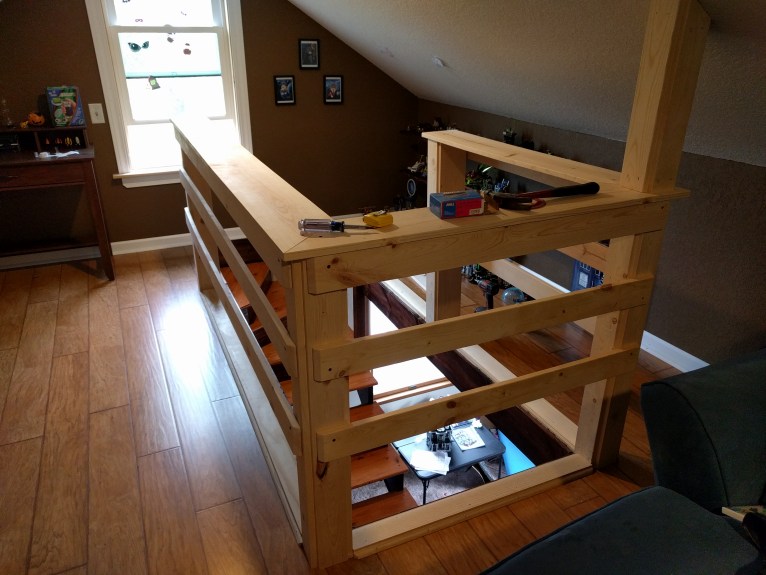
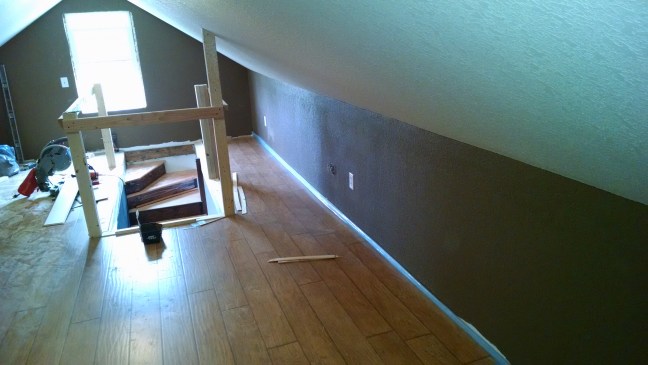
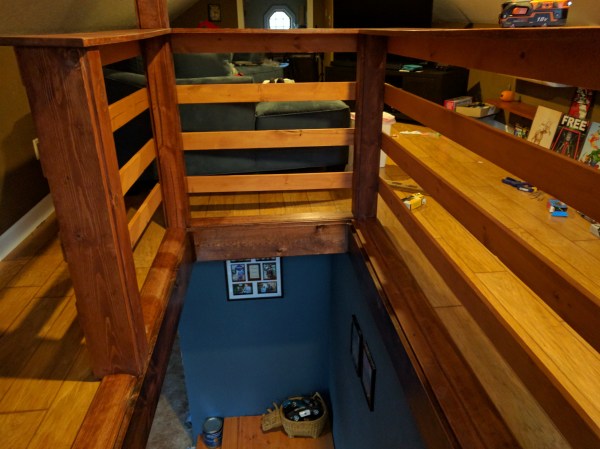
Here's some flooring and also check out the temporary railing. I got tired of shitting myself in fear every time I walked by the death hole, so I put one up. The posts are permanent, though.... that shit goes into the floor and are screwed and glued directly to the floor joists. When finishing time comes I will just clad them in nice wood and attach the permanent railings to them.
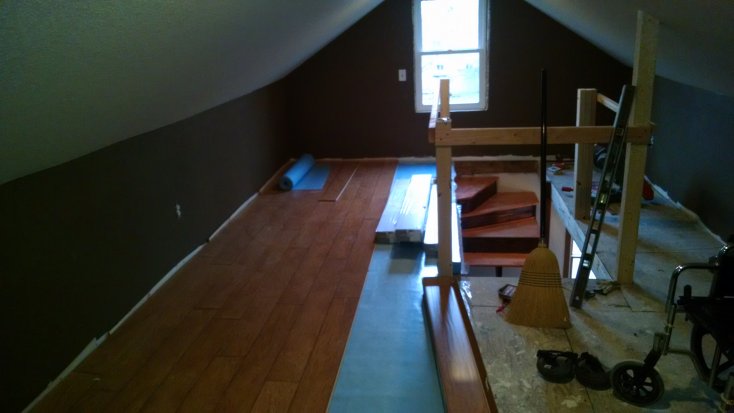
So, probably 30% of the floor is done. I finally remembered how to do this shit correctly so I got 5 rows done today.... only got 3 done yesterday. I should be able to get at least 5 more tomorrow if the kid goes to school... he may not. Each row continues into that back storage room... the idea is that when I get to the open doorway, I will be able to just keep running them. The odds of the flooring of the two rooms, with their own runs, lining up correctly on the first try, though, are slim... it may end up being a challenge.
Bottom step built and functional. I will be adding a decorative riser later in order to hide the dead space under the landing.
Top view of the steps. That shit looks good and whoever designed the top landing is very creative and deserves some type of interior design award.
Here's some flooring and also check out the temporary railing. I got tired of shitting myself in fear every time I walked by the death hole, so I put one up. The posts are permanent, though.... that shit goes into the floor and are screwed and glued directly to the floor joists. When finishing time comes I will just clad them in nice wood and attach the permanent railings to them.
So, probably 30% of the floor is done. I finally remembered how to do this shit correctly so I got 5 rows done today.... only got 3 done yesterday. I should be able to get at least 5 more tomorrow if the kid goes to school... he may not. Each row continues into that back storage room... the idea is that when I get to the open doorway, I will be able to just keep running them. The odds of the flooring of the two rooms, with their own runs, lining up correctly on the first try, though, are slim... it may end up being a challenge.
"Be bold, and mighty forces will come to your aid."
Re: Finishing my attic
Holy geez, I was negligent with pics. I came to post some pics of the built and finished attic railings, and now I see I never even showed pics of the completed floor and trim. That was done at least 6 months ago.
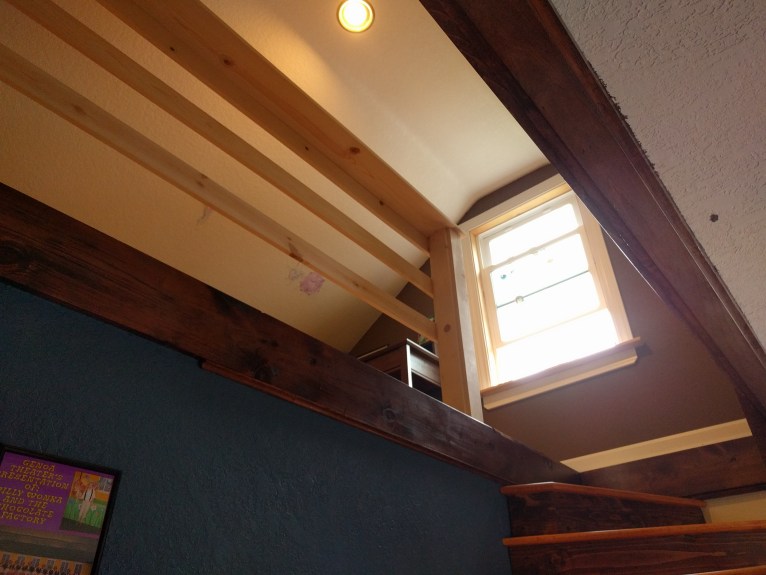
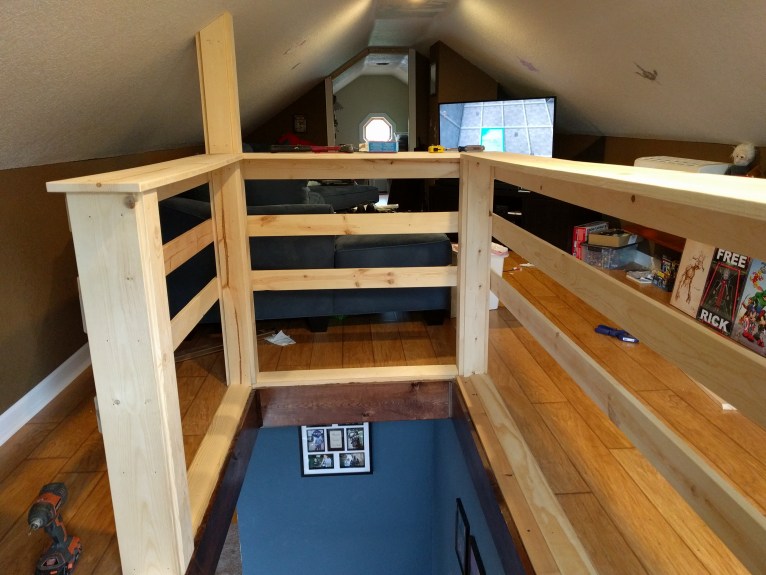
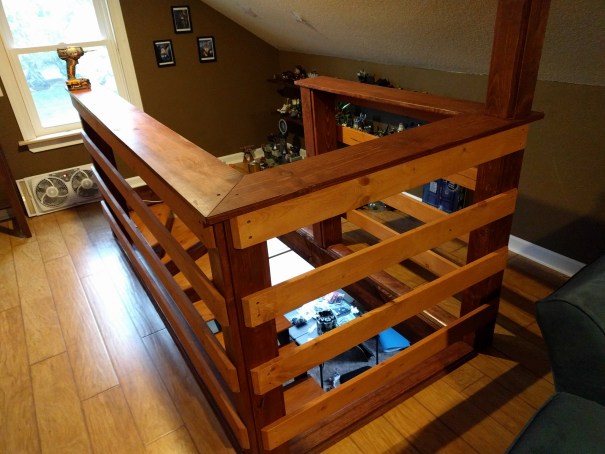
Anyway, Attic railings are built, and now just need to be stained. Rain is in the forecast for the next couple days so who knows... I will be disassembling and staining outside as much as possible. You can see completed flooring and some decoration in the following pics, but they weren't framed to highlight that so, you know. Whatever. Enjoy.
All wood was cut, shaped, and sanded... nothing was bought pre-anything.
View from the bottom of the stairs, up.
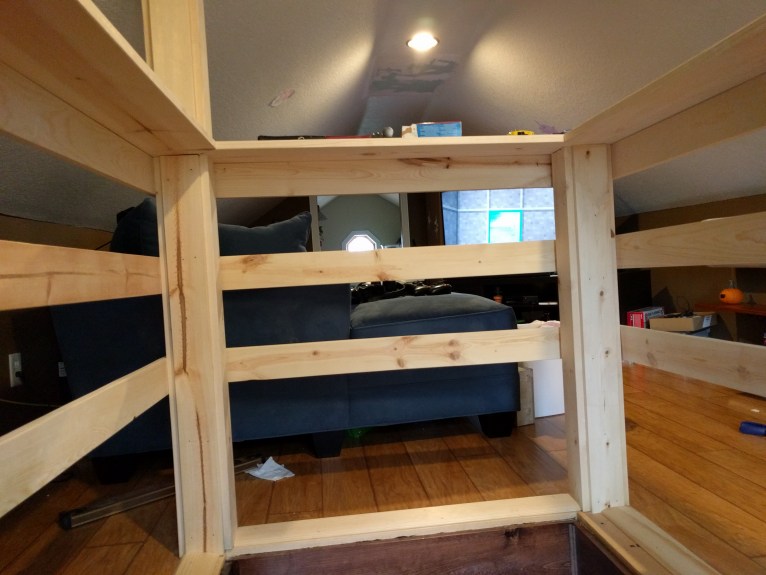
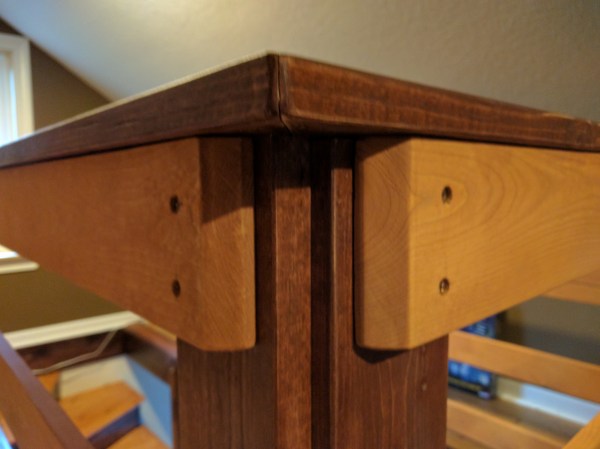
Inside view of the railings, from the steps.
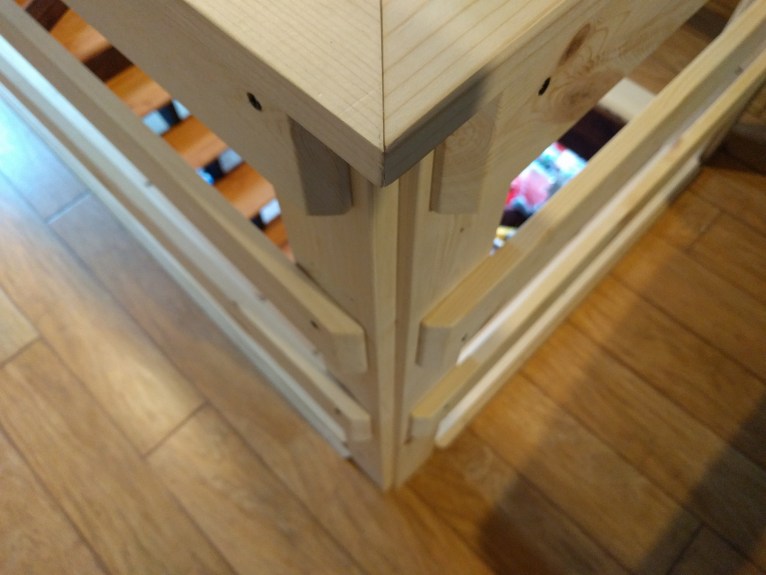
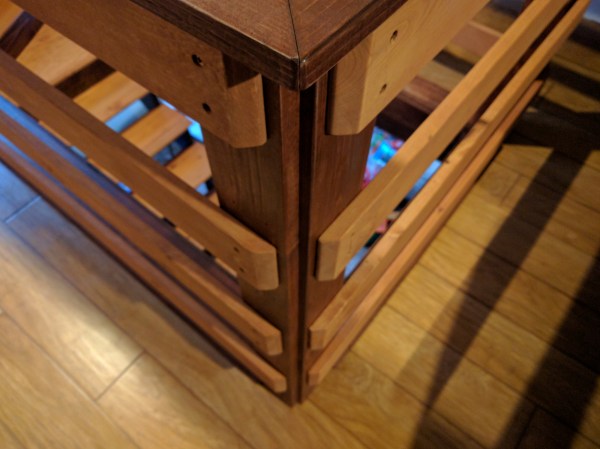
Inside view of the corner. Marvel at how it all comes together.
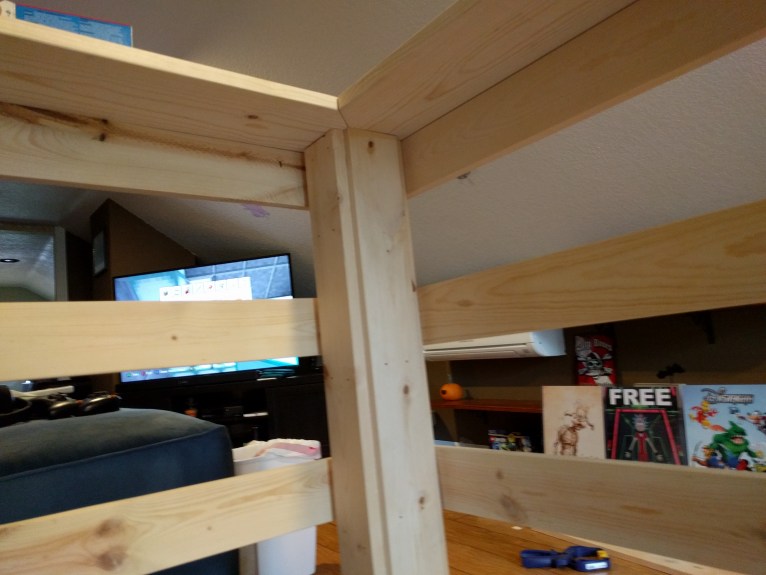
I took a little bit off that corner, since it is the top of the stairs, and now you wont poke your hip on a sharp corner as you pivot going up or down that top step.
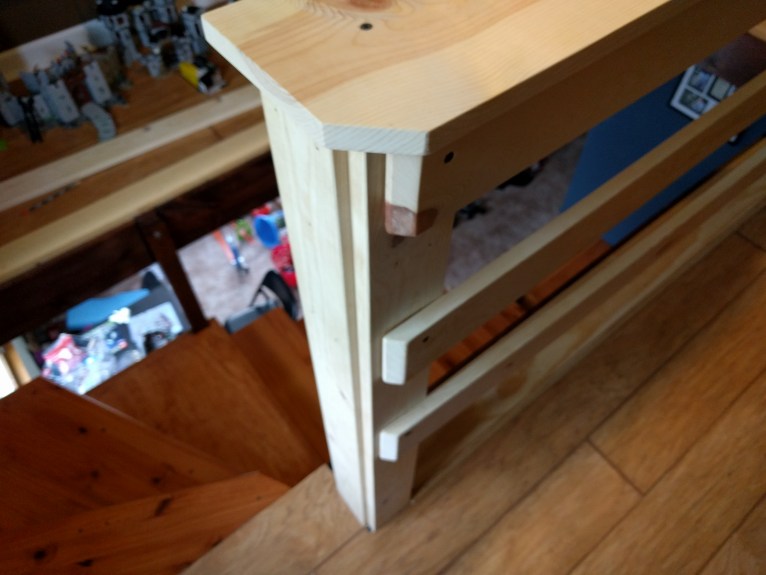
There's actually a 4th "railing" near the bottom, I removed them because the last thing I did was put down trim to cover (most of) the screw holes on that bottom plate and I needed room to swing my hammer. They were built to be removed anyway... we discussed this a page or so back, talking about removable railings for moving big furniture up and down. The railings are removable with screws, which will be slightly recessed and made part of the design.
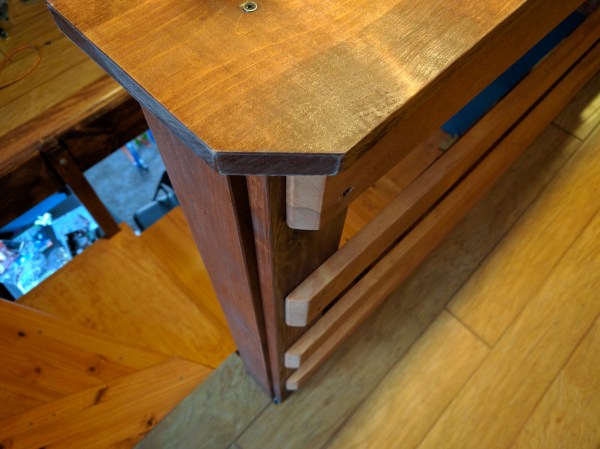
Some of the floor trim with neat angles you'd never notice unless someone pointed it out.
I think it looks neat how this corner comes together. I cut all the angles to make it look neat in anticipation of this corner.
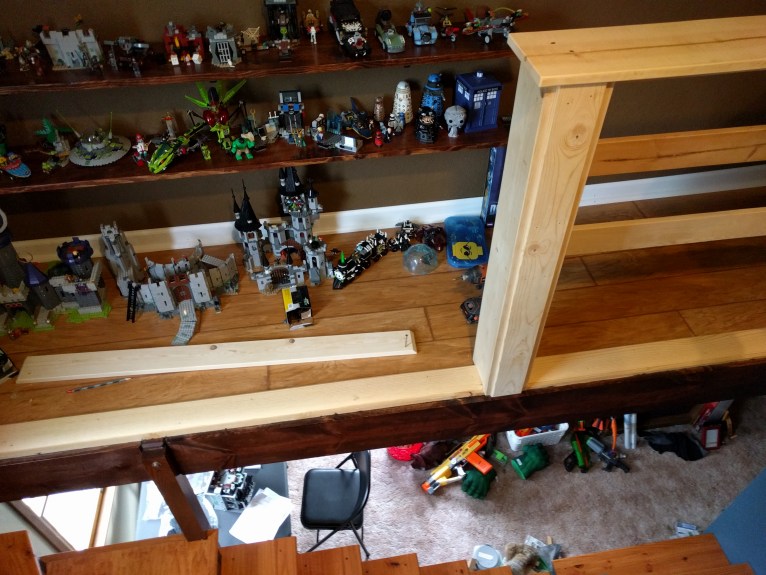
Shelves Mark 1: I threw up some shelves, I realized that at the top of the stairs... instead of railing it off and having a massive amount of dead space, just leave it open and accessible from those top steps at chest level. Good spot to display his legos.
Another angle into the room, flooring, furniture, big TV with Minecraft on it.
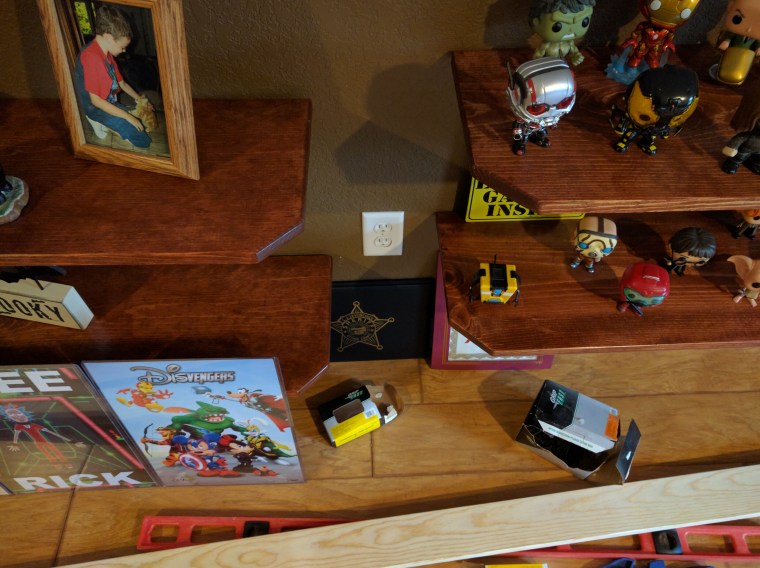
And Shelves Mark 2: the opposite wall from the other shelves, and I figured a better design I like. Note the cut corners, Galactica style, so you don't poke yourself getting to that outlet. Now I want to redo the first shelves, to match.
As I said, still some staining to do. I'll post pics, hopefully soon.
Anyway, Attic railings are built, and now just need to be stained. Rain is in the forecast for the next couple days so who knows... I will be disassembling and staining outside as much as possible. You can see completed flooring and some decoration in the following pics, but they weren't framed to highlight that so, you know. Whatever. Enjoy.
All wood was cut, shaped, and sanded... nothing was bought pre-anything.
View from the bottom of the stairs, up.
Inside view of the railings, from the steps.
Inside view of the corner. Marvel at how it all comes together.
I took a little bit off that corner, since it is the top of the stairs, and now you wont poke your hip on a sharp corner as you pivot going up or down that top step.
There's actually a 4th "railing" near the bottom, I removed them because the last thing I did was put down trim to cover (most of) the screw holes on that bottom plate and I needed room to swing my hammer. They were built to be removed anyway... we discussed this a page or so back, talking about removable railings for moving big furniture up and down. The railings are removable with screws, which will be slightly recessed and made part of the design.
Some of the floor trim with neat angles you'd never notice unless someone pointed it out.
I think it looks neat how this corner comes together. I cut all the angles to make it look neat in anticipation of this corner.
Shelves Mark 1: I threw up some shelves, I realized that at the top of the stairs... instead of railing it off and having a massive amount of dead space, just leave it open and accessible from those top steps at chest level. Good spot to display his legos.
Another angle into the room, flooring, furniture, big TV with Minecraft on it.
And Shelves Mark 2: the opposite wall from the other shelves, and I figured a better design I like. Note the cut corners, Galactica style, so you don't poke yourself getting to that outlet. Now I want to redo the first shelves, to match.
As I said, still some staining to do. I'll post pics, hopefully soon.
"Be bold, and mighty forces will come to your aid."
Re: Finishing my attic
Hey good news! I just happened to find some pics I took during the flooring phase. Enjoy!
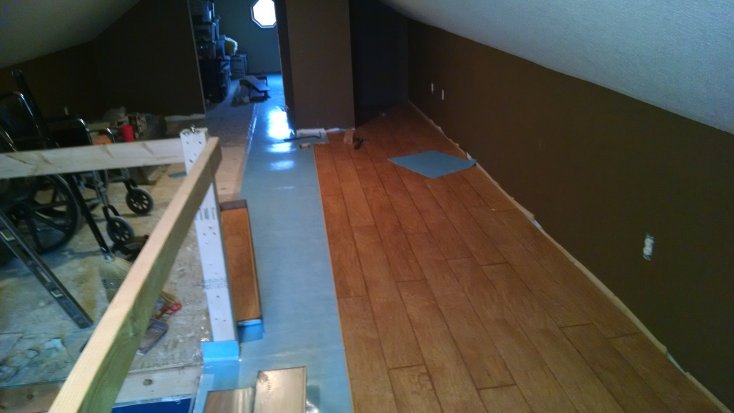
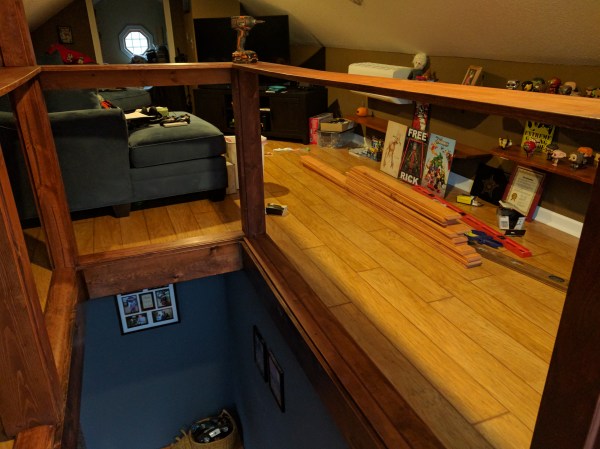
So I mentioned that I was running flooring... and I had to stop at a wall, and continue on the other side, and hope I got them lined up enough to make a straight, unbroken run in the doorway...
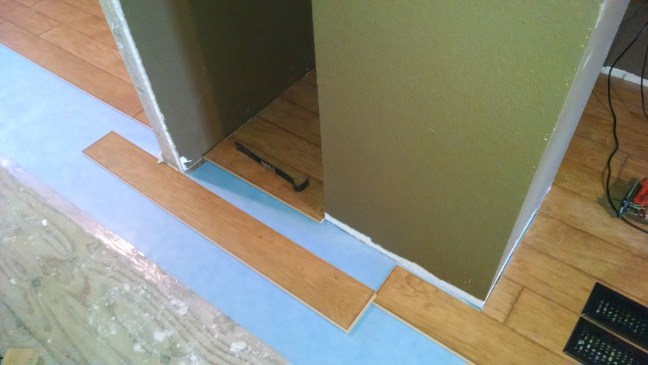
Holy shit, I did it! They all lined up properly.

And of course, the seams of boards lined up perfectly so I have a 4-board corner, and abosolutely no way to fix it without ripping up the entire run. Grrr.
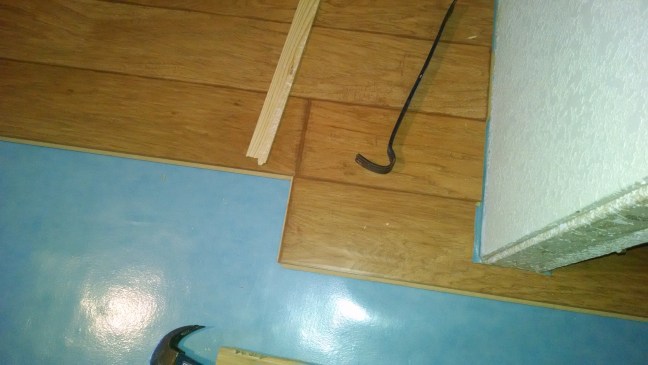
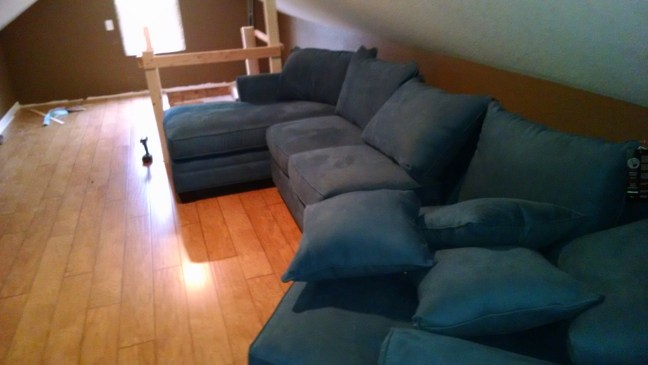
The little double-vent you can see in the floor to the right is simply a air-circulation hole down into the hallway, where the drop-down attic stairs used to be. Now air can circulate through the stairs-hole, and also right there. There haven't been any real problems with noise conduction... that may change when he starts taking girls up there.
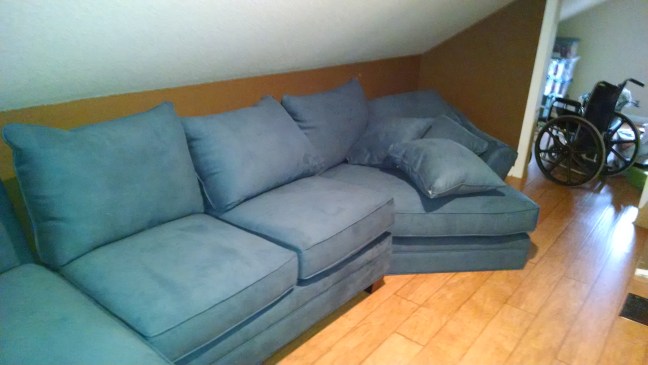
The new couch for the kid to chill upon.
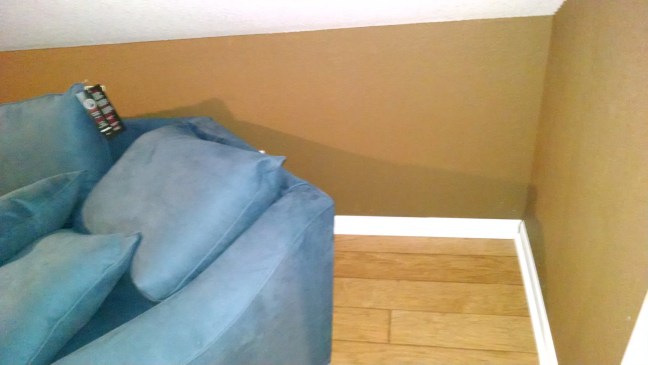
And a finished, trimmed out corner.
So I mentioned that I was running flooring... and I had to stop at a wall, and continue on the other side, and hope I got them lined up enough to make a straight, unbroken run in the doorway...
Holy shit, I did it! They all lined up properly.
And of course, the seams of boards lined up perfectly so I have a 4-board corner, and abosolutely no way to fix it without ripping up the entire run. Grrr.
The little double-vent you can see in the floor to the right is simply a air-circulation hole down into the hallway, where the drop-down attic stairs used to be. Now air can circulate through the stairs-hole, and also right there. There haven't been any real problems with noise conduction... that may change when he starts taking girls up there.
The new couch for the kid to chill upon.
And a finished, trimmed out corner.
"Be bold, and mighty forces will come to your aid."
Re: Finishing my attic
Nice work, damn. Uh, want to come finish mine?
It's not me, it's someone else.
Re: Finishing my attic
Holy geez I was hoping you'd ask.
"Be bold, and mighty forces will come to your aid."
Re: Finishing my attic
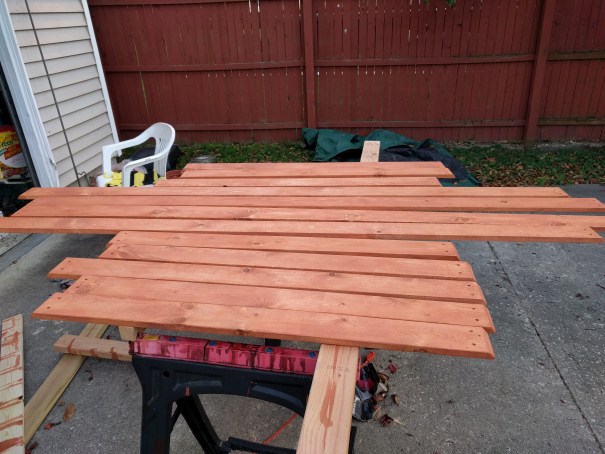
A side note... there are 3 different qualities of board, "Standard," "Select," and "Quality." Those railings are mainly 1x4x8s... a Standard board is about $2.50 each, Select are about $3.50, and Quality are like $8 each. "Standards" tend to be bowed and warped and rough, Quality are about as nice as raw wood gets, and Select are right there in the middle.
Well, my local Menard's doesn't have a good reputation for having good finishing wood, rightly deserved. They had plenty of Quality boards that I couldn't really afford, and the only Select boards they had left, at the good price point, were the ones abused and tossed aside by customers. So I went to the "Standard" boards, and started digging down... near the bottom of the stack were plenty of boards in pretty good shape.
And that's why I had to spend so much time sanding, working out gouges and shit.... but damn, look at them now. Pretty much perfect. A little $30 palm sander that I bought during the basement project and 10 minutes working with each one saved me a lot of money.
"Be bold, and mighty forces will come to your aid."
Re: Finishing my attic
YW!GORDON wrote:Holy geez I was hoping you'd ask.
I pay, and you'd get a break from your MIL. Which, really, should be payment enough.
It's not me, it's someone else.
Re: Finishing my attic
Got stupid-busy the last few days, haven't made a TON of progress.... except for...
I took all the railings back off, and stained the support structure a darker brown, and also put on the first coat of polyurethane, and when it was dry, sanded it. You need to sand the first one or two coats for some reason, but the following coats go on very smoothly.
And took the railings outside to stain them the lighter brown, and drill countersink holes for the screws. I did as much staining as possible outside to keep the fumes out of the house.
Then I put them back together. I was being extra super careful to hold the drill firmly and not let the bit slip off the screw and gouge the wood...
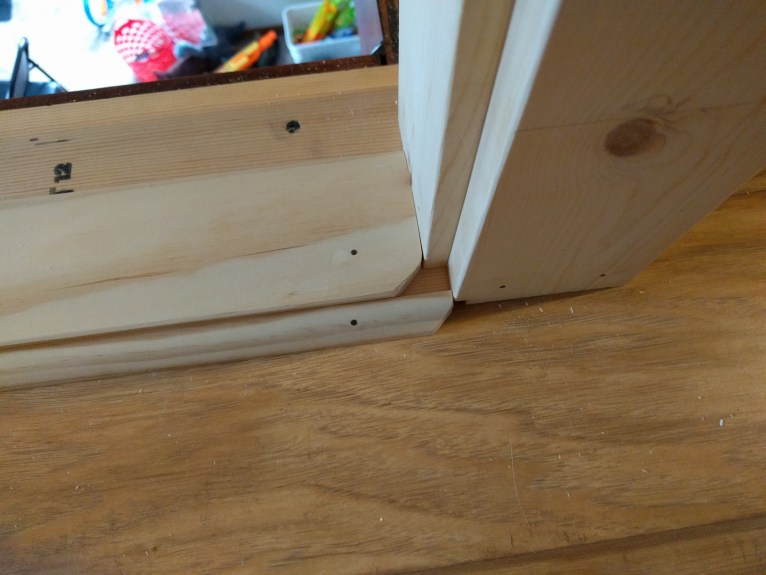
So just to spite me the drill bit itself broke on one of the last railings, one of the ones that face people, and not the wall.
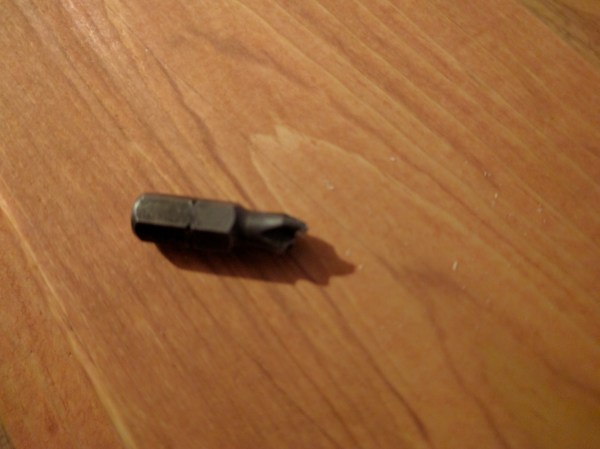
Here is the awesome gouge it made. You can still the broken bit still in the screw head. Fucker.
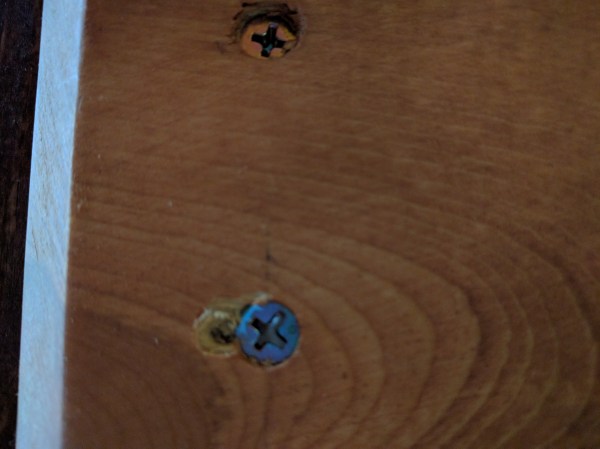
Anyway, if I don't point it out no one will notice, but I'll always know it is there. It all looks pretty good, it is 2-tone so it matches the stairs coming up.
The bit where the darker brown looks a little fucked up is because the first coat of poly has been sanded. Now that it is put together I can poly the entire thing tomorrow, sealing all of those seams. The fresh poly makes the sanding scuffs disappear.
Pics of the finished project in a few days. Maybe a week.
I took all the railings back off, and stained the support structure a darker brown, and also put on the first coat of polyurethane, and when it was dry, sanded it. You need to sand the first one or two coats for some reason, but the following coats go on very smoothly.
And took the railings outside to stain them the lighter brown, and drill countersink holes for the screws. I did as much staining as possible outside to keep the fumes out of the house.
Then I put them back together. I was being extra super careful to hold the drill firmly and not let the bit slip off the screw and gouge the wood...
So just to spite me the drill bit itself broke on one of the last railings, one of the ones that face people, and not the wall.
Here is the awesome gouge it made. You can still the broken bit still in the screw head. Fucker.
Anyway, if I don't point it out no one will notice, but I'll always know it is there. It all looks pretty good, it is 2-tone so it matches the stairs coming up.
The bit where the darker brown looks a little fucked up is because the first coat of poly has been sanded. Now that it is put together I can poly the entire thing tomorrow, sealing all of those seams. The fresh poly makes the sanding scuffs disappear.
Pics of the finished project in a few days. Maybe a week.
"Be bold, and mighty forces will come to your aid."
Finishing my attic
Bumping this, which was my fist stairs building/staining project.
For the record, no one has ever slipped on these stairs while wearing socks.
For the record, no one has ever slipped on these stairs while wearing socks.
"Be bold, and mighty forces will come to your aid."