|
|
| Post Number: 1
|
GORDON 
90%

Group: Super Administrators
Posts: 36125
Joined: Jun. 2004
|
 |
Posted on: Dec. 20 2014,13:19 |
|
   |
I didn't even think to document progress like I did with the basement.... so here's the few pics I took during. Â I just laid the very last bead of caulk, this shit is done.
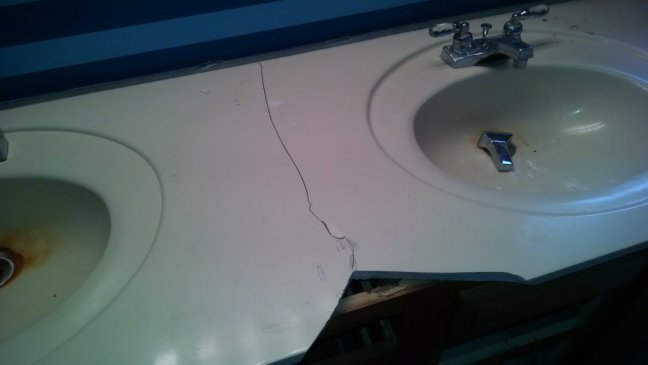
This is the one off the kitchen... the one guests would use. Â The previous owners painted it some HORRIBLE "artistic" design of light blue and dark blue, stripes and arrows. Â Just really terribad. Â And I always wanted to repaint, but I hated the double sink (not needed in a guest bath), and I hated the fixtures, and I hated the trim, so I knew I couldn't just paint without it becoming a whole major project, so I always procrastinated.
But then I slipped in the shower and put my knee through the tub. Â Pictures of this exist, but they are in the wife's facebook pics and she has probably uploaded 3k pictures since then, literally, and I have no idea how to find it.
So the tub was destroyed, and if I am going to have to replace it anyway, might as well do the whole bathroom.
Waited until Menard's (the closest home improvement place by 15 miles) was having an 11% off sale, and ordered the entire bathroom all at once. Â Got $300 back. Â Should have ordered the fixtures and stuff then, because there were still about $600 of odds and ends to purchase during the project that I ended up paying full price for.
So I had a garage full of stuff... new tub, shower shell, vanity, sink, floor tiles.... and I procrastinated, because I am always a little scared of starting a new project when I am going to do new things and learn as I go. Â I've never done any of this before, and tiling a floor scared the crap out of me. Â So easy to screw up, and so hard and expensive to fix.
And then the wife decides to move her family christmas party from her mom's house to our house, because her mom is going crazy. Â So now I have a party coming in 5 weeks, and it's time to start the remodel.
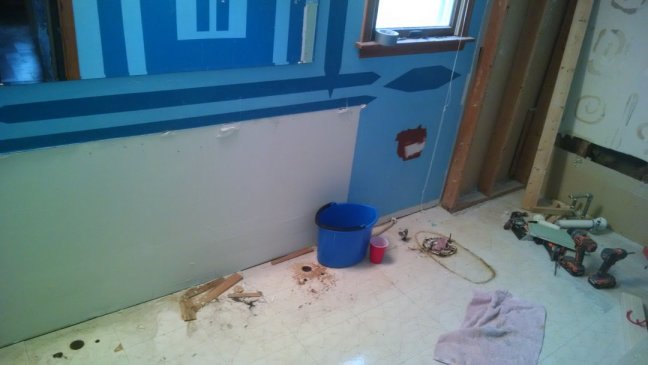
I start with demolition. Â I'm going to take out the old vanity which is getting replaced and carefully remove the toilet (something else I had never done before) so it could be reused, and then I will have free and open access to the broken tub.
Big project stars with a single swing of the mini sledge, and I marked the occasion:
Got that stuff removed, and took my sawzall to the tub shell... fiberglass.... so I was able to remove it one half at a time. Â The lip went under the (moldy) drywall, so I cut out a strip. Â The wall to the right is taken down to the studs because that was what I called the false "floating wall," I could pull a few nails and slide it in or out depending on the size of the new tub, and then rebuild the wall to fit. This part didn't scare me... did lots of drywalling in the basement.
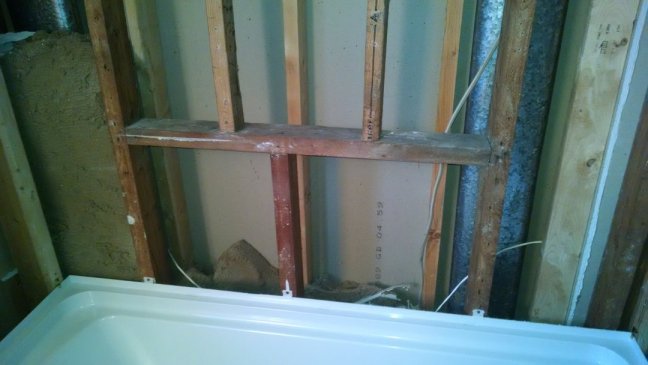
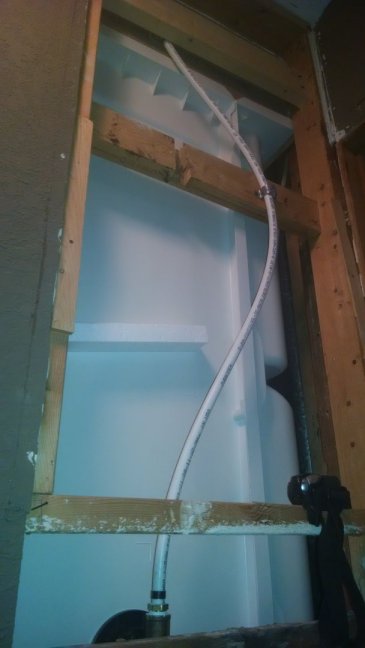
I ended up taking out ALL the drywall around the tub and shell, because the directions for the new shell installation (another first for me...) said screw it right to the studs. Â So I needed bare walls. Â Here's the wall with the new tub already screwed into it. Â You can see a white wire running left to right... I figured as long as I had the wall open anyway, might as well run a speaker wire.
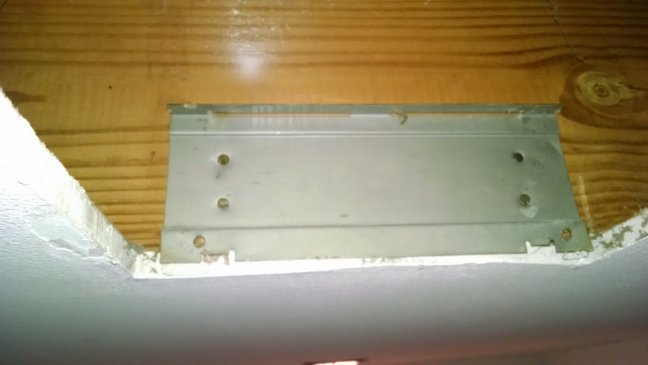
Also replaced the 2 ceiling mounted fixtures, one a bath fan, and the other the light over the shower. Â The old fan sounded like a rattly jet engine so I always wanted to replace that anyway. Â For some reason I took a pic of the old fan mount. Â I don't remember why, but here it is.
Couple fun facts: the exhaust tube that ran from old fan to outside wall was a foot short for the new fan, which meant I had to buy 8 feet of tube and a coupling so I could get the extra foot I needed, and the old tube had some dead birds in it. Â Yay.
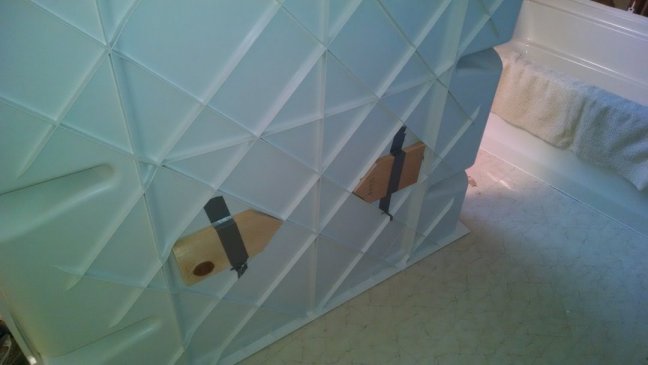
I mentioned the reason I had to replace the old tub was because I slipped in the shower... I decided the new shower would have a nice handhold in it, so I preemptively put some wood mounts on the back of the shell, got exact dimensions so I would be able to find it blindly from the front, and then took a picture of it just to make sure. Â Spoiler: the tape didn't hold and mounts didn't work well.
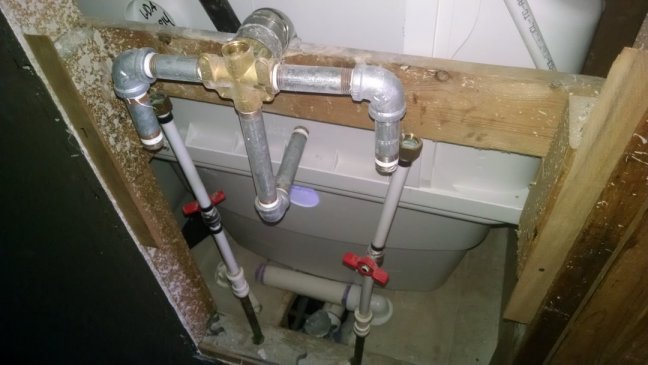
I took lots of pictures of existing plumbing... new tub was bigger, so old stuff had to be replaced or modified, and it is best to have a pic to take to Menard's to make sure you don't forget anything.
I actually already replaced the bath fixture once right after I bought the house in 2007ish, so here you can see where I cut the copper and installed PEX, and I have the old fixture just hanging there so I could get my head wrapped around what I had to replace.

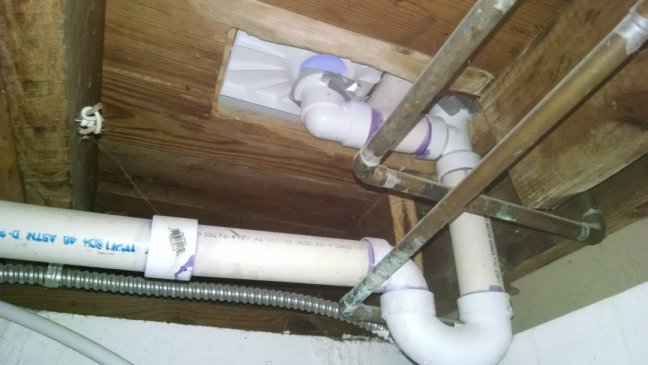
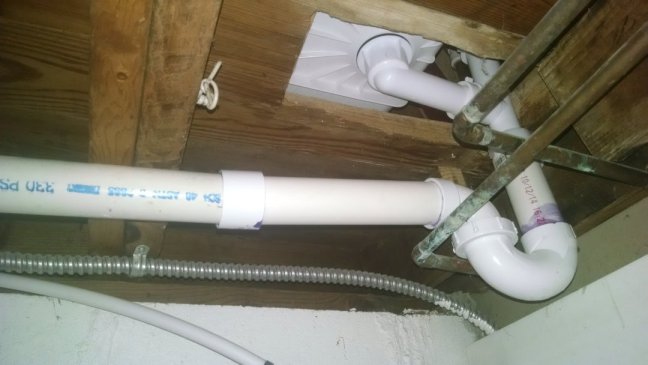
And here was the existing drain plumbing... again, I installed this in 2007 when I replaced the drain hardware.
Unfortunately, that is all the pics I currently have of "before." Â I will post more if my wife finds more... she already told me she can track down the "knee through the tub" hole.
Continued in next post, I am approaching pic limit.
--------------
I don't give a fuck!
|
 |
|
|
| Post Number: 2
|
GORDON
90%
Group: Super Administrators
Posts: 36125
Joined: Jun. 2004
|
|
Posted on: Dec. 20 2014,14:02 |
|
 |
So the tub and shell went in, and I rebuilt the walls around them. Â Lots of dust. Â Once that was done I replaced the exhaust fan... no need to run drywall dust through the NEW fan... and at this point there was no more procrastinating on the tile floor. Â Everything next is going on top of that. Â Scared to death. Â Stressing hard.
Up until tiling day I thought I had a perfectly flat floor. Â I was going to just lay cement board on top of the existing linoleum tiles, and go to town. Â But then in my stocking feet I felt a groove... and I got down on my hands and knees and put my eyeball to the floor... and found a big depression, about 3 feet around. Â Long, painful, story short, I ended up putting down cement board and THEN thin-set mortar into the hole, and used my 3' fiberglass level to smooth it all out. Â This was a mistake, should have put down the thin set THEN the cement board. Â I ended up having trouble with the tiles at the thin-set transition, because I hadn't gotten it perfectly smoothed.
Anyway, I figured out my tile layout, and began setting the first six, which happened to be where my thin-set was. Â The plan was to lay all the full tiles, let the mastic (the stuff you use to cement tiles to a floor) set overnight, then start cutting edge pieces the next day. Â The first six, my first six ever, took me about 4 hours. Â Didn't know what I was doing, didn't have any kind of technique, couldn't get them level over the shitty, patched, leveled floor, and kept making a mess. Â I was frikkin exhausted by the time I finally got them acceptable. Â The next day I was able to lay the final 2/3 of the full tiles.... first third looked like shit, but the last third went on nice and neat. Â I got all the cut tile pieces in the next day, no problem... I'm a pro at this point. Â Pro tip 1: get an electric tile saw (I borrowed one but saw them at Menard's for $50). Â They cut through them like butter and it makes it all quick and easy. Â Pro tip 2: Keep your big, thick sponge nearby in a bucket of water and clean the tiles as you go. Â MUCH easier than trying to clean them after the sloppies dry.
Next day was grout. Â Again, a first, but I had the tools and I read how to do it in a book and I ended up getting that looking perfectly, in my opinion. Â
Day after that, the edge/baseboard tiles... whatever they are called. Â Got them all laid and cut to size, and the next day grouted them up. Â I left slots in the walls for the legs of the vanity so there wasn't a gap between it and the wall the thickness of the baseboard tile.
Once all the tiling was done I could get the toilet back in... another first. Â Since I had just raised the thickness of the floor by an inch, I had to put in an extender on the toilet flange. Â That caused me a little stress, but I got the toilet in and smooshed the wax ring and I have not encountered any leaking. Â Go me.
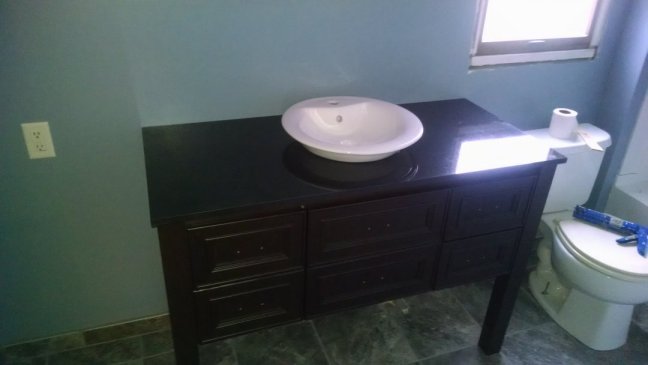
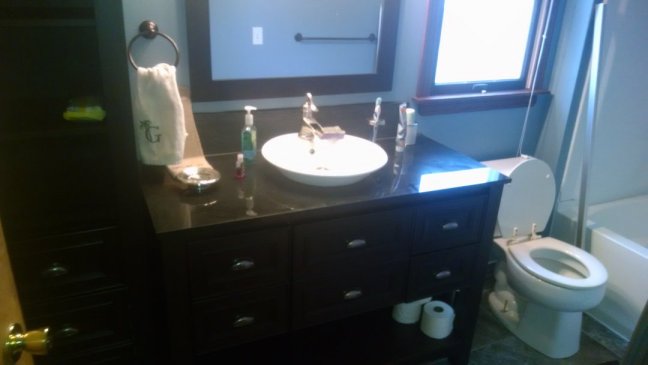
Then the new vanity and sink basin.... I had to get a little fancy with the plumbing, the plumbing for the double sink didn't line up perfectly for the new sink, so I had to bring everything over by a foot. Â I should have gotten pics, I will post them in the future. Â Since the vanity is open underneath, as you can see, I am going to modify it most cunningly to hide the plumbing. Â I'll post pics when that's done. Â In this picture you can see I removed trim from around the window, as well. Â It was shit and the wrong color so I just replaced it all.
Here's a pic of the door... I stained the inside of it to match the new window trim and the darker color of the new vanity. Â Also new trim around that. Â
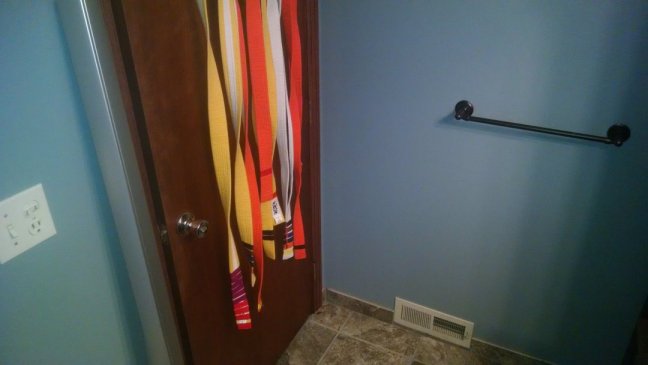
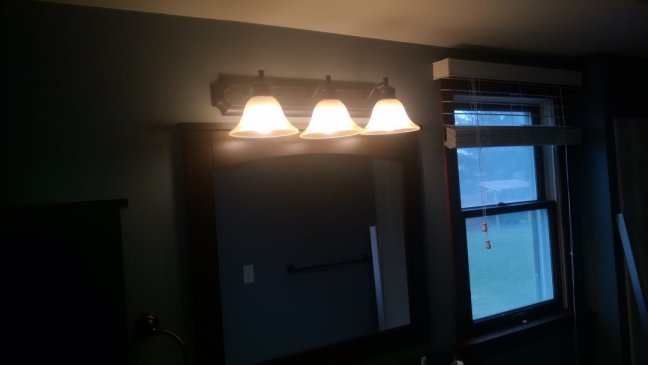
New vanity lights and blinds for the window, and the new oak trim.
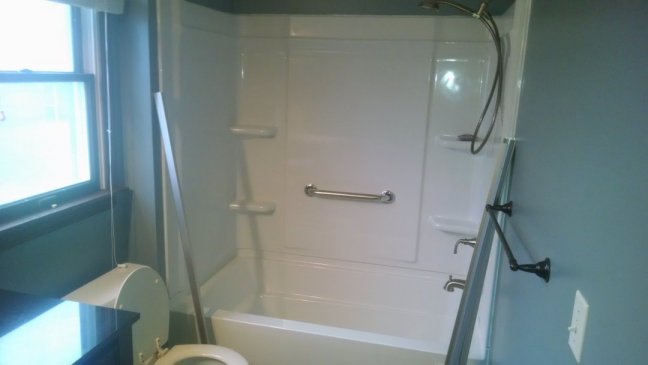
Fully armed and operational toilet and vanity.... this is where we were for the christmas party. Â Tub plumbing was not yet in.
After the party I spent a few days doing the tub plumbing.... whenever the old guy at Menard's was helping me pick out stuff I needed, it was all exactly what I needed. Â When the young guy was there, 75% of it was the wrong size, and I would make multiple trips back to get the correct stuff.
I ended up using the same iron pipes on the new fixture, but I needed to add some length to the PEX because the new tub was bigger.
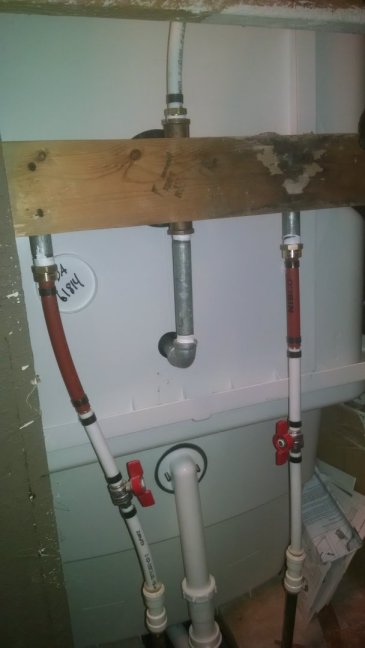
And I used the exact same shower PEX without modification, but because the new fixture was higher, I had to bend it a bit to make it fit. Â I love plumbing with PEX.
And here's the new drain plumbing. Â No big deal once I figured out how to tighten the new-fangled "push to close" drain.
Now, two days ago I pulled the last box out of the garage, the shower doors. Â Absolute last step of the project. Â Got them in the house, opened it all up, started reading the directions.... and figured out the had given me doors for a stand-up shower, not a tub/shower. Â Totally wrong. Â And I start to stress... this stuff was all special order, and it had been sitting in my garage for 6 months, and I was very concerned Menard's would not take it back so I could get the correct thing. Â Well, I took back the open box and they didn't even blink, just refunded my money. Â I really like Menard's. Â Got the correct door the next day at the Menard's across town... they had one in stock already.
So today I get on that.
and
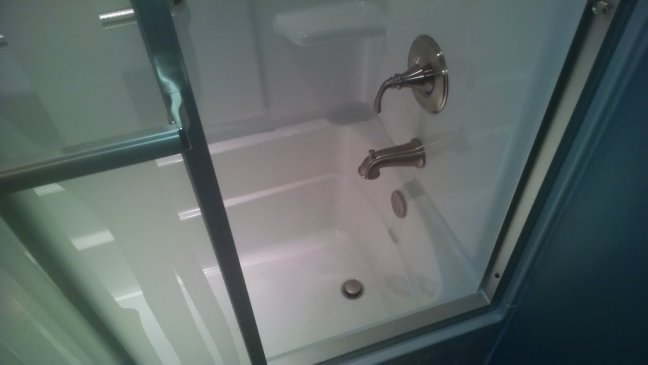
and ALL DONE.
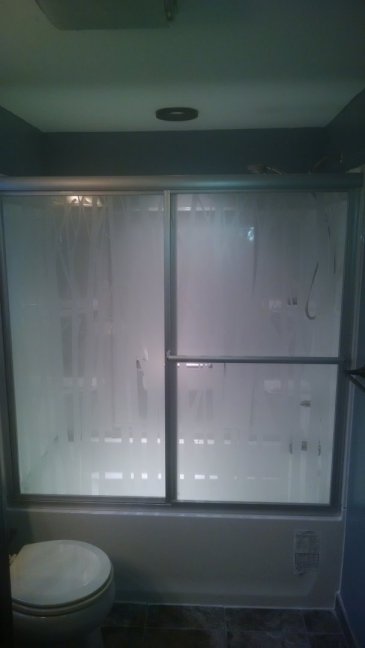
Now the bathroom is the nicest room in the house and my wife wants to to redo the other bathroom AND build one upstairs.
--------------
I don't give a fuck!
|
|
|
|
| Post Number: 3
|
GORDON
90%
Group: Super Administrators
Posts: 36125
Joined: Jun. 2004
|
|
Posted on: Dec. 21 2014,16:23 |
|
|
Here's the hole I put in the old tub with my knee. Hole is about 9" side to side.

--------------
I don't give a fuck!
|
|
|
|
| Post Number: 4
|
TheCatt
Top 2%

Group: Super Administrators
Posts: 22951
Joined: May 2004
|
|
Posted on: Dec. 21 2014,17:01 |
|
|
Ouch.
You should come down and finish my attic.
--------------
It's not me, it's someone else.
|
|
|
|
|
|
|


