Topic: Finishing my basement
started by: GORDON
Posted by GORDON on Oct. 19 2010,07:43
The first $200 has been spent, all on lumber and some concrete screws. Phase one is to frame in a few walls, leaving it all open to run wiring. Phase 1 ends when my $250 budget runs out, then I can save up for phase 2.Already had all of my own tools, and some faint memories of how to build stuff. Last time I did any major construction, I was about 17. Going to separate off half the basement and build it into a man cave. The other half of the basement is the washer and dryer and stuff... woman's bidness.
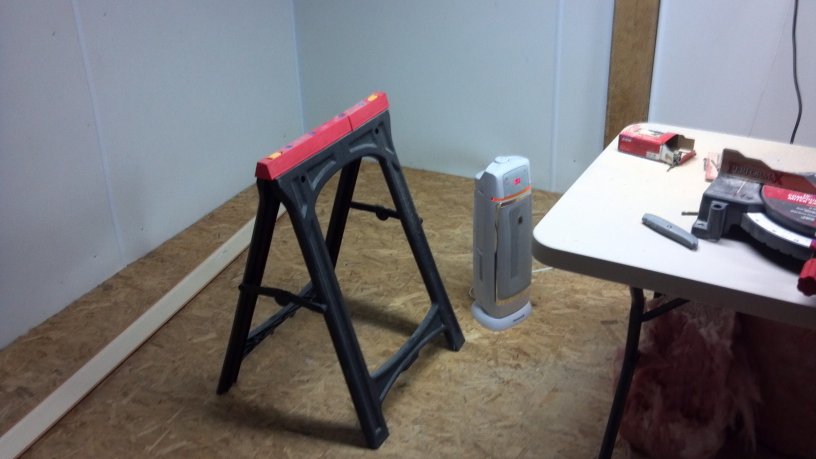
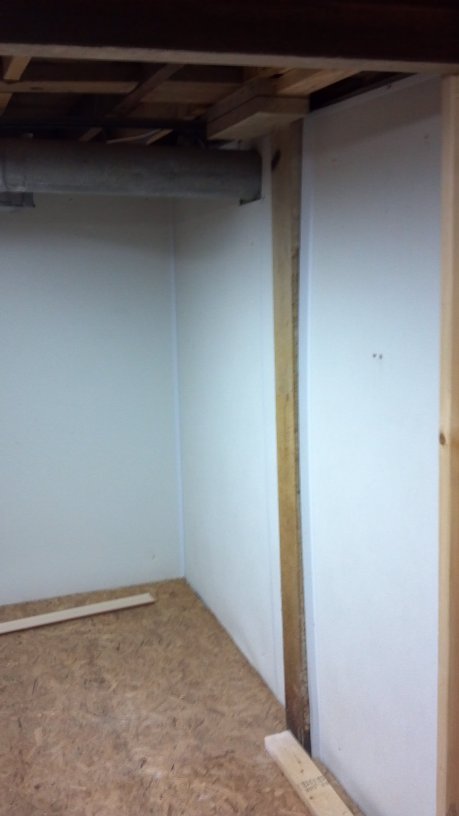
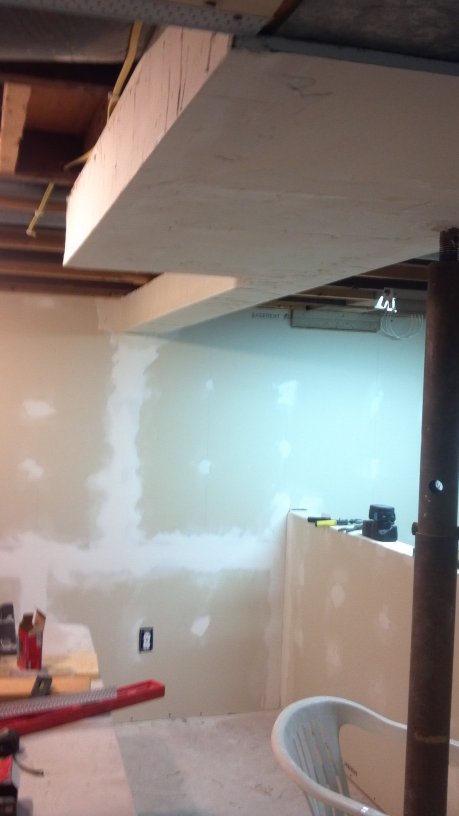
These are the before pics, right before I cut the first board:
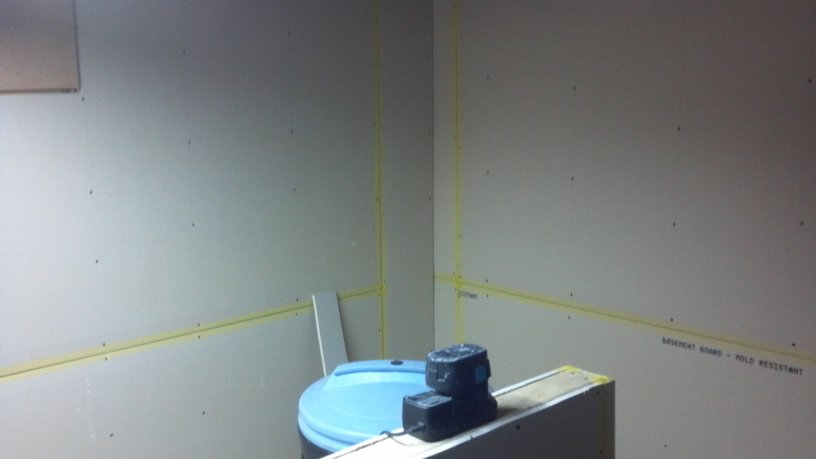
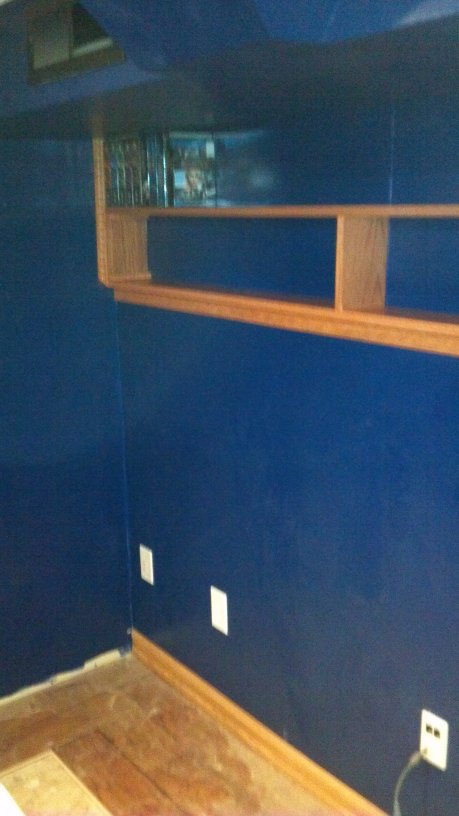
Looking to the right from where the door will be:

That off-white rectangle high on the wall is styrofoam covering the entrance to the crawl space that contained that big ass hornet nest. Black tape on floor is where I am putting the wall. Tape was to help visualize during the brainstorming phase. I also installed those glass block windows myself the first year I moved in. Used to have ancient glass pane windows, and I was getting snow drifts inside the sill that first winter. The tiny hole to the left of the window is where an outside spigot used to run. Last year when I decided I was going to do this project, I moved that spigot higher so the plumbing wouldn't be in the way of my wall. Was part of a different project to fix a burst copper pipe, so I was doing a plumbing project, anyway.

Black thing on wall is access to a different crawl space. My house is a hodgepodge of room additions, and I have 4 separate crawl spaces with the only access to each from the basement.

Looking left from the door, my pile of lumber. 50 2x4's, 5 sheets 3/4" ODB plywood. I chose the ODB because it was less than half the price of regular plywood... and I figure with the money saved I could actually double it up on the unfinished side if I want further sound proofing. Also 4 2x2 squares of underlayment, to go unter the wall, in case the basement seeps. It has a rubber coating with feet on the bottom so if my basement does spring a leak somewhere, it won't get the wood wet. I'll post pics of that in the next post. You can see them from the side in the bottom left of the pic, leaning up against some stuff.

I already have a day of work done, but I am just now getting around to making this post.
Posted by GORDON on Oct. 19 2010,12:57
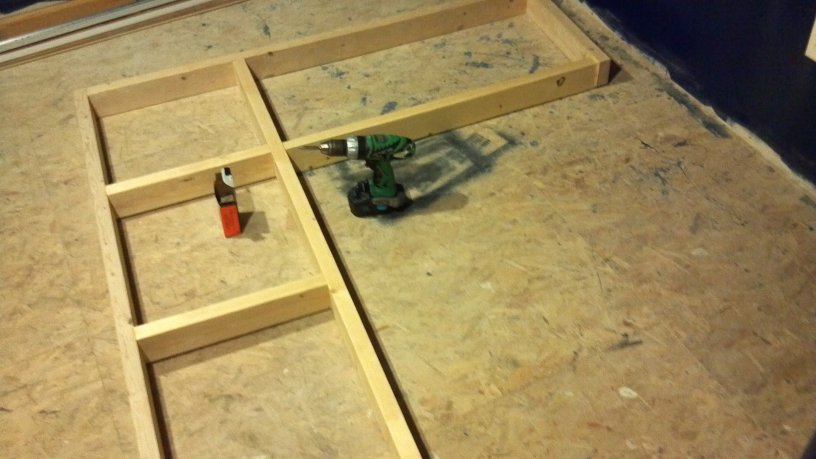
This is what I actually got done last night.Base plate and underlayment, a few studs.

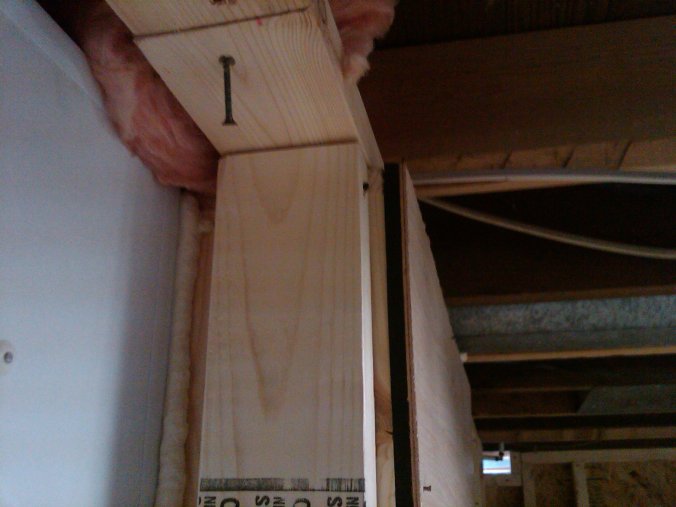
Crippler studs and top plate.

I left a little notch in the top corner so I could run conduit. I plan on lots of Cat-5e and speaker cable going through the room, and I want it to be future proofed.

Anchored to the basement floor with Tapcons.

This is the underlayment. It comes in 2x2' squares, about 7 dollars per. I may or may not do the entire floor with those... kinda pricey at 17' x 12'.

Looking back at this pics, I see some small mistakes I have made... I am thinking "Why did I do it that way?" Seemed right at the time.... I'm pretty out of practice, but it isn't like this is a load bearing wall. Hell with it.
I have gotten more done this afternoon. Pics later.
Posted by GORDON on Oct. 19 2010,16:58
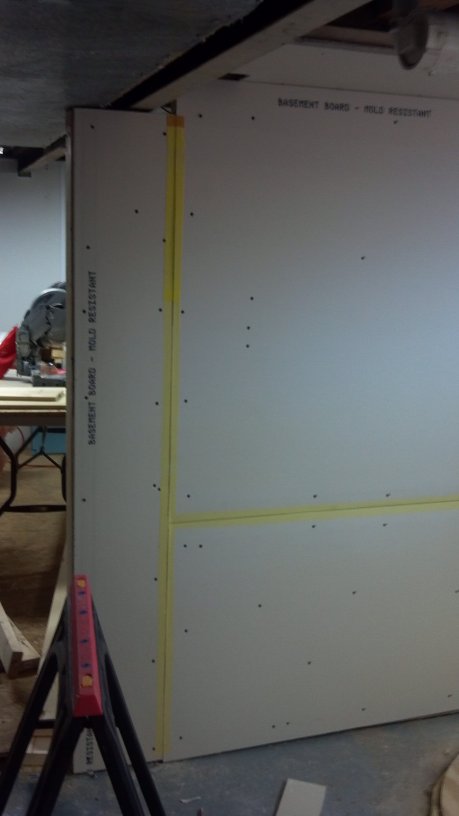
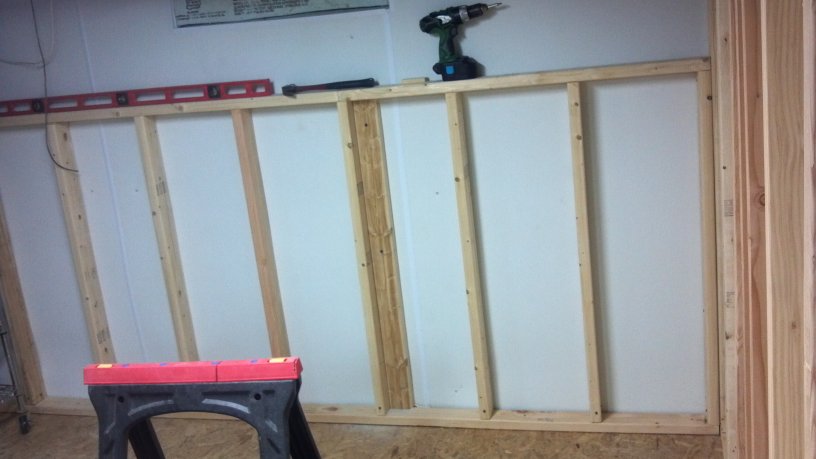
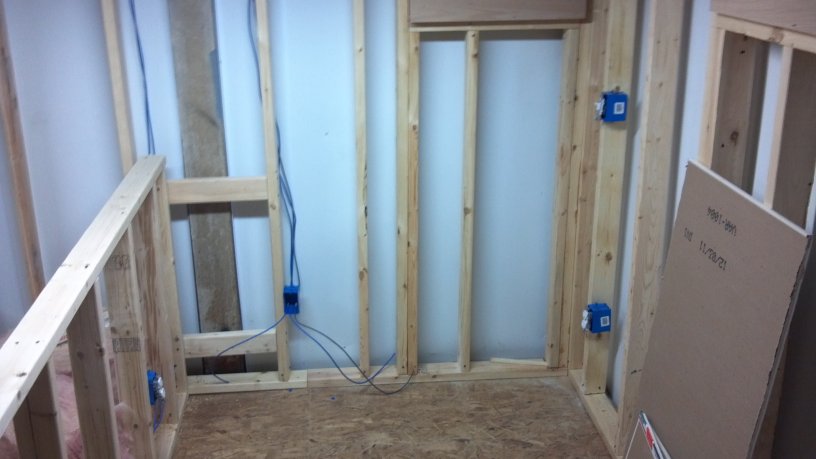
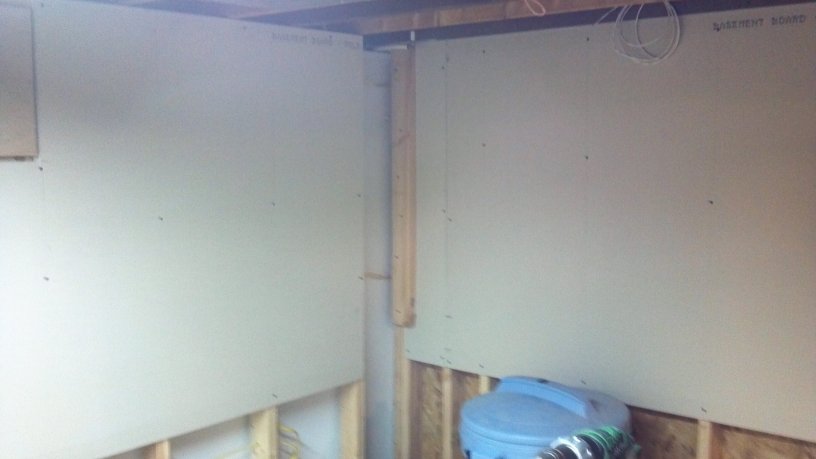
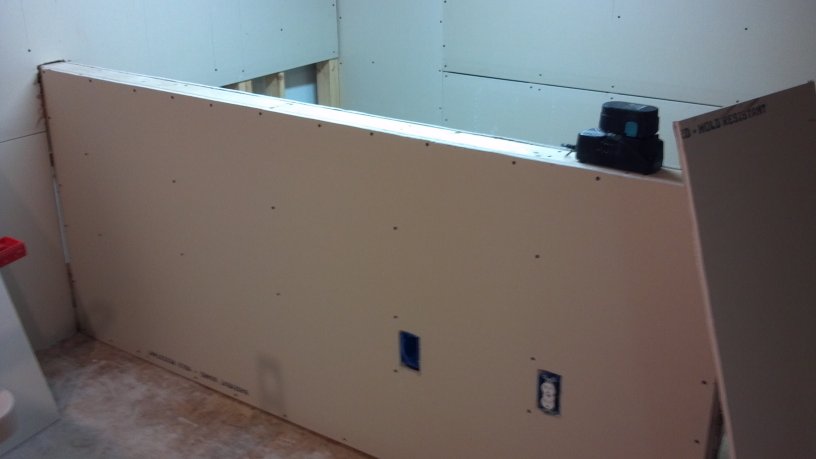
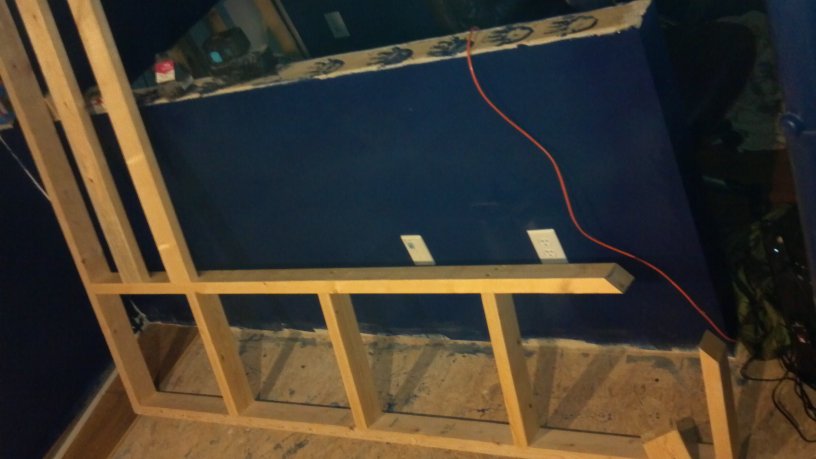
Here's today's progress. The wall to the right of the doorway is done, except for sound proofing (which will probably just be another layer of 3/4" OSB, possibly sandwiching a sheet of drywall. I read that works well).This is the unfinished side facing the man cave. Again, leaving it open for the running of wires.

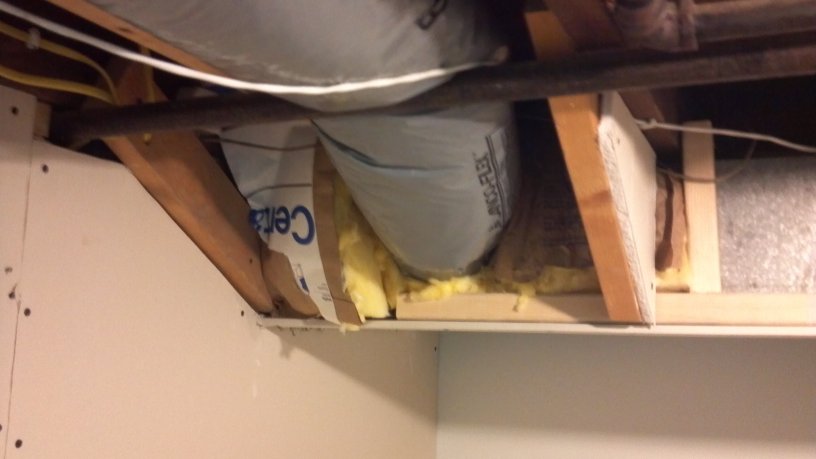
The open spaces at the top of the new plywood aren't really open. There's a floor joist up there. I will probably stuff that area with insulation and put a strip of plywood straddling those 2 joists for further sound proofing.

The black line on the floor is the other part of the wall... on the docket for tomorrow. I will also be enclosing a small room down there for a pantry (and it also contains the house demarc). I will need to move one of the fluorescent lights into the pantry... I may also do that tomorrow if the existing wiring is long enough. If I need to buy more wire it won't be done this week.

Posted by Cakedaddy on Oct. 19 2010,18:14
How come you are using plywood instead of drywall?You sure do have a lot of Berk-Tek in that last pic. . .
Posted by GORDON on Oct. 19 2010,18:17
Sound proofing. There will be layers.
Posted by GORDON on Oct. 20 2010,20:14
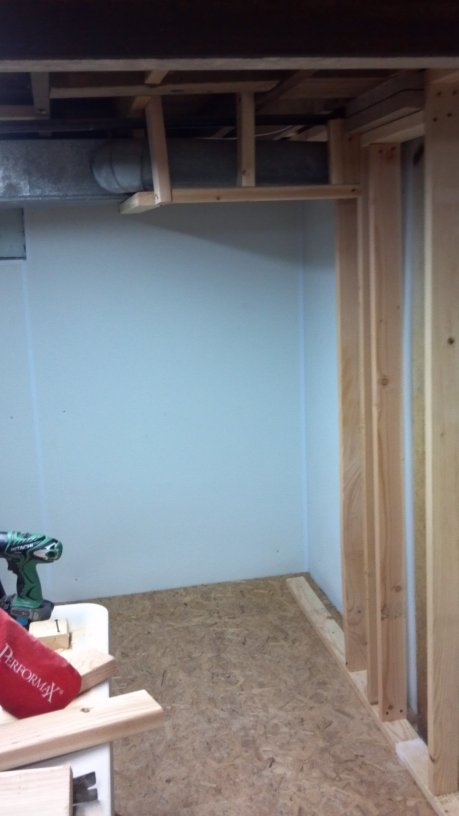
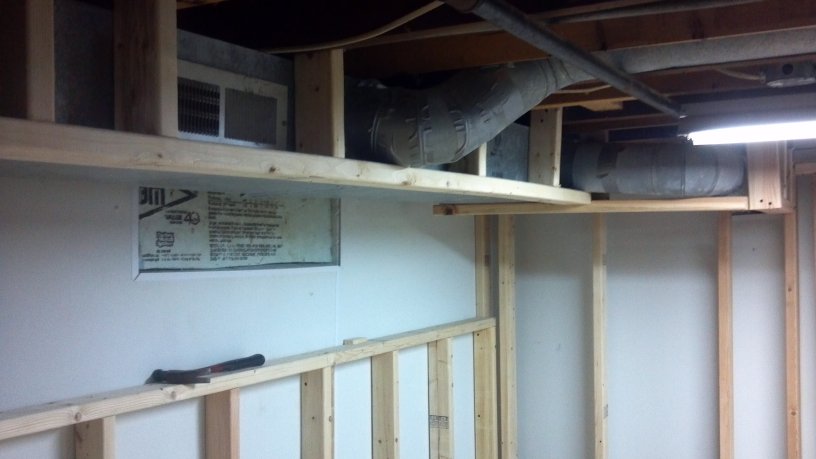
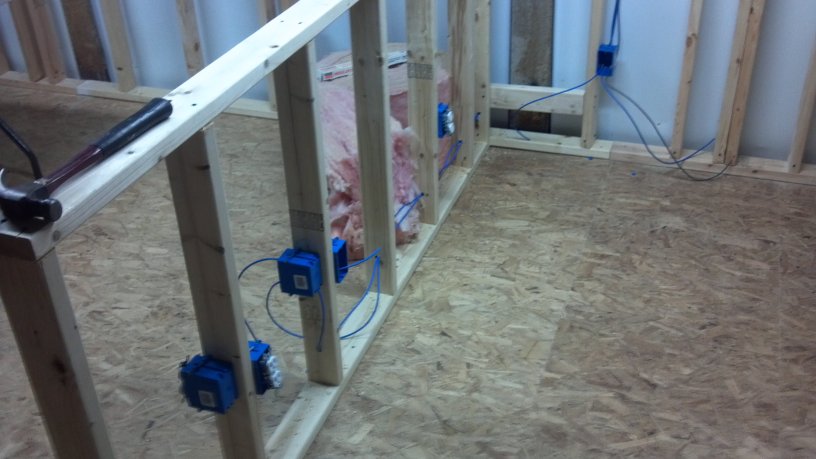
Had distractions today, so didn't get a ton done.This is the same wall opposite of where the door will be. Base plate/underlayment is in place and achored to the floor. The stud against the wall is anchored down. Have the top plate in place. All that is really left is to put in a couple studs.

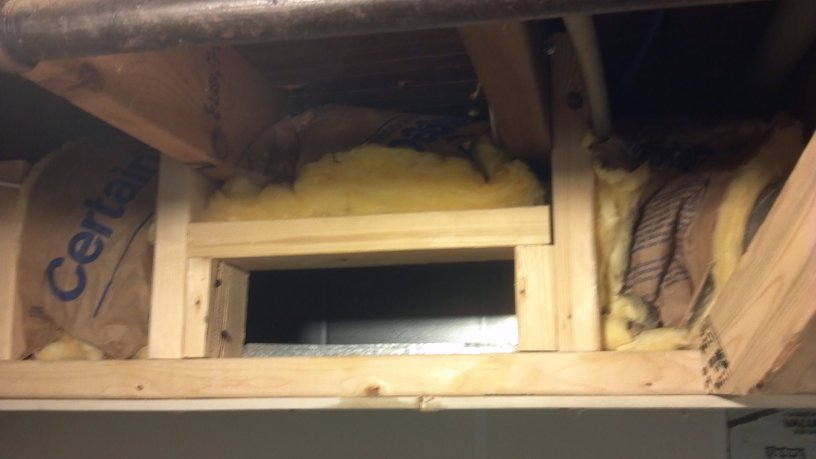
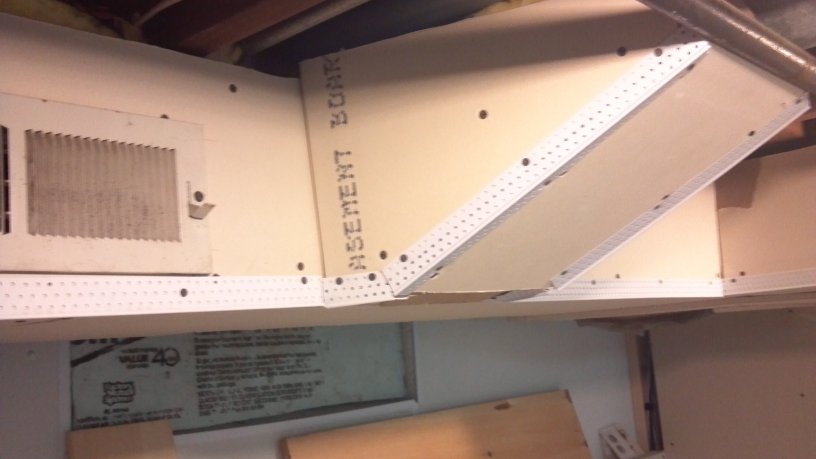
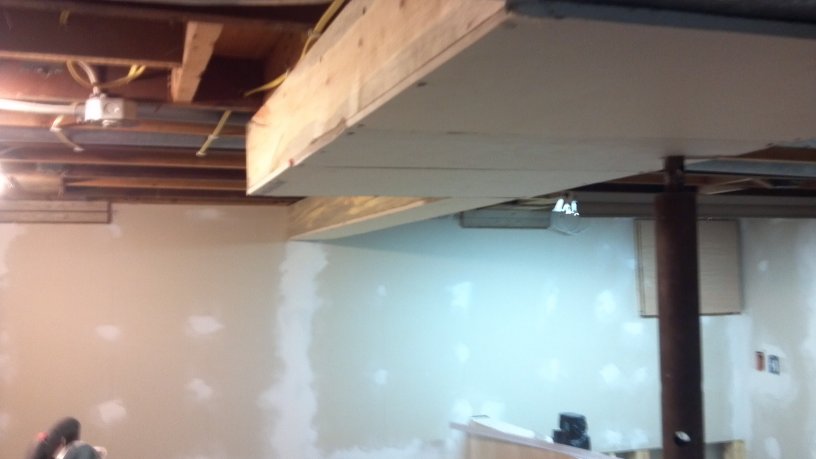
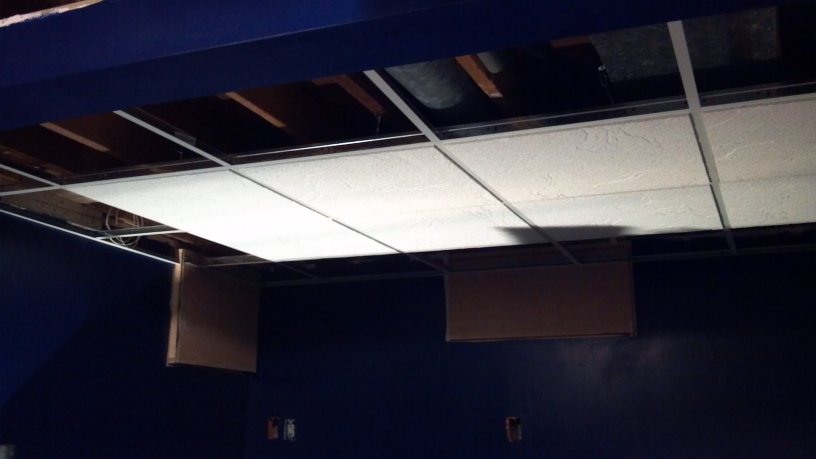
Because of the overhead air ducts, the ceiling on this side of the room will be coffered by about a foot. This is the side I planned on having the big screen TV, so it will work out well.

Posted by GORDON on Oct. 21 2010,17:44
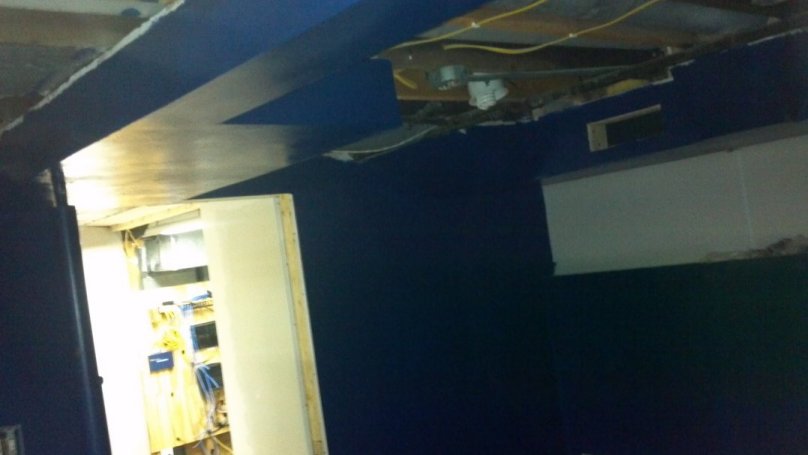
Another fuller schedule today, so not a lot done, but here it is:"Main Wall," opposite side of the door.
The header over the doorway is kind of funky, but that is a cold air return vent and it has exactly 6'2" of clearance. I was trying to leave as much room as possible for whatever ceiling/door frame ends up going there. Door is probably going to be custom, since they don't make pre-hung doors 6'2" high. I'm thinking of recreating the Tardis out there... see, you walk in and it's bigger on the inside....
The area where those racks are is going to be the pantry. That is the next set of walls I'm building, hopefully tomorrow.


Posted by GORDON on Oct. 22 2010,20:36
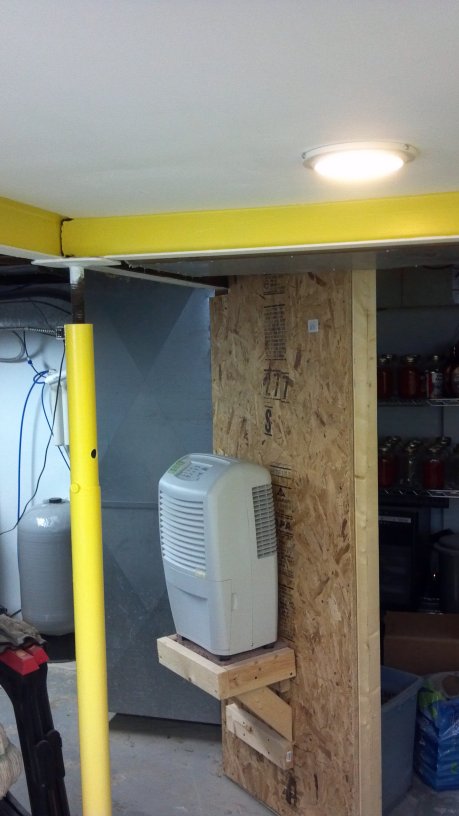
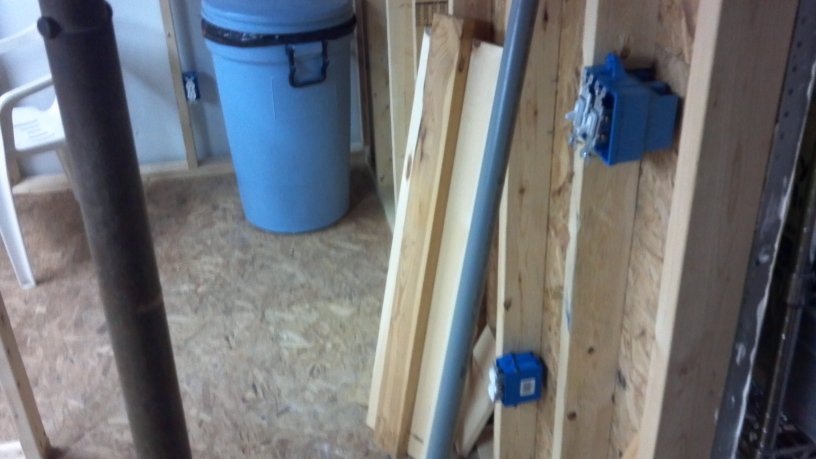
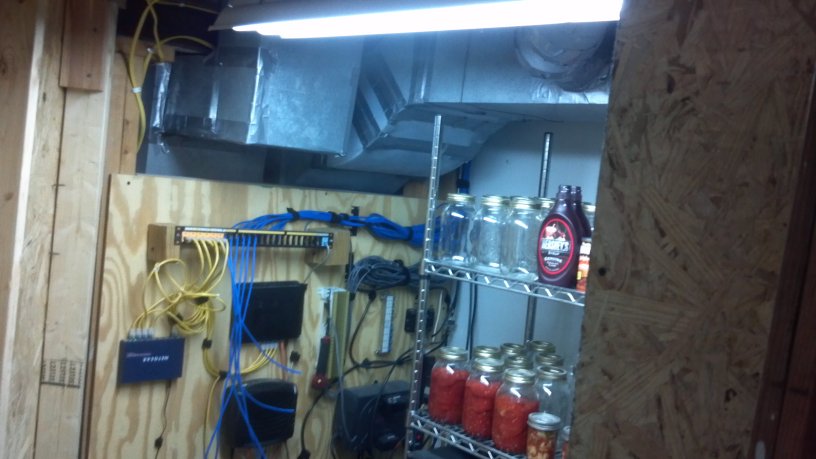
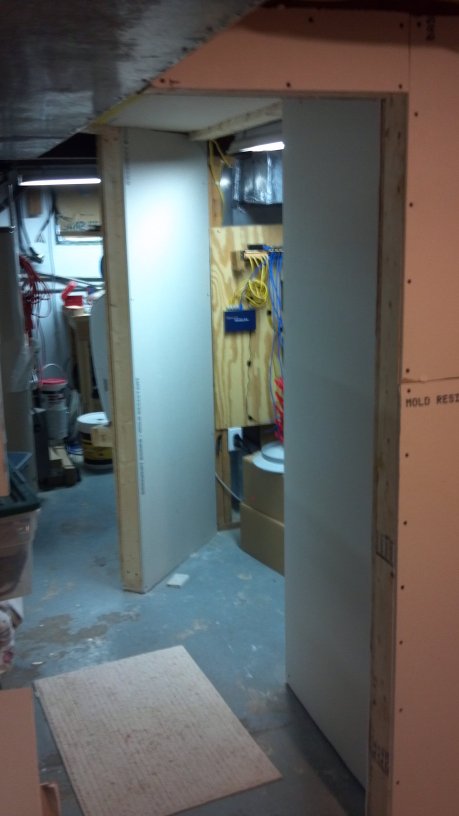
Worked on it a couple hours this afternoon, and then a few hours this evening.This is the pantry/demarc area. I had a basic idea of what I wanted to do, but hadn't gone as far as planning the details of it, so I spent a good hour today figuring out how I should proceed.
The original plan called for a door, but I didn't like how small and confined it was when I laid it out that way, so I decided to skip the door and bring the wall out at an angle. This gives me a basic enclosure for food stuffs and network equipment, yet is still open and easy to access. I will be finishing the walls inside as this area is directly between the furnace and the man cave... noisy when it kicks on and is blowing air. A couple finished walls should deaden most of the noise.

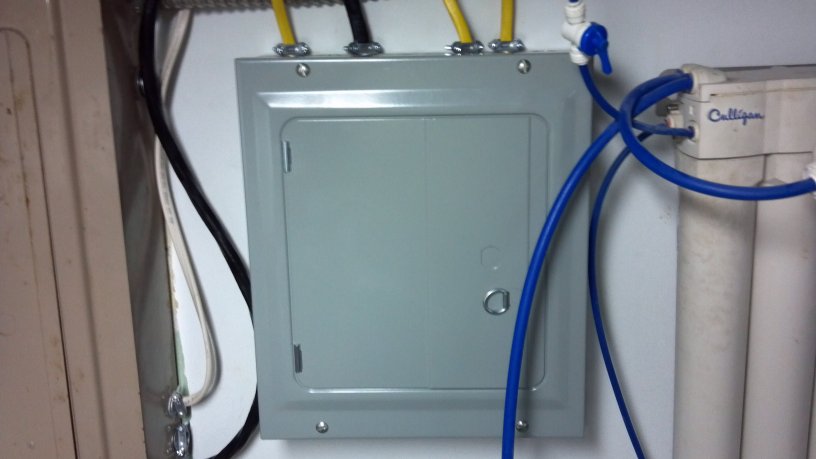
That's the house demarcation point (demarc) in there. Phone, cable TV, and internet all come into the house at that point and I have them split off from there. The switch is dangling from the wall. It slipped its screws when I leveled that existing wall. The big white thing on its own shelf on the left is the dehumidifier. It has been sitting on a box for about 2 years since the basement was waterproofed... I finally have a permanent spot for it.

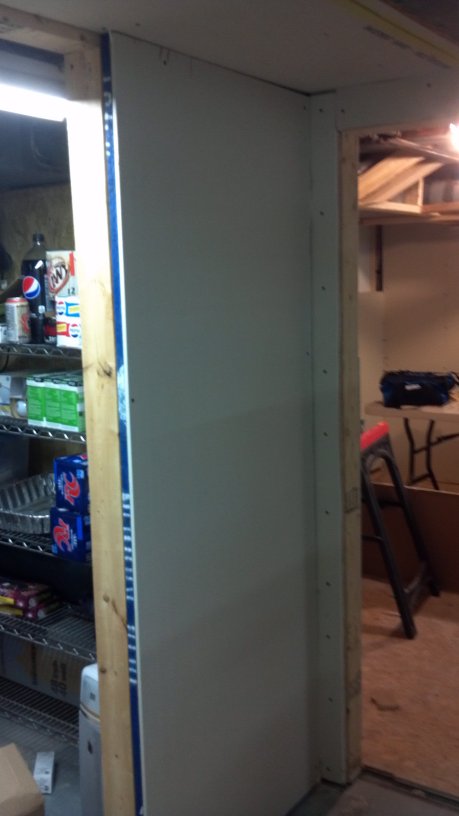
This is the wall to the right of the entrance to the pantry, and the man cave behind and to the right.

Posted by unkbill on Oct. 24 2010,19:12
If you think insulation will deaden sound you will be wasting your money. It really doesn't. You might want to look into other options. I have none to give but know for a fact insulation is a waste. Without looking it up what does OSB mean?
Posted by GORDON on Oct. 25 2010,12:57
(unkbill @ Oct. 24 2010,22:12)
QUOTE
If you think insulation will deaden sound you will be wasting your money. It really doesn't. You might want to look into other options. I have none to give but know for a fact insulation is a waste.
Without looking it up what does OSB mean?
Without looking it up what does OSB mean?
Offhand don't know OSB.
I read a long time ago a good sound proofing method was to layer 3 or 4 layers of plywood and drywall, alternating.
This is an interesting idea; 2 layers of drywall with copious amounts of silicone calk in between to dampen vibrations. That seems quick and easy.
< http://www.soundproofing101.com/soundproofing_3.htm >
Posted by TPRJones on Oct. 25 2010,14:35
If you can pull a vacuum in the middle, that would be the best sound-proofing possible.
Posted by Paul on Oct. 25 2010,15:40
(Cakedaddy @ Oct. 19 2010,18:14)
QUOTE
How come you are using plywood instead of drywall?
You sure do have a lot of Berk-Tek in that last pic. . .
You sure do have a lot of Berk-Tek in that last pic. . .
I wondered this myself.
Evidently he's building a rape room.
Posted by TheCatt on Oct. 25 2010,15:43
Where's the lotion and/or basket?
Posted by GORDON on Oct. 25 2010,18:12
You're an amateur if you need a dedicated room for your raping.
Posted by unkbill on Oct. 26 2010,01:23
Oriented Strand Board.I have 2 sliding closet doors down here next to the truck if you can recycle them in your room.
Posted by GORDON on Oct. 26 2010,06:21
(unkbill @ Oct. 26 2010,04:23)
QUOTE
I have 2 sliding closet doors down here next to the truck if you can recycle them in your room.
Maybe not in the basement but talk to my wife, we have a lot of doorless closets in the house. I won't be back to town until tomorrow afternoon.
Posted by unkbill on Oct. 26 2010,11:27
(GORDON @ Oct. 26 2010,06:21)
QUOTE
(unkbill @ Oct. 26 2010,04:23)
QUOTE
I have 2 sliding closet doors down here next to the truck if you can recycle them in your room.
Maybe not in the basement but talk to my wife, we have a lot of doorless closets in the house. I won't be back to town until tomorrow afternoon.
Won't be back in town untill Nov 19 help yourself they might not stay good in this weather.
Posted by Cakedaddy on Oct. 26 2010,21:26
Having been in insulated attics trying to drop cable down through a wall and trying to communicate with the person below you. . . I can assure you, insulating is a VERY good sound proofer. Screaming as loud as I could, and the person still couldn't hear my instructions.
Posted by unkbill on Oct. 28 2010,21:00
(Cakedaddy @ Oct. 26 2010,21:26)
QUOTE
Having been in insulated attics trying to drop cable down through a wall and trying to communicate with the person below you. . . I can assure you, insulating is a VERY good sound proofer. Screaming as loud as I could, and the person still couldn't hear my instructions.
Are you talking about blown in insulation or fiberglass. He is installing fiberglass and are you sure your worker wasn't just ignoring you?
Posted by GORDON on Jan. 20 2011,11:54
I had an extended project come up at the end of October, and by the time it ended in December I had lost my momentum.... but I was always thinking about it. Specifically, whether or not I trusted the basement waterproofing company I hired, "Everdry," to have done a good job laying down new concrete on the floor along the wall where they put in new drainage tile. The concrete they put down developed hairline cracks every 4 feet or so, and it sounds very thin when I walk on it.In the end I decided I didn't trust it enough to anchor the wall plates with the Tapcons, and made the decision to put the underlayment down on the entire floor. It is doubling my materials cost, but I just think that concrete is too thin to take the torque of a Tapcon without crumbling.
I had another $100 in the budget a few weeks ago, so I bought a couple new tools and $80 worth of underlayment. I got the first row down against the concrete wall, and framed most of a new wall:

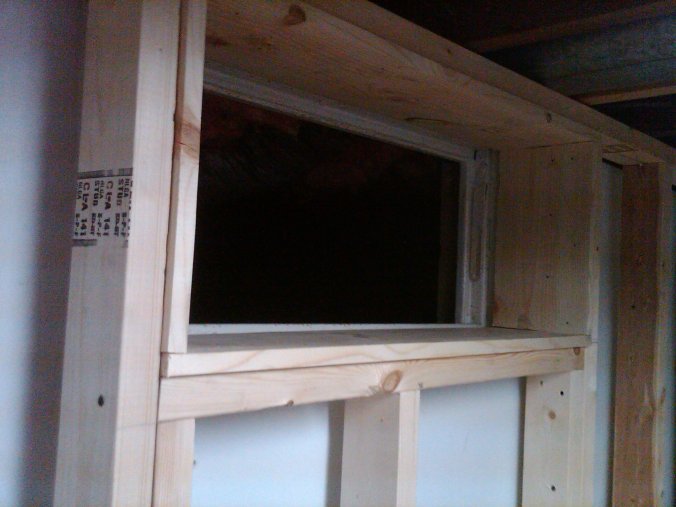
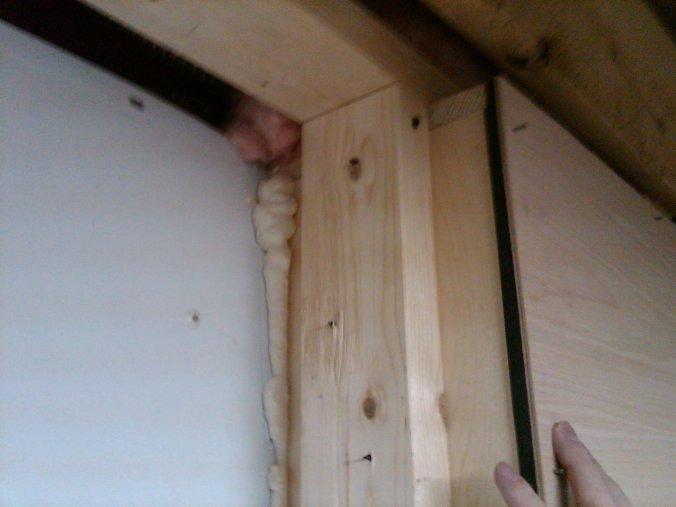
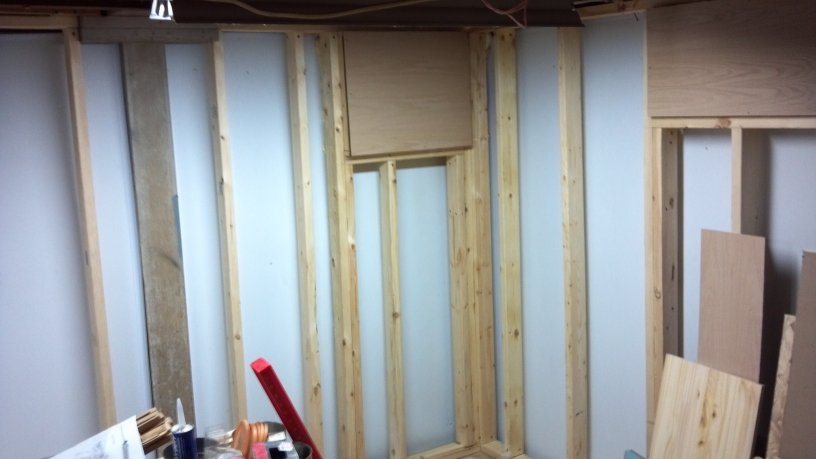
The little window-looking thing is a crawl space access. I am going to frame the inside with a 1x10, and then I can build a real weather-sealed access panel. As it is a get breezes from the crawl space.
I was only using the existing 2x4's I had, so I had to skip a few studs, because I really need to get the other crawl space access weather sealed. It is covered with black plastic held on with duct tape, but it gets so cold the duct tape stops sticking and then I have strong, cold wind pouring into the basement. As it is I go down twice a day to restick the tape with the heat from my hands.

I used my last 6 2x4's to get it to the point where I am ready to go get the finishing stuff for that access hatch.
I mentioned the underlayment...

2x2 foot squares, the last batch I bought were $6 each. I have to prop up a portion that you can see that picture because the basement floor tilts to drain leaking water into a sump that is on the other side of that wall.
So that is it for now. I have no uncut boards in the basement. I'll post again when the next bit starts, which will hopefully be soon.
Posted by unkbill on Jan. 20 2011,13:36
Ever dry and other companies don't use concrete like what you think of concrete in a basement. I think it is more of a fas drying hydrolic cement that doesn't get as hard as concrete.
Posted by GORDON on Jan. 20 2011,13:37
Well whatever it is, it is too thin and sucks.
Posted by GORDON on Jan. 26 2011,10:03
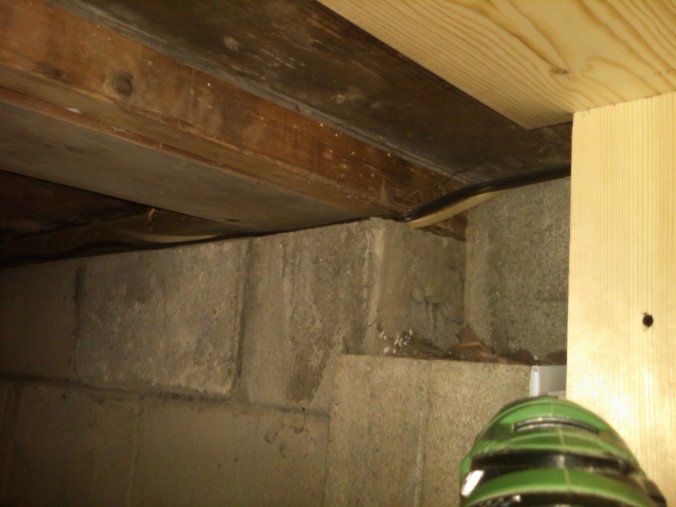
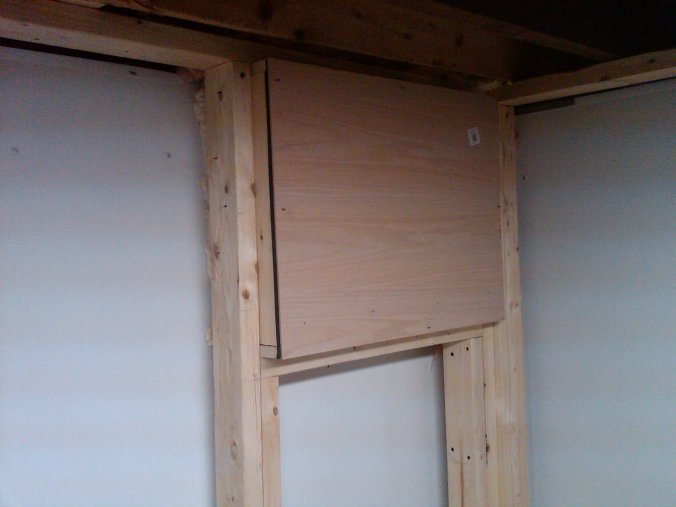
Finally insulated that crawl space where the hornets were.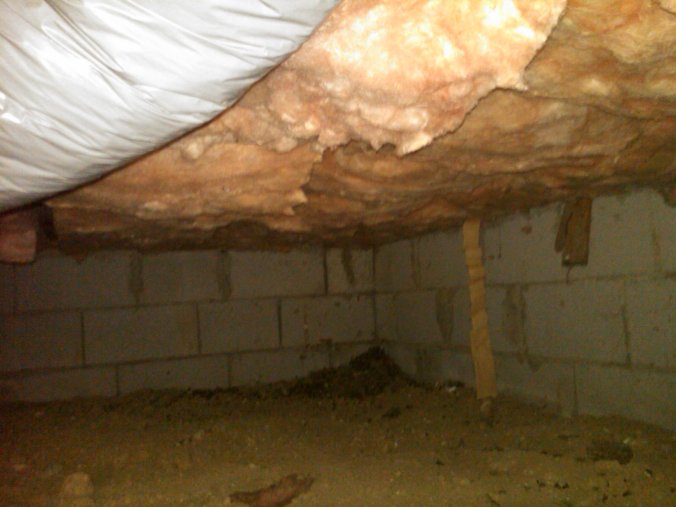
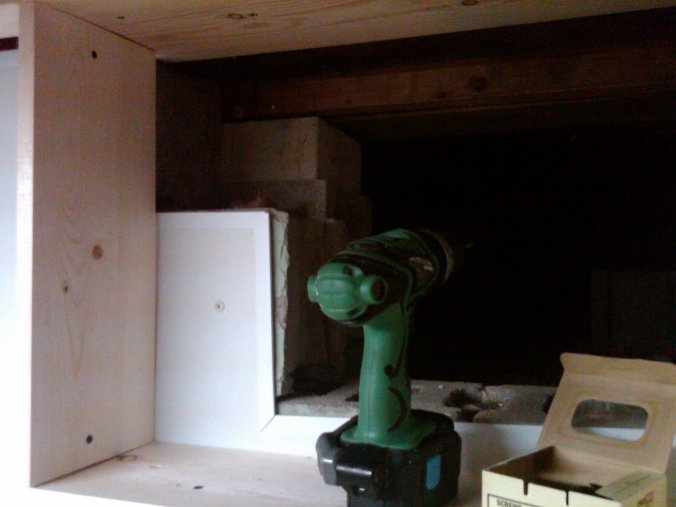
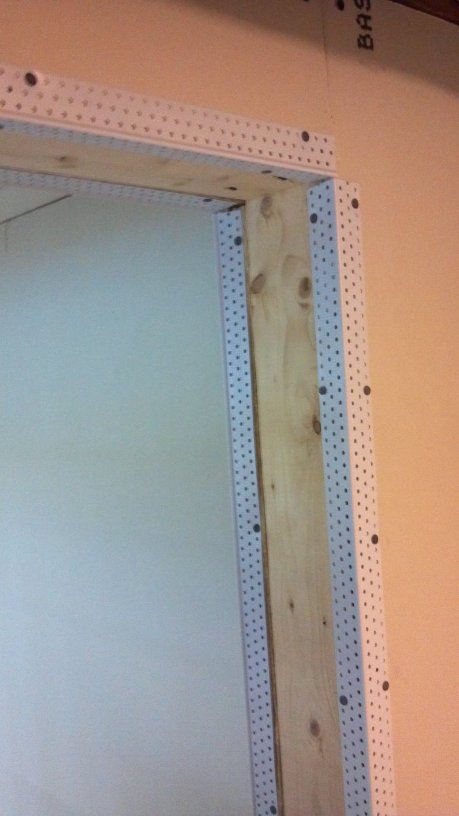
I made a frame around the first access hole with a 1x8, which I was upset to learn was actually a (approx) .8 x 7.2. When I measured the hole it was going to be perfect for an 8" board... I had to compromise on the design a bit. You can see the "1x8" doesn't quite go back to the old window frame I had wanted to use as a 'backstop.' (There's an old window frame there because that part of the house was added on, and the window was converted to an access hole for the crawl space.)
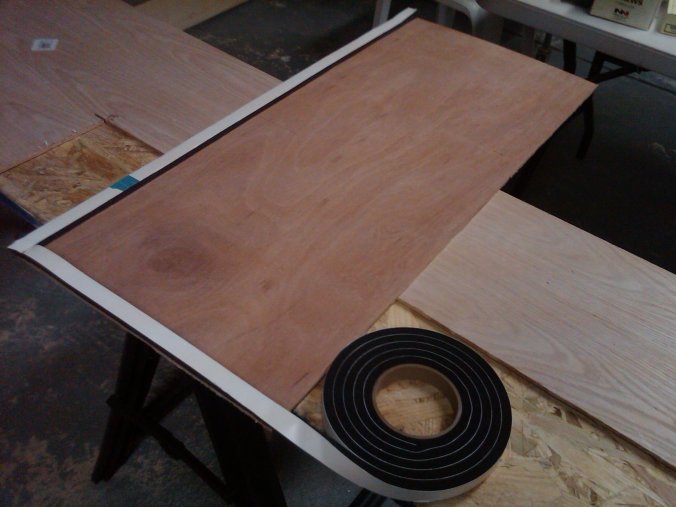
Cut a 1/4" piece of oak plywood, and put a weatherproofing strip around the outside.
Not pictured: I nailed a piece of 2x4 inside of that hatch both as a support structure, and give the panel something to rest on the inside of the frame I built, above.
Perfect fit.
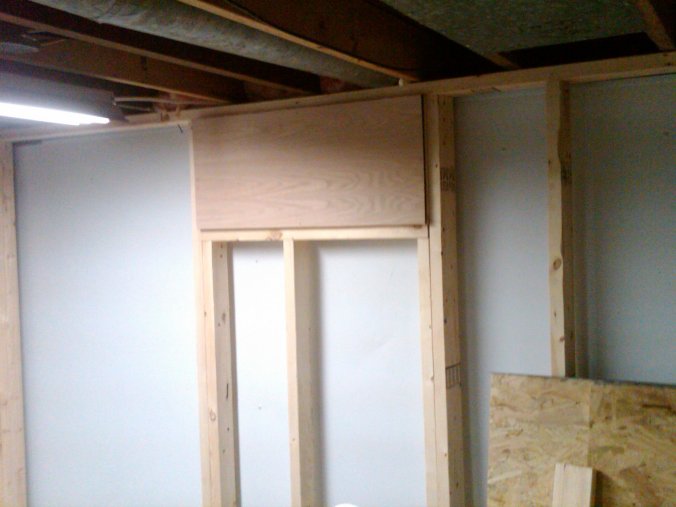
Stuffed a little pink insulation up in the floor joists, and sprayed a little expandable foam around the outside of the frame.
Tackling the other access panel tomorrow.
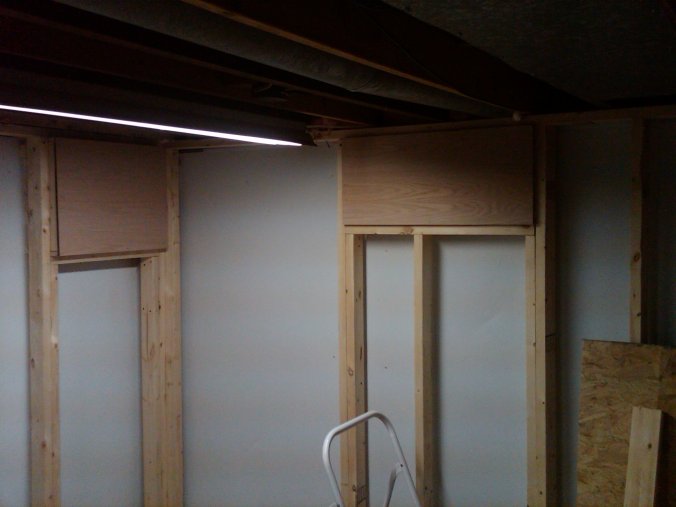
Posted by GORDON on Jan. 28 2011,16:44
Finished the second crawl space access. Knocked out block instead of a former window, but nothing really new. Second verse same as the first.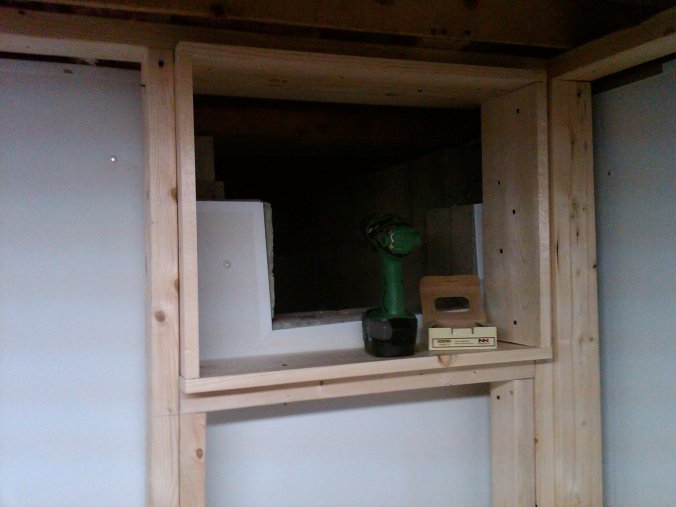
I had another $100 for the project as of Feb 1, but then I went and spent it on a bday present for the wife. Sigh. Next cash infusion is March 1, unless the income tax refund is surprising. Will find that out tomorrow.
Posted by Cakedaddy on Jan. 28 2011,18:45
What's the total cost so far?
Posted by GORDON on Jan. 28 2011,20:01
Hmmm.I think
Not counting the $50 I spent on 4 rolls of pink insulation. That wasn't technically part of this project.
Posted by GORDON on Mar. 12 2011,12:23
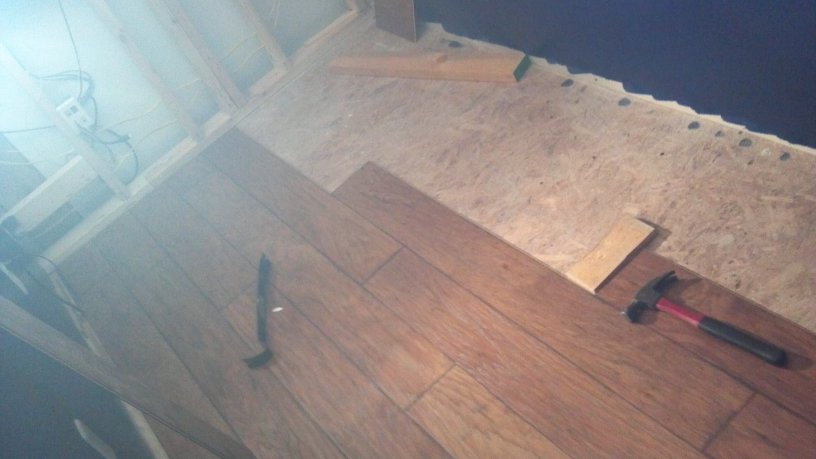
Spent and installed another $75 on sub flooring. Nothing picture-worthy, just keeping the running tally of costs.
Posted by GORDON on Mar. 12 2011,16:47
I was out and about tonight, and bought more materials. Add $85 to the running tally, bring the total to $560.On a side note, I bought a hammer drill the other day and used it today to drill holes in the basement floor for anchoring Tapcons.... it was like drilling into butter and I am kicking myself for not owning a hammer drill before now.
Posted by GORDON on Mar. 23 2011,17:52
Spent $115 on enough flooring to finish the floor. Will post a couple pics when I get it done.Running tally: $675.
Posted by GORDON on Feb. 17 2012,09:41
(GORDON @ Oct. 19 2010,19:58)
QUOTE
The open spaces at the top of the new plywood aren't really open. There's a floor joist up there. I will probably stuff that area with insulation and put a strip of plywood straddling those 2 joists for further sound proofing.
That was before.
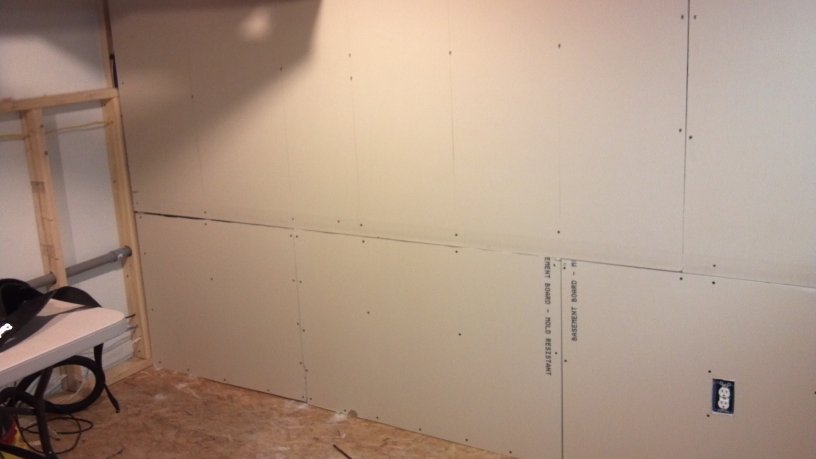
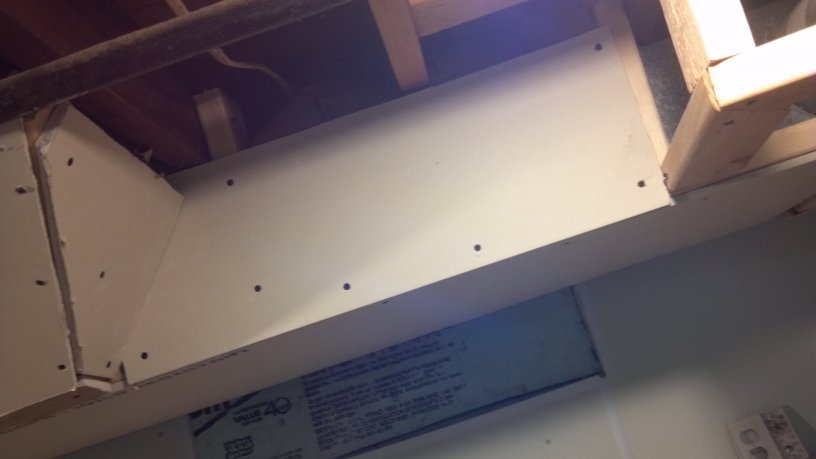
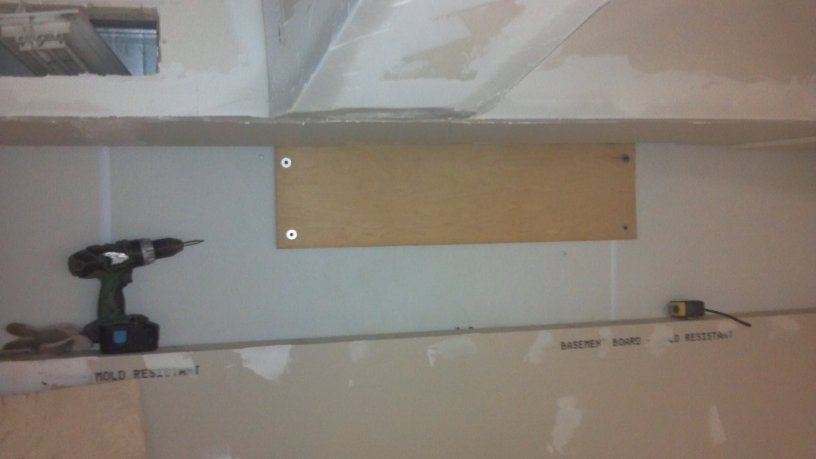
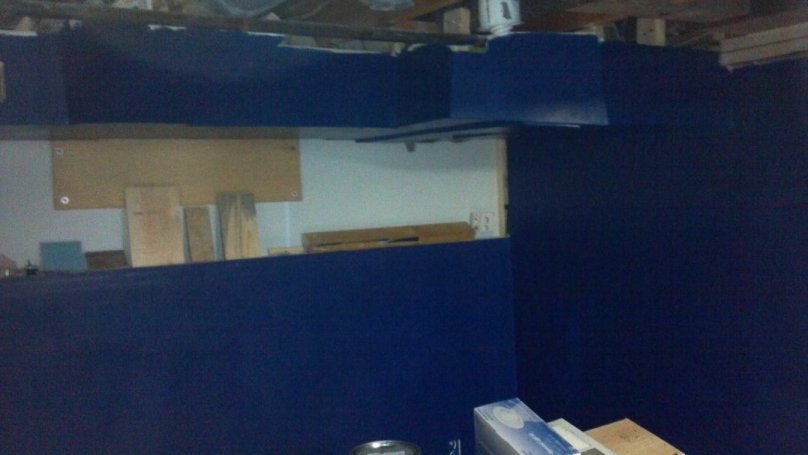
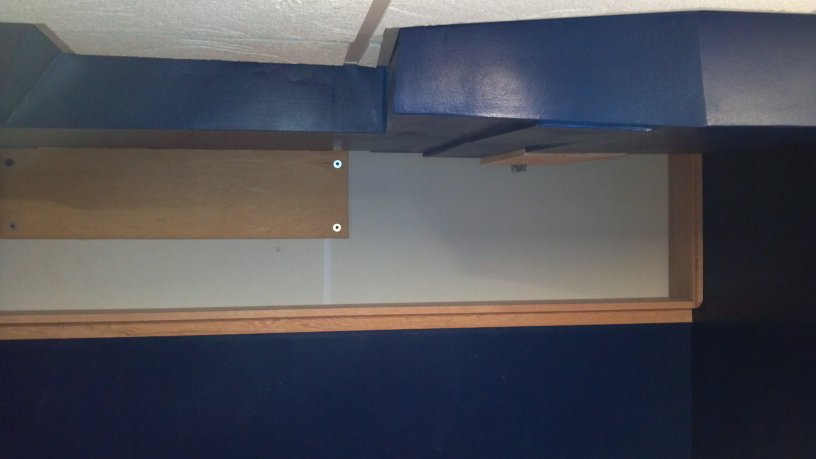
This is after:
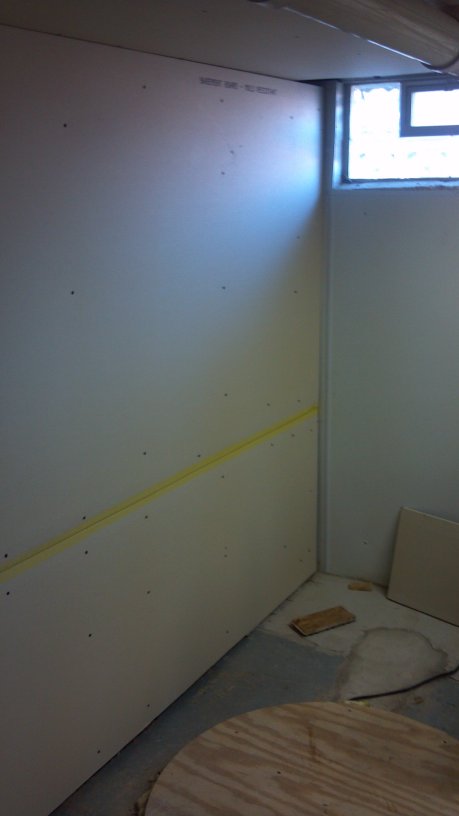
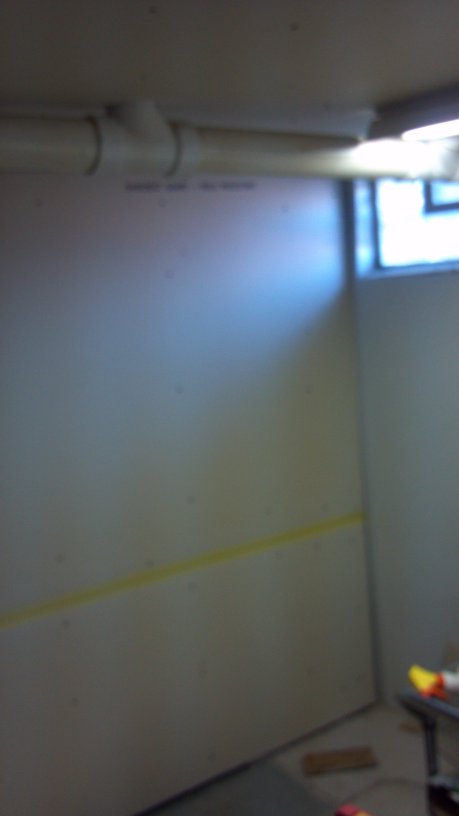


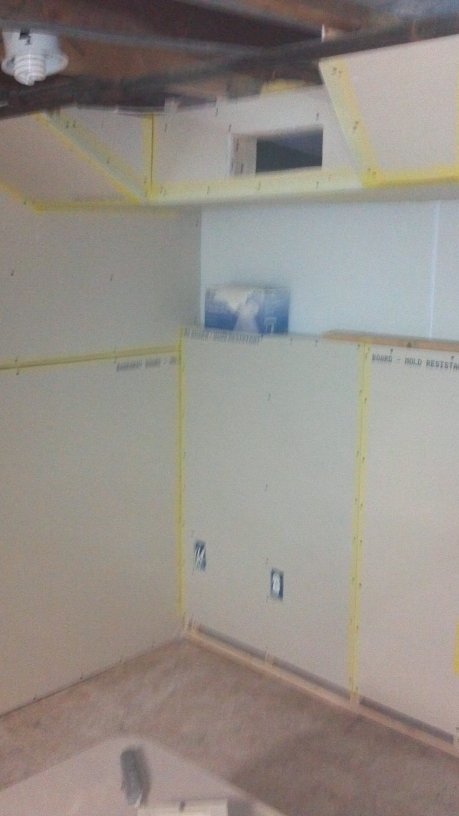
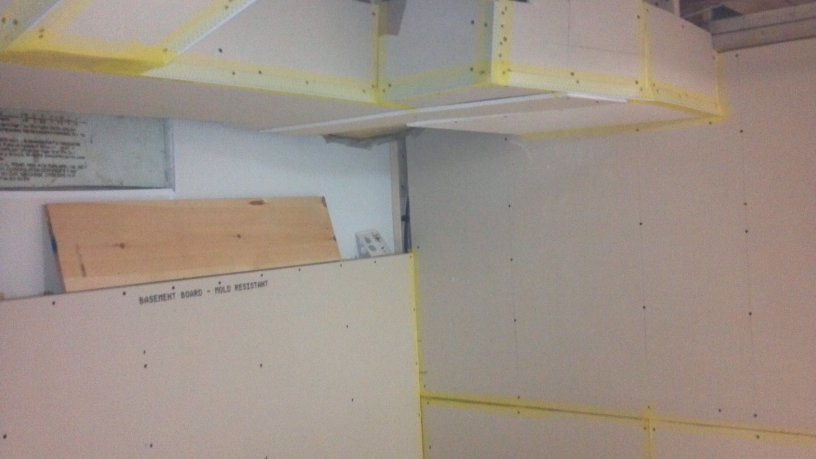
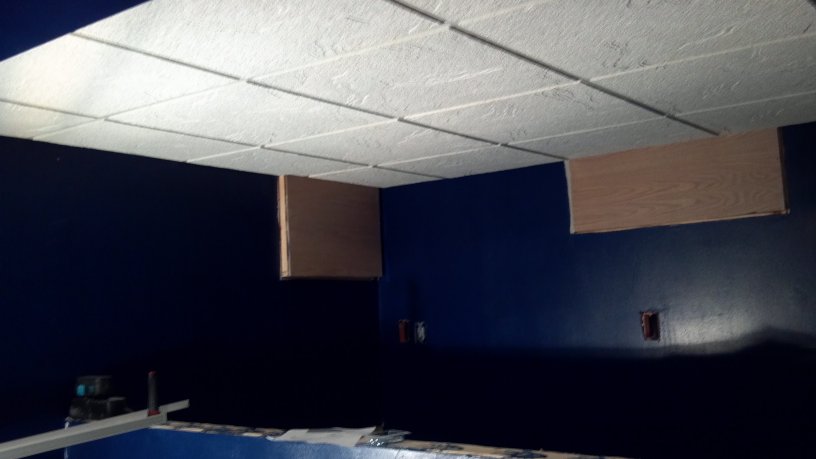
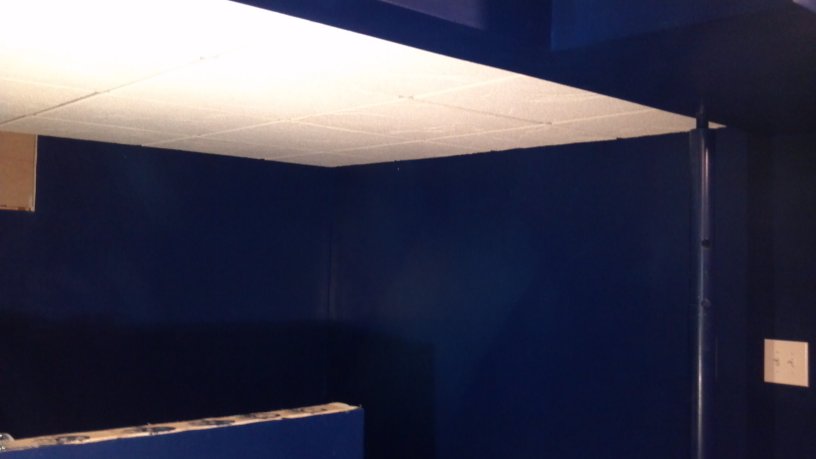
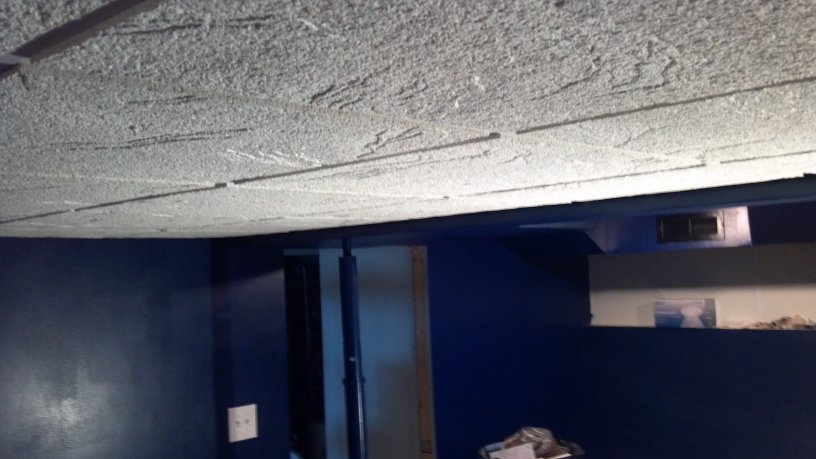
This was my first experience doing drywall. Lessons learned: imperfections with your sanding will not be hidden by 2 layers of primary and a layer of paint, and put covers over everything you don't want coated under a layer of dust during the sanding.
Also that is a recessed light fixture I installed to replace an old-timey fixture that was just screwed to the unfinished ceiling in between floor joists.
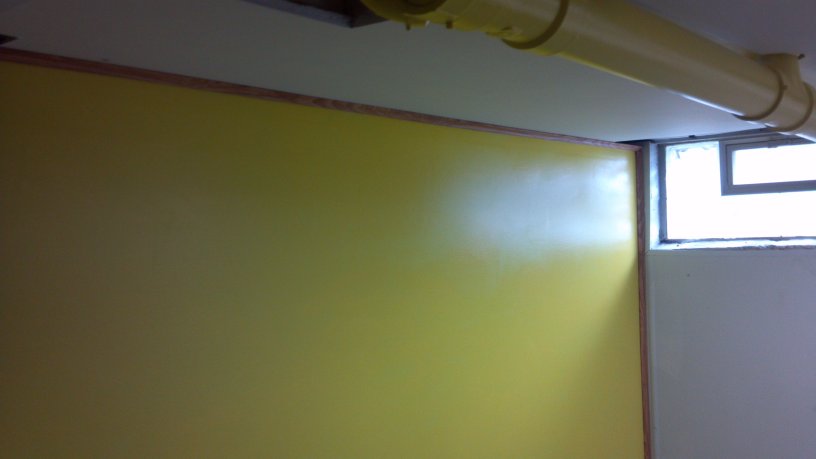
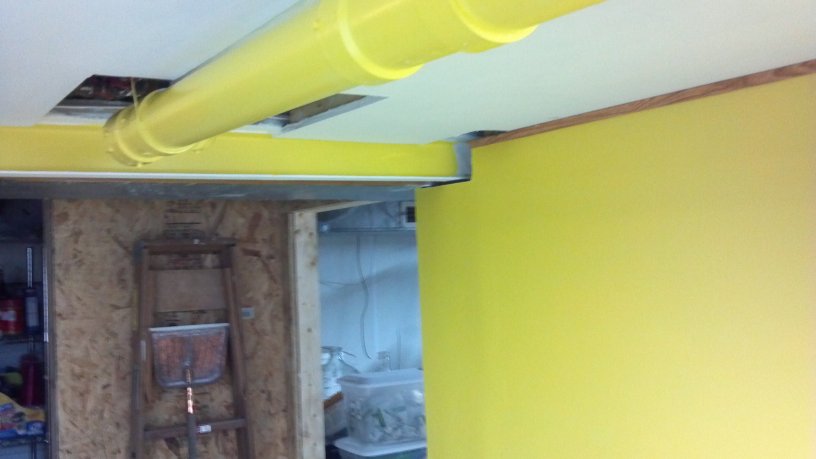
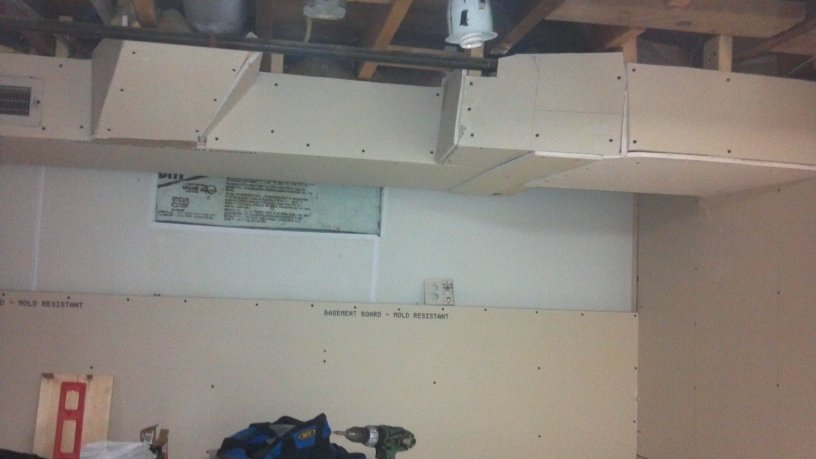
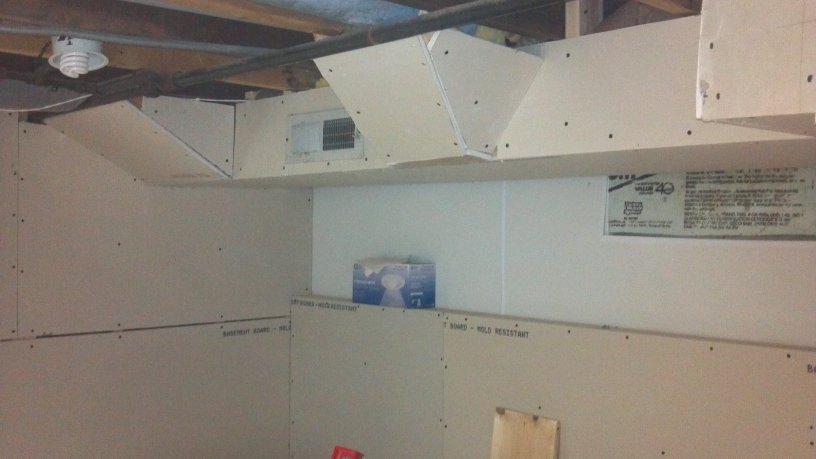
Spent about $160 on drywall, mud, screws, nails, trim, light fixture, shelves (not pictured), primer, and paint (paint is fucking expensive, wtf). Wanted to get the wife's laundry-side of the basement done and finished and pretty so she has one less thing in life to complain about. Yellow is so it will be brighter down there.
Next: finish framing the man cave walls, and get it wired for sound, data, and power. I believe the money is already in the bank.
Posted by GORDON on Feb. 17 2012,09:44
Running tally: $835.
Posted by Cakedaddy on Feb. 17 2012,15:51
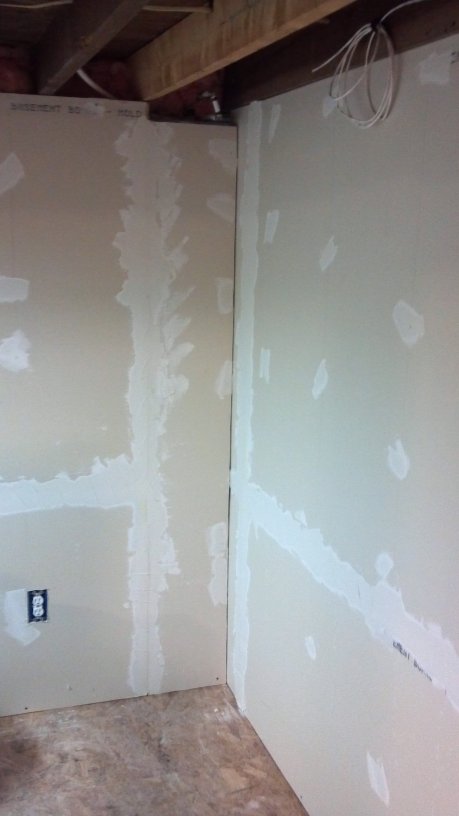
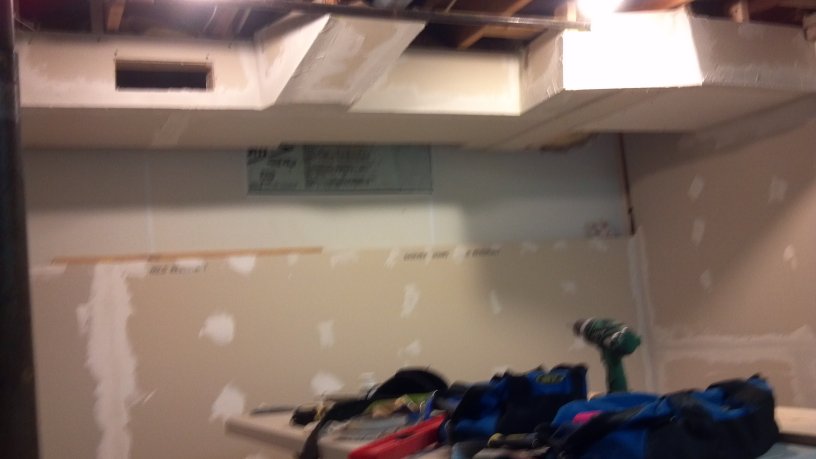
I'm going through the house and re-mudding all the spots I mudded before and thought were good enough until we started painting. Mudding is hard.
Posted by GORDON on Feb. 17 2012,16:00
(Cakedaddy @ Feb. 17 2012,18:51)
QUOTE
I'm going through the house and re-mudding all the spots I mudded before and thought were good enough until we started painting. Mudding is hard.
I did about 4 mud/sanding cycles before I decided to go with the primer. (Maybe 3, I forget. I do know that I bet I can get it in 2 applications next time, now that I know what to do.) Just a glance and a random person wouldn't notice, but I know where to look so I always see the imperfections under the paint. Lesson learned.
More than good enough for a basement laundry room.
Posted by unkbill on Feb. 18 2012,16:44
I mix mud with my primer and use a heavy napped roller. It gives the wall a little texture that helps hide even more sins.
Posted by GORDON on Feb. 22 2012,09:36
(GORDON @ Jan. 20 2011,14:54)
QUOTE
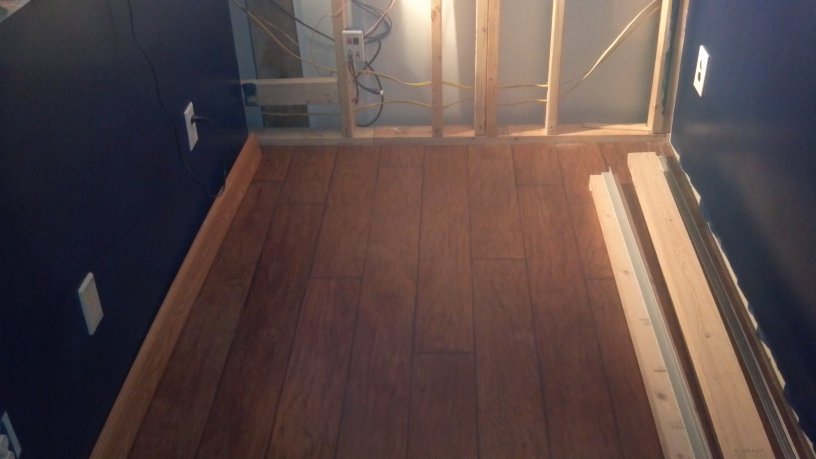
I finished the subfloor a few months ago, never got around to pics. Here is one:
and I had a few 2x4's left over from the laundry room ceiling project, and I finished the north wall and started the west wall. Lumber yard run for more wood is tomorrow.
Also I bought a compound miter saw at some point, so now cutting the wall studs to length is a lot quicker and easier and I get a perfectly straight cut. Before I was doing it the old fashioned way with a square and a circular saw.
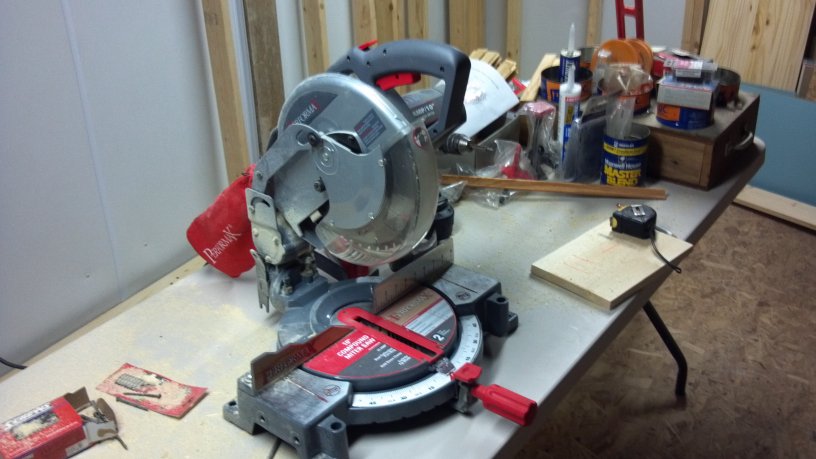
No new expenditures since the last update, just used up leftover materials on-hand.
Posted by GORDON on Feb. 23 2012,11:37
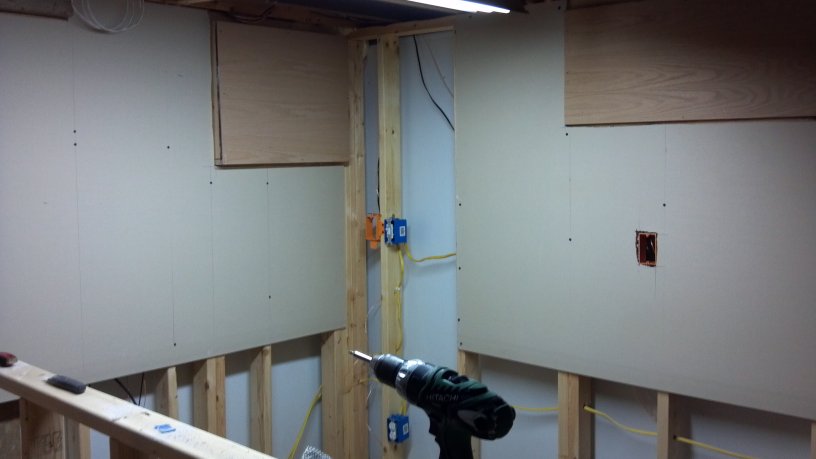
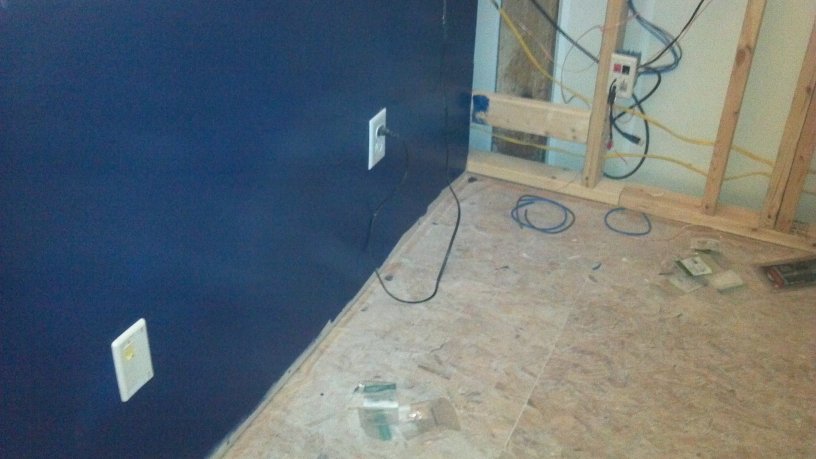
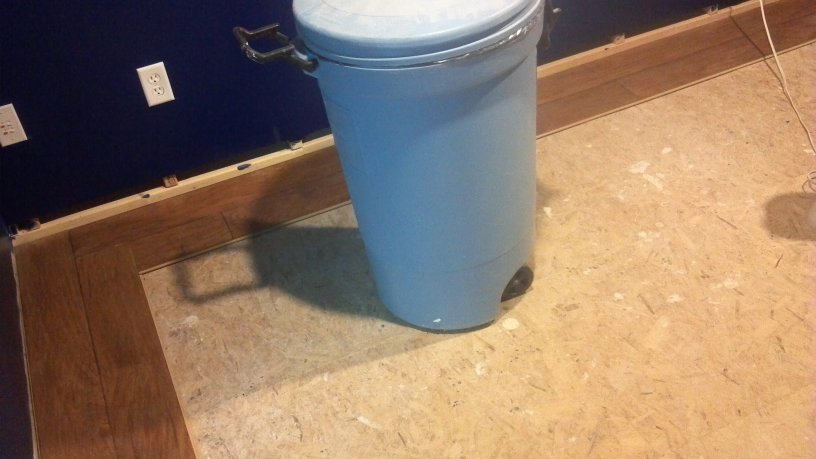
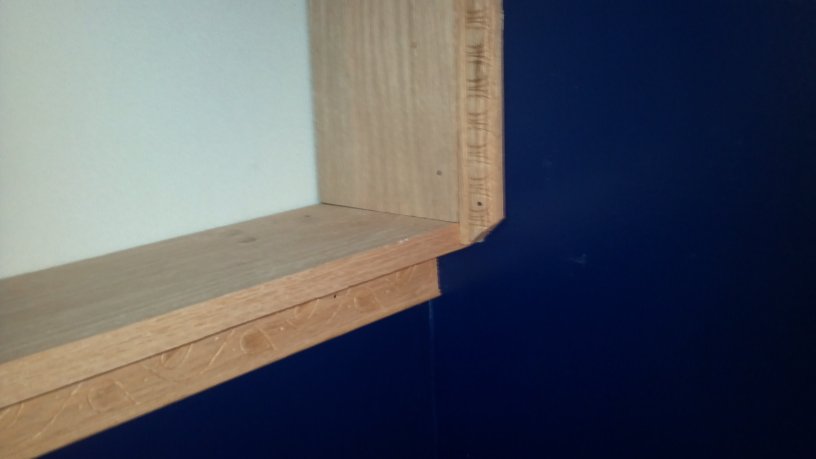
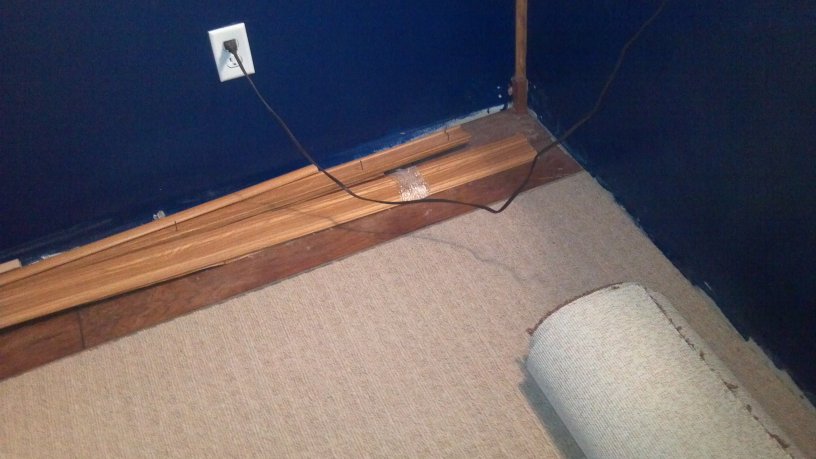
Ran to the lumber yard this morning before the weather moved in, got another dozen 2x4's.Put up a few more studs on the west wall, and removed an outlet that was there, that I didn't want buried inside the wall. Knowing it was there would bug me forever. The 2 little fang marks is where it was anchored to the wall.

And yes, the wall is bowed out, from time and pressure. At some point in the past it was reinforced with those vertical steel beams you can see in some of the pictures. I marked it last year to see if I could detect any further expansion, but so far I haven't detected any. I can't dig out the opposite side of the wall to relieve pressure, because that is crawl space behind there, with about 2 feet of access. Dumb situation.
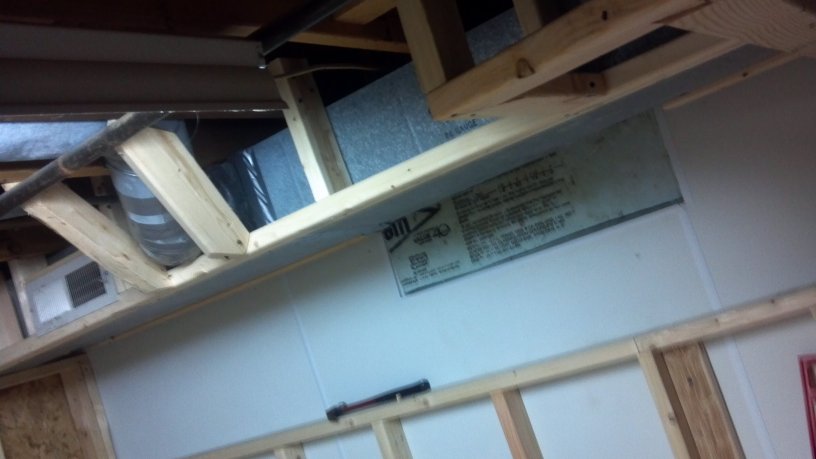
Before I continue on tomorrow, I need to figure out what I am going to do about the duct work on the ceiling on the south side of the room. I can't leave it exposed.
Posted by unkbill on Feb. 23 2012,17:57
The technology is here. I think you could do the same with heat. No more heating pipe.< http://news.bbc.co.uk/2/hi/technology/8618161.stm >
Posted by GORDON on Feb. 24 2012,12:00
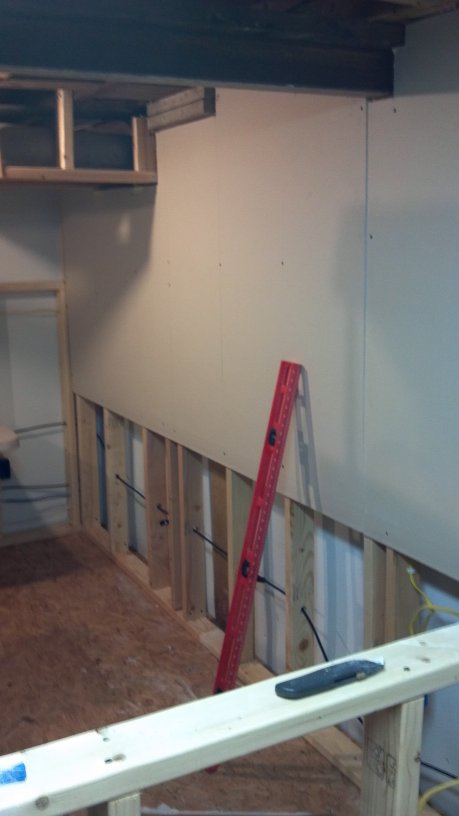
I have finished the west wall, for the most part. Ran myself completely out of screws.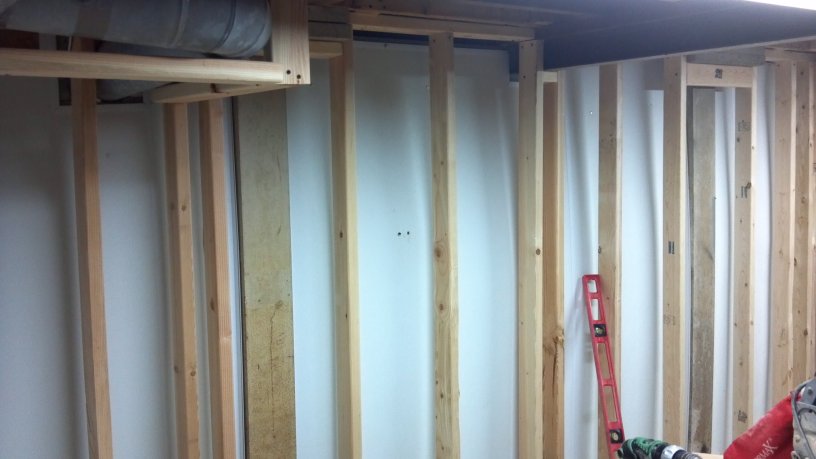
No idea what to do with the south wall and duct work, so I started framing it in, thinking I could enclose it in drywall and make it look cool. The original plan was to leave the south wall unframed, as it would be behind the big TV, and if I ever needed to get into that crawl space I can't build a new wall there because it would make the gap between the heating duct and wall too narrow. But, leaving it unframed and unfinished, I think, will look like shit. No idea what I want to do. I am really stuck for the ideas. I need to get some artisans down there to have a look and see what they come up with.
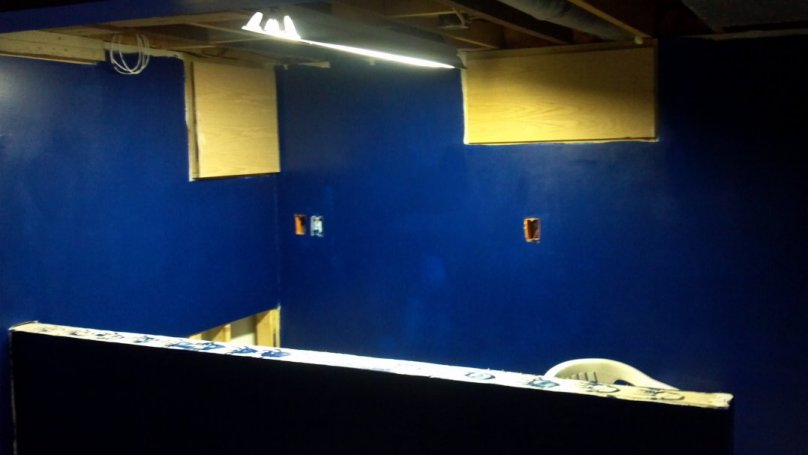
Posted by GORDON on Feb. 25 2012,12:30
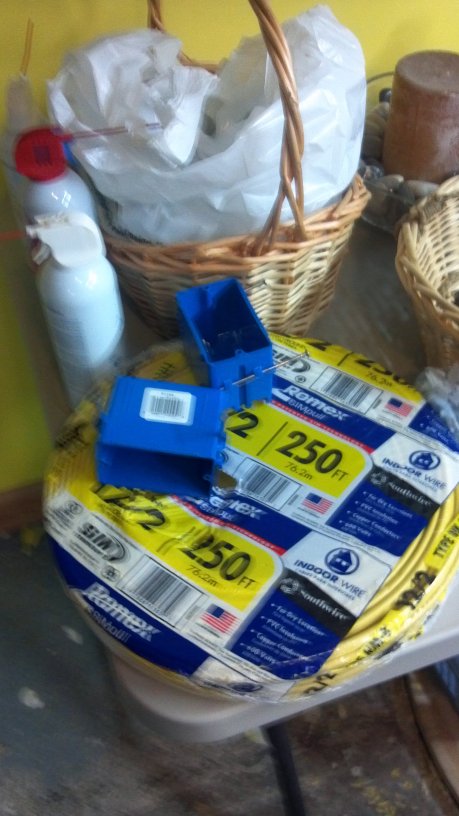
Just spent $100 on electric wiring, boxes, and a couple new breakers for the breaker box. 250' of 12-2 wire was $70.Running tally: $935
Posted by GORDON on Feb. 25 2012,17:40
(unkbill @ Feb. 18 2012,19:44)
QUOTE
I mix mud with my primer and use a heavy napped roller. It gives the wall a little texture that helps hide even more sins.
How much mud do you put in a gallon of primer? Just guestimate a dollop? I may do that in the main room.
Posted by Cakedaddy on Feb. 26 2012,00:02
We use water and mud. Just get it soupy and use a paint roller. Less water=bigger globs/texture. But this will only cover minor stuff. Start with very little water. It's kind of like mixing cement. It never seems like you've put enough water in it, until you've put way too much in.
Posted by unkbill on Feb. 27 2012,17:31
I really couldn't even guess. Would be quite a bit of mud. You want it thick. Actually the last time I did it I took a half gallon of pre mixed mud and started to thin that down with primer. Doesn't take much primer. And the reason you use primer instead of water is you don't have to primer after you texter. You cut out a step before you paint.
Posted by GORDON on Feb. 27 2012,18:28
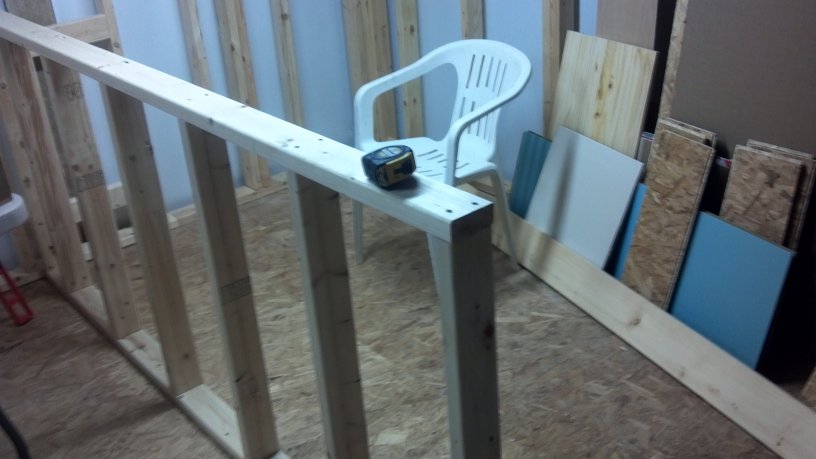
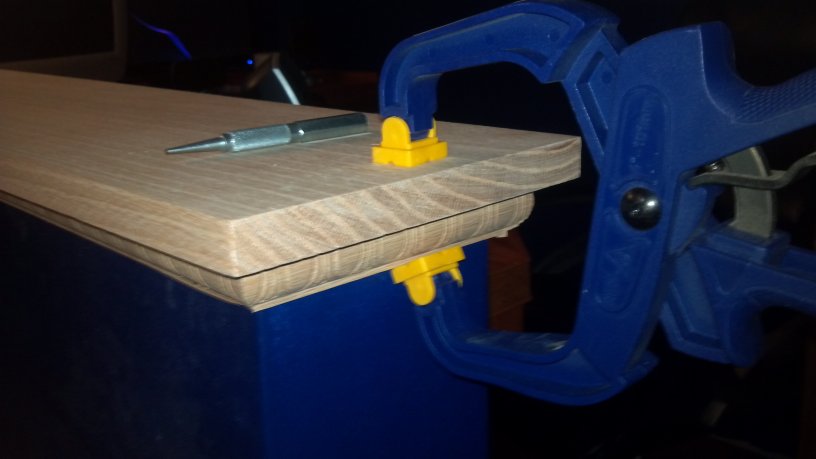
Decided to build a half-wall on the south wall, where the TV is going. This leaves the crawl space accessible, I can hide the network and power lines for the entertainment center in the wall, and I can turn it into a nice shelf.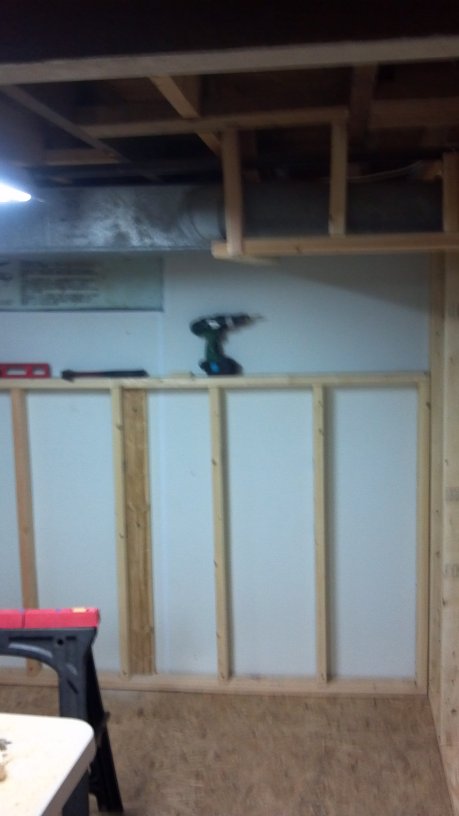
The board in place sideways (under the hammer) is anchored to the wall in approximately the middle, and the framed wall is anchored to it. Makes it nice and sturdy and won't pull away from the wall, since there is no top plate anchored to the ceiling.
Tomorrow's task is to build another half wall between where the couch and desk will be. I just decided to do that yesterday. It's going to be neat.
But after that the wiring starts.... and I am all ready for that, too.
Spent another $50 on lumber.
Running tally: $985.
Posted by GORDON on Feb. 28 2012,12:41
(GORDON @ Feb. 17 2012,12:41)
QUOTE
Spent about $160 on drywall, mud, screws, nails, trim, light fixture, shelves (not pictured)....
Pictured:

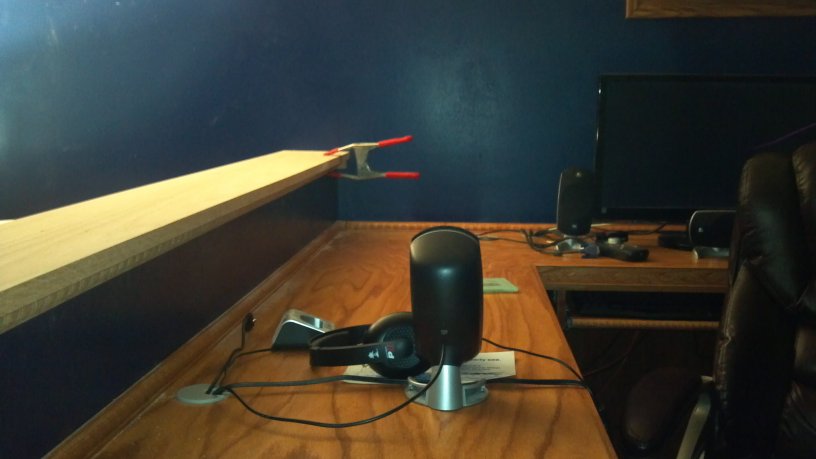
I built a half-wall between my desk area, and the couch/entertainment area. I wanted the heighth to be enough to clear the back of a typical couch, and high enough above the level of my desk that it would be at least higher than the size of a DVD, if I had some lined up beside my monitor. I am going to build the desk myself, so this half-wall is going to be the actual backstop for my work space.
So I measured the height of my couch, which I think is typical. Little over 3 feet high. Measured the height of my current desk: about 2 feet high. SO, I figured, if the wall is 40 inches high, it should be where I want it, and not so high that I cant see over it when sitting behind my desk.
Put down the base plate... 7.5' long, exactly 5' from the back wall. Then I started cutting my studs 40" long, placed them, and put on the top plate, 7.5" long. Everything square and level and good to go. I kept thinking it looked a little high. 2 studs in, out of 7, I am testing it by bringing a little chair wher the desk will be and figuring, "well I can MOSTLY see over the top..." I get the entire wall done, kind of thinking it looks too high. Then I realize I am not even done yet making it higher, because there will be a nice .75" top plate on top of it all.
Figure out my mistake, yet?
I wanted a 40" high wall, and I cut my studs 40", and didn't account for the thickness of the top and bottom plates.
So I tore it all down, recut it, and rebuilt it.
Then I went a long way into framing in the duct work, which I hope to complete tomorrow.
And then, like I said, wiring.
Spent another $40 today on outlets and switches.
Running total: $1,025.
Posted by GORDON on Mar. 01 2012,17:20
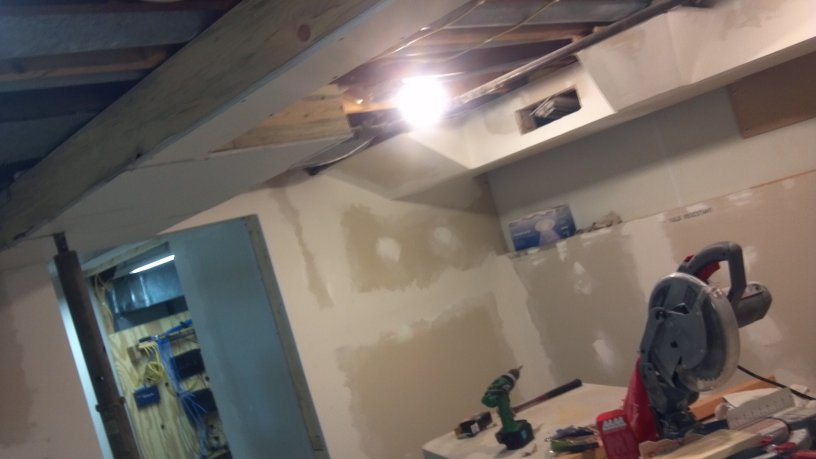
Finished framing in the duct work.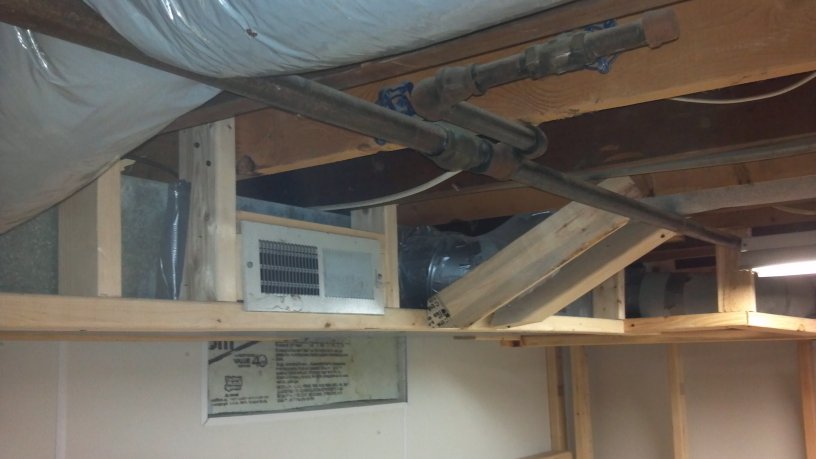
Thus ends the major carpentry, so I cleaned up and put the saw away.... and went into electrician mode.
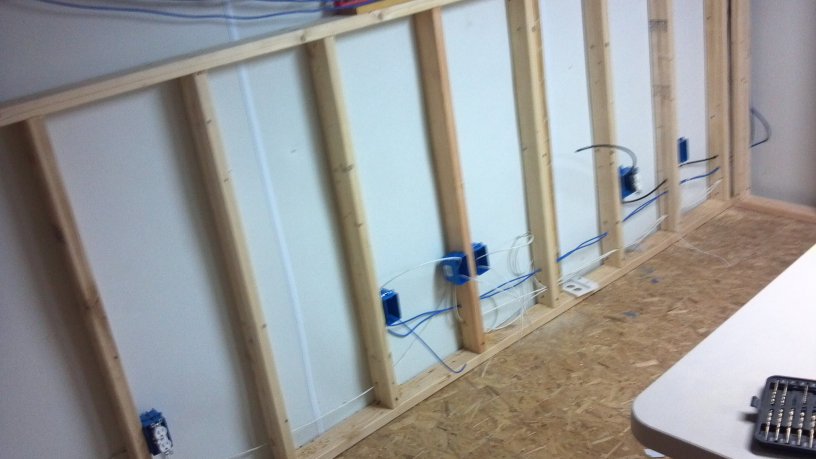
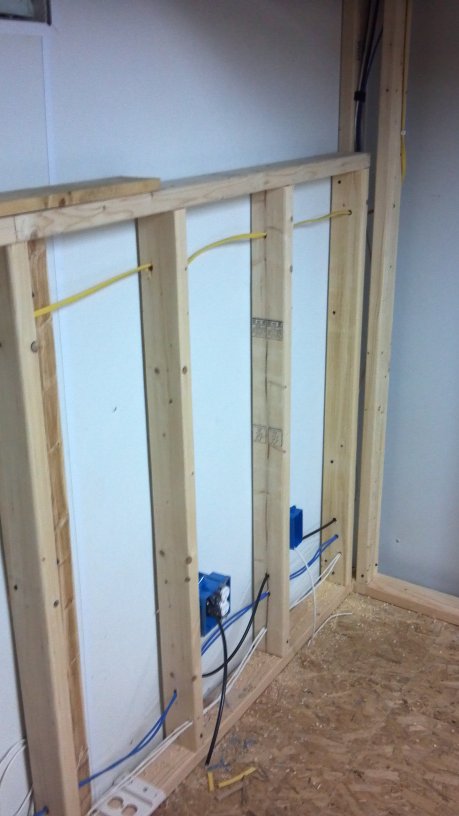
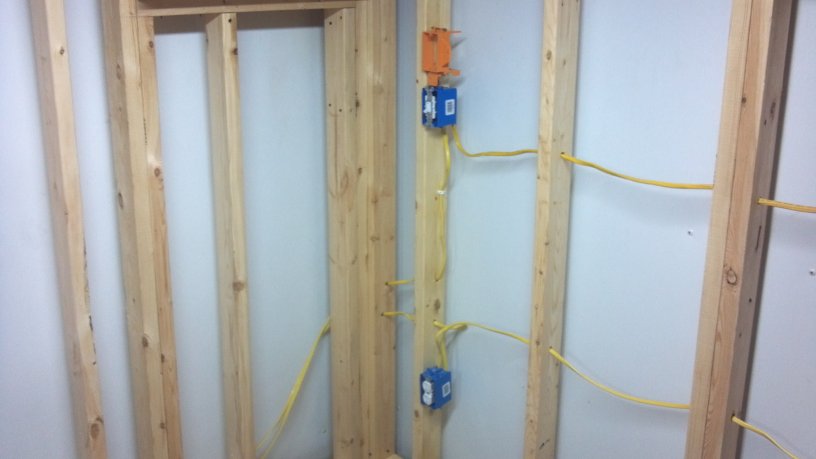
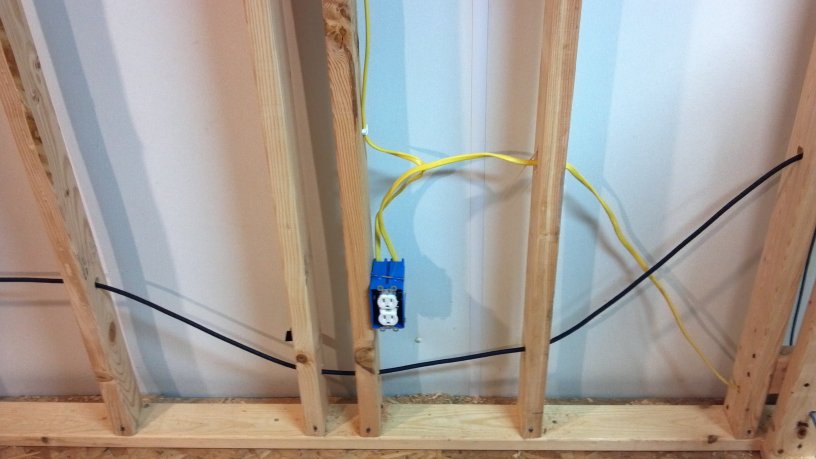
I have the low voltage wire pulled. White is audio, blue is Cat-5e, and black is Coax Quad Shield.
This is where the entertainment stuff will be; TV, receiver, PS3, etc. I have 2 Cat-5e lines going there, all the audio, and coax.
Hey, notice that line sticking out from behind the stud, in the corner? My dumb ass nicked it with the drill when I was making the hole for the coax, and now I have to splice it.
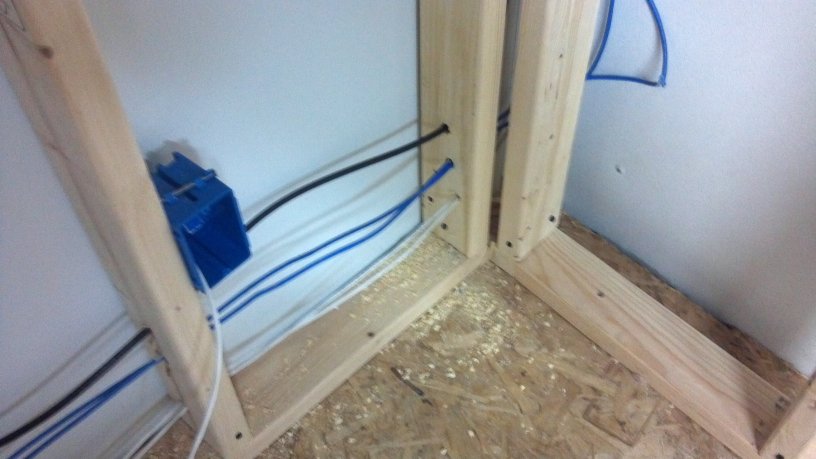
This is my desk/work space. 2 Cat-5e for my personal area, and a phone line.
There's another Cat-5e for a guest plug-in (or I could use it at my work bench area).
Not pictured: I forgot to order an HDMI line from the entertainment area (where the receiver will be) to my desk, where I am going to have a small TV for when I am gaming and don't need to have the 60" plasma on. The receiver will have 2 HDMI outputs to put the signal where I want it. 30' HDMI Cable should arrive in a few days. Note: cable and a couple female/female adapters for the ends was going to cost me $70 on newegg.com. Got the same things for $24 on amazon, with free shipping.
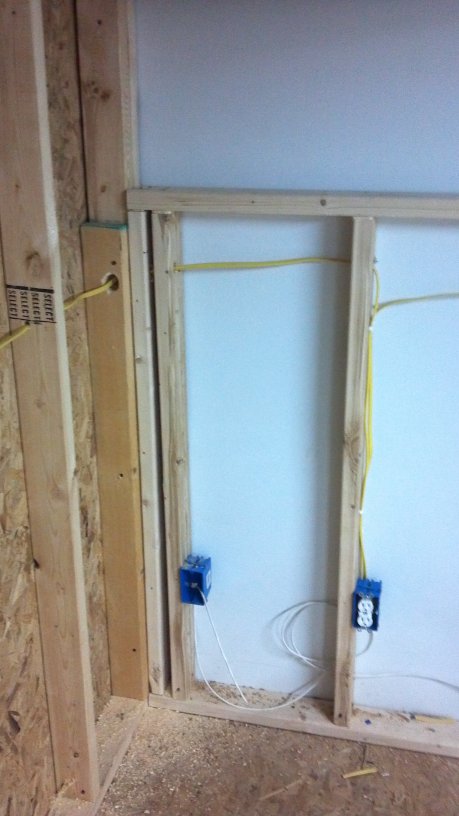
Here's inside the door. One switch is going to go to a plug to turn a lamp on and off (the ceiling is too short for a fixture or ceiling fan), and the other plug is going to turn on some recessed lighting in the ceiling that will shine on the entertainment center for when I have to have good lighting on that area, for whatever reason.
I have the electrical outlets in place, but haven't pulled that wiring yet. A little hesitant since I have never pulled high voltage before, and I going to be learning as I go. I am starting tonight, though, as I may have a partner to help me drywall this weekend, and the wiring has to be done, first.
Posted by GORDON on Mar. 02 2012,15:47
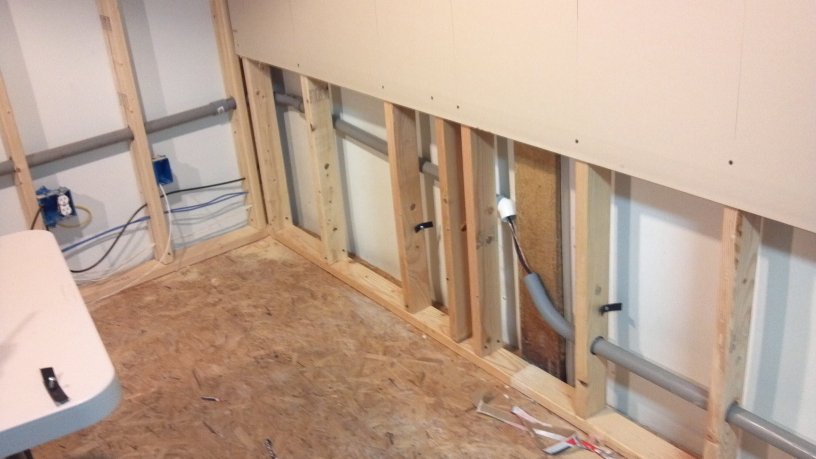
Wanted to get the low voltage tightened up before I stated the high voltage cables, so now it looks nice.
.... and yellow is NM 12/2 electric line. Ran the first of three circuits I am installing.
This corner was a bit hard to get through. Ended up using a 1.25" spade bit to just ream out a hole.
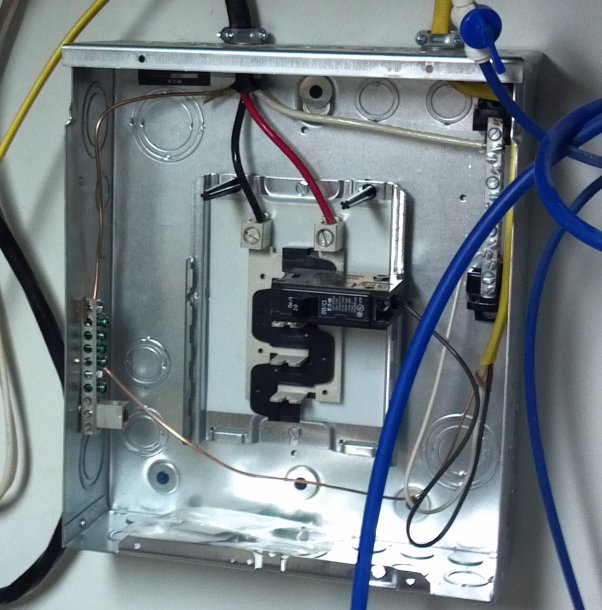
Read my Wiring book 4 times, and felt fully confident in my ability to plug in a few new circuits.... and my panel is a mess. I have enough breaker slots and holes on the bus bar, but I will feel better if I get an electrician in here first to see how much it would cost me to have a subpanel installed.
Until then, I will run the other two circuits, one of which is a 3-way switch. That's going to be interesting.
Posted by GORDON on Mar. 02 2012,20:50
I put off the drywalling because I need more time to get the wiring finished up this week. I have the HDMI cable in transit, as well as PC rear-speaker line extensions, which will also be buried in the walls. My shit is going to be awesome. I had forgotten the PC speaker lines until I woke up in a cold sweat at about 4 am this morning.Also trying to talk myself into installing the breaker subpanel myself, to save money. My book tells me how to do it, and my local Menard's has all the stuff....
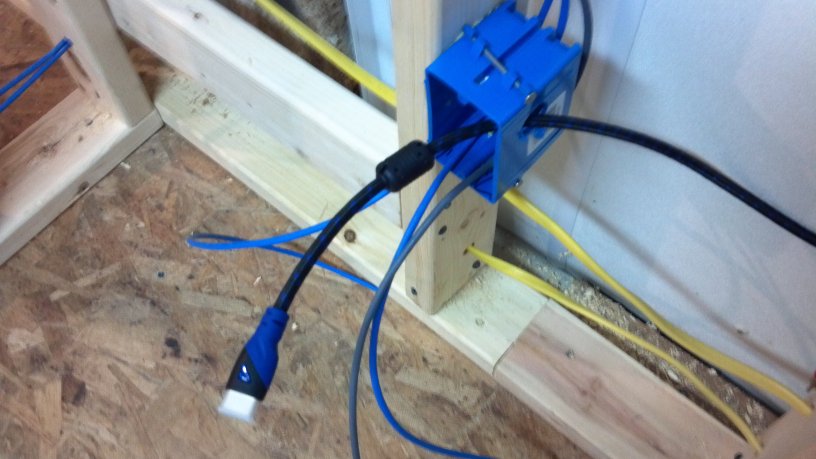
Posted by GORDON on Mar. 02 2012,20:54
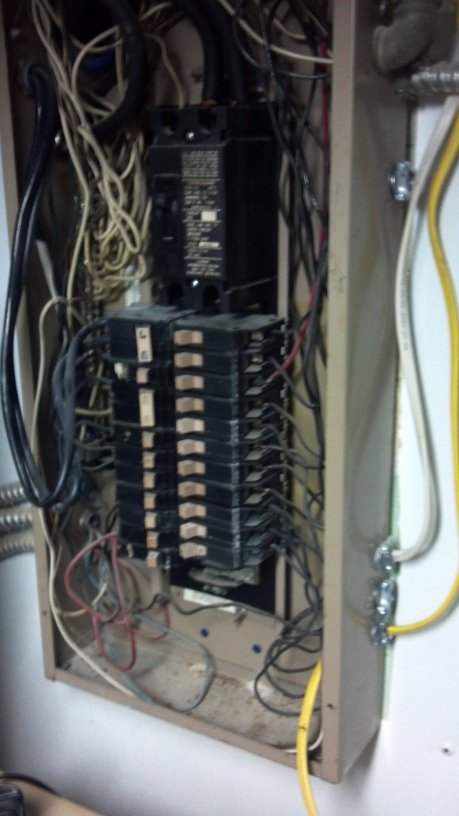
Oh, also, funny story: You can see the new line I ran into my breaker panel, it is the yellow one in the bottom right. When I was feeding it through my knockout, I was kind of feeding a couple inches, and pulling it forward to bend it around a turn inside the panel. Doing that over and over, feeding the 2-feet of line, or so.Well, after about the 4th little pull and bend, the entire bottom portion of the panel pulled itself out of the wall, anchors and all. I tapped those back in place, unscrewed one of the screws, and the maniacs had it held in there with a little half-inch screw in a cheap plastic anchor.
I got out the hammer drill, bored out the holes, and anchored the damned thing with concrete anchors. You can see the 2 blue dots (Tapcons) near the bottom of the panel, and little piles of pulverized concrete from the drill.
God damned people.
Posted by GORDON on Mar. 03 2012,14:29
Installed a new subpanel today, and my first circuit of outlets has power. It is really fucking awesome and I am awesome.Pics later.
Posted by GORDON on Mar. 04 2012,13:57
This is the subpanel.Used an 8-guage wire (the black one) to bridge over from the old panel, where I used a double pole 40 amp fuse. That 8-guage wire costs $30 for 15 feet. Thick and harder than hell to cut. Anyone want to buy 10 feet of it for $10? A steal.
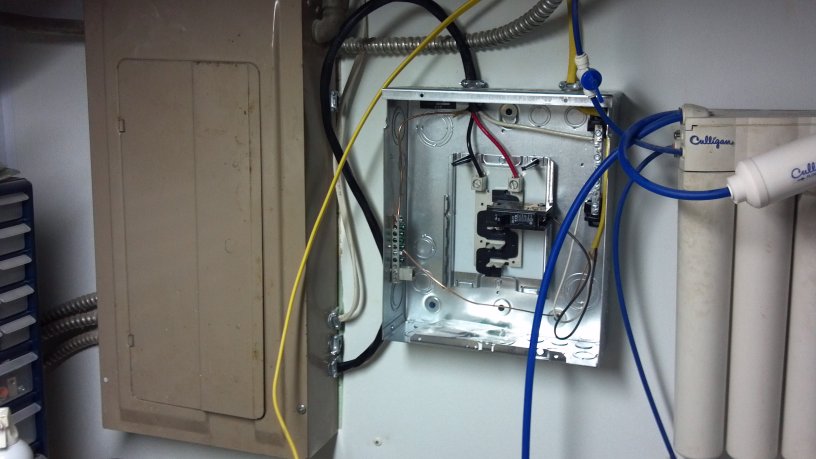
In these pictures there is one circuit already plugged into a 20 amp breaker and is hot, and the second circuit isn't installed yet and is dangling off to the left. I had a little boggle with these fuses... this is a newer style than I had ever seen, and they have a hard reset that you need to trigger before they work. When I plugged everything in I wasn't getting power to the outlets, and I was all WTF. My voltage tester told me I had 123 volts going to the hot bus bars of the new panel, but I wasn't getting anything after the breaker. Unk came over and had it figured out within, literally, 5 seconds.
Hey, cut me some slack. Learning this shit as I go.
As I said, the second circuit is half done, I just got tired of wiring outlets after the first 3 and a half. Two and a half outlets to go, then I plug it in to the breaker. After that, one more circuit to run, to a couple overhead lights, a couple switches, and a plug.
Tomorrow.
Posted by GORDON on Mar. 04 2012,13:59
Spent $80 on the new panel, wire, and fuses.Running tally: $1,105.
Posted by GORDON on Mar. 04 2012,16:00
I just noticed I was spelling "gauge" wrong.I wonder why the firefox spellcheck didn't catch it.
Posted by GORDON on Mar. 05 2012,13:57
Finished the second circuit, and now I have power to outlets where my desk will be.Started the third circuit, which first creates a dedicated outlet for my server. It is currently sharing an outlet with my furnace, dehumidifier, router, cable modem, switch, etc, and even though it is on e brand-new UPS, I think I am still getting undervoltages when the furnace kicks on, from time to time. Yes, this shouldn't be possible with a good UPS.... but once or twice a week the server goes down with a loud whine that you can hear through the house, and when I go downstairs to power it down the furnace is ALWAYS on, right next to it.
So my best guess was as undervoltage.
It is on a new circuit now away from the furnace, so we will see.
Here's a picture of the new outlet, bottom left on the DMarc. Dangle blue Cat-5e lines are the new ones I have run, but not yet terminated.
And here is the completed subpanel. One bridging wire, and 3 circuits, all nice and neat.
Going to run the switches tomorrow, which will finish circuit 3. I am guessing I am going to run out of 12/2 NM wire before I am done. I didn't think I would go through 250 feet of it, but it is going to be close. Have had very little waste, as well. I dunno.
Posted by GORDON on Mar. 07 2012,12:43
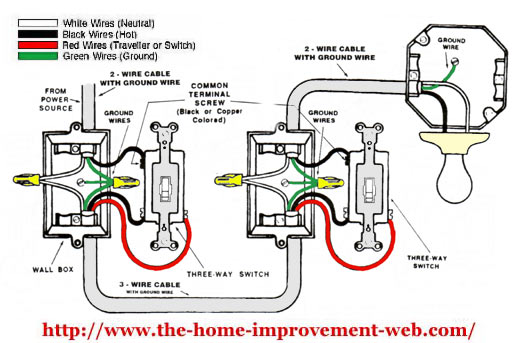
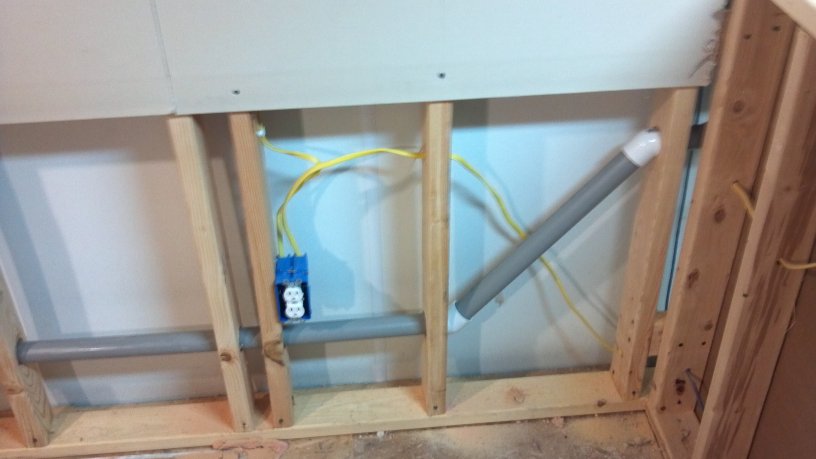
Finished running the 3-way switch.A 3-way switch is when 2 switches control a light fixture, or in my case, an outlet. Specifically, one plug out of two on an outlet, which required some minor modification of said outlet. The bottom plug is always on, the top plug is controlled by the switches. So now I have 2 switches that will turn a lamp on and off, as needed.
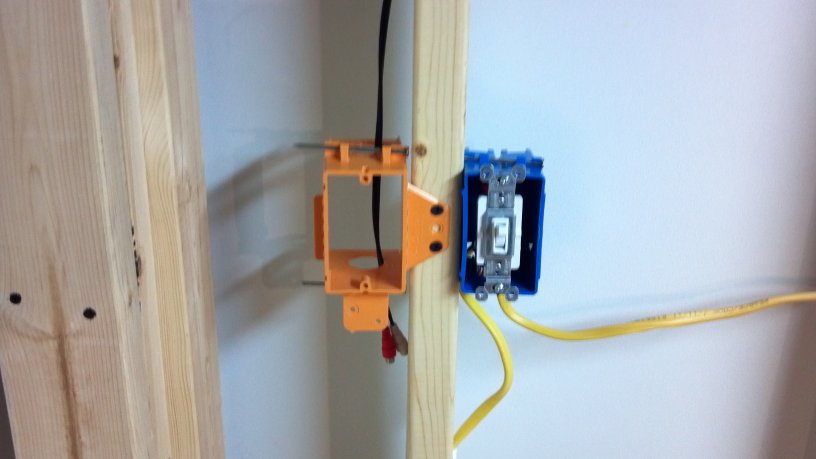
Here's the switch behind my desk... when I enter the room I can turn the light on so I can maneuver through to my chair, and once I am seated I can reach behind me and turn off the light for mood gaming.
Orange box is where my PC speaker cable is going for the rear/left speaker. Never got that in a pic before.

Here is the work light I put on the outlet for testing.
Funny story, bro: I was trying to be careful and work these plugs without turning off the breaker, because the server is on it and I didn't want the UPS beeping at me. But then of course I grabbed that outlet I was talking about and the bottom plug is hot and I shocked the shit out of myself.
Good times.
30' HDMI cable has arrived. Will get that in the wall pretty soon. I have one more tiny little line to run for some recessed lighting. Once it and the speaker extension cables are in the walls, it is time to drywall.
Spent another $25 today for some 12/3 Romex for the 3-way switches.
Running tally: $1,130.
Posted by Cakedaddy on Mar. 07 2012,18:12
Since you haven't mentioned it, I'm guessing you didn't pull permits for any of this. Are you concerned about when you go to sell the house and there's a new sub-box and room down there? You're house don't match the prints they have downtown.
Posted by GORDON on Mar. 07 2012,18:43
(Cakedaddy @ Mar. 07 2012,21:12)
QUOTE
Since you haven't mentioned it, I'm guessing you didn't pull permits for any of this. Are you concerned about when you go to sell the house and there's a new sub-box and room down there? You're house don't match the prints they have downtown.
IT WAS LIKE THIS WHEN I BOUGHT IT, I DONT KNOW WTF HEY OTTAWA COUNTY GET YOUR SHIT IN ORDER.
Posted by unkbill on Mar. 07 2012,19:42
(Cakedaddy @ Mar. 07 2012,18:12)
QUOTE
Since you haven't mentioned it, I'm guessing you didn't pull permits for any of this. Are you concerned about when you go to sell the house and there's a new sub-box and room down there? You're house don't match the prints they have downtown.
When I first read this an hour ago I couldn't respond because I was laughing to hard. (Not because you said it but because)
Ottawa county has only a few rules.
1. Pull a permit so we can inform the taxation people and they can raise your taxes. We don't care if we inspect the job or not.
2. If you get caught not pulling a permit you pay double for all the permits.
3. Start back at rule 1.
Posted by GORDON on Mar. 07 2012,20:06
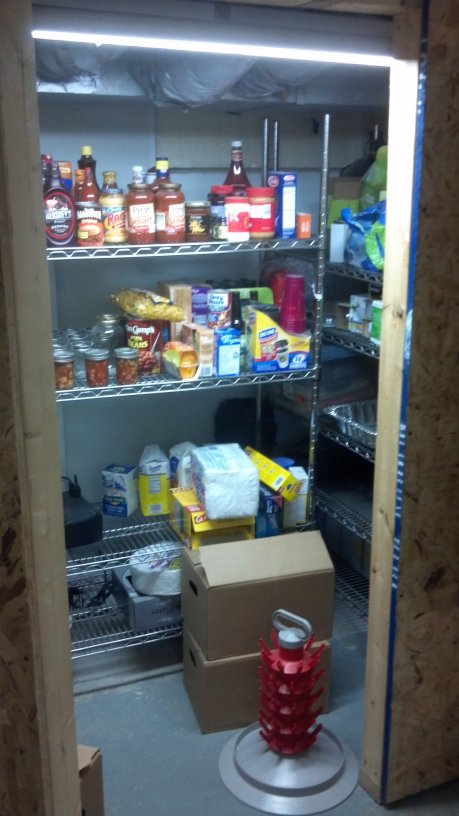
Finally installed a light in my pantry, what I have been dreaming about for a year. IT'S SO FUCKING BRIGHT IN THERE.Pics later.
Posted by GORDON on Mar. 08 2012,13:53
(GORDON @ Mar. 07 2012,23:06)
QUOTE
Finally installed a light in my pantry, what I have been dreaming about for a year. IT'S SO FUCKING BRIGHT IN THERE.
Pics later.
Pics later.
I am coming down with something so haven't done anything in the basement today, but here's some pics of the pantry so you can ooh and ahhh at the new bright light.
Posted by GORDON on Mar. 20 2012,16:58
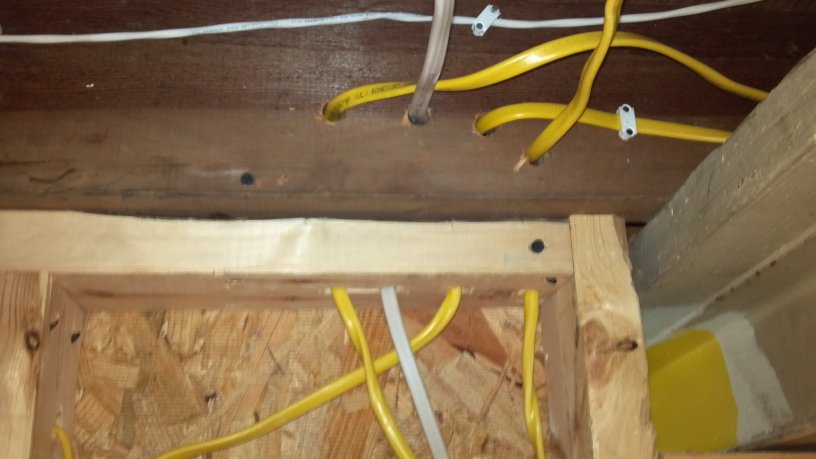
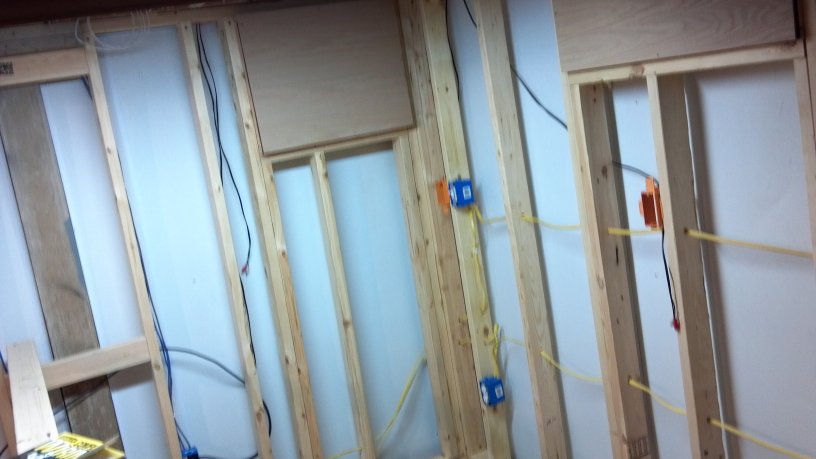
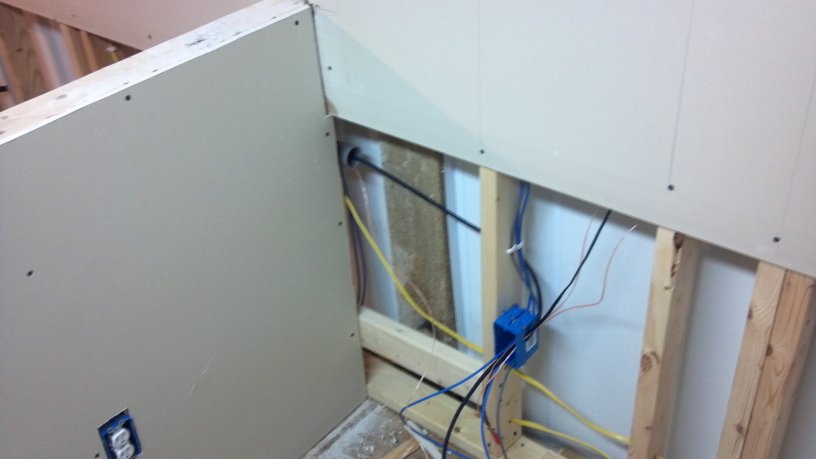
Got a cold or mono or something the night I installed that pantry light, so I haven't done much the last week.... but I did finish the last of the wiring.These are in no particular order:
This is kind of a busy area of wiring. They are turning that corner behind the joist and going down into the top plate of the new wall... good thing I left an access right there for a water-line cutoff when I finished the laundry area ceiling. I hadn't planned on needing to run wires through there.
This is one end of my 30' HDMI line, where my desk will be. I already have couplers for a wall plate, or an HDMI patch cable.
This is the same corner. Electrical, PC speaker cables, CAT-5e.
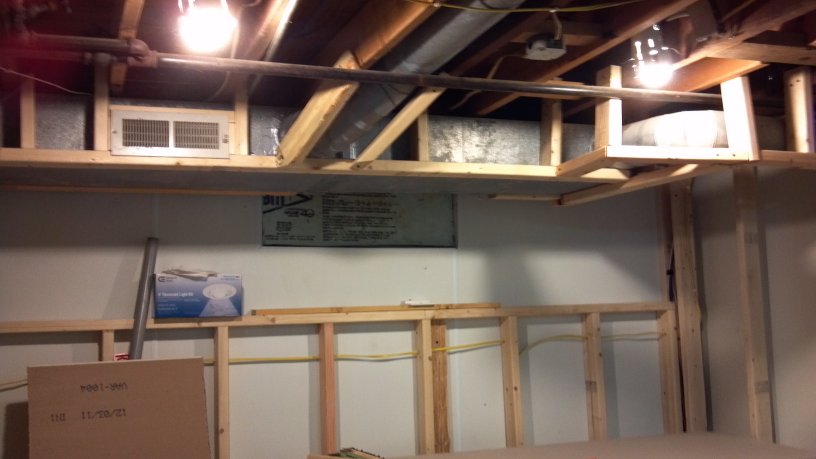
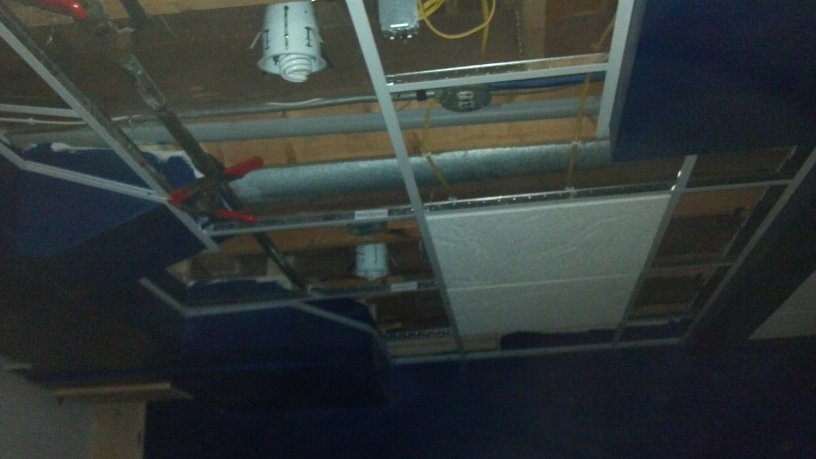
These are 2 recessed lighting fixtures, installed temporary-style. I am probably going with a drop ceiling for easy access to the floor/ceiling area, and I don't know yet how low the surface will be... so for now they are just velcro'd up.
This is a junction box... my book told me that all splices should be in a box, not just exposed. One hot goes in, and splices to 2 lines that go to the double switch plate.

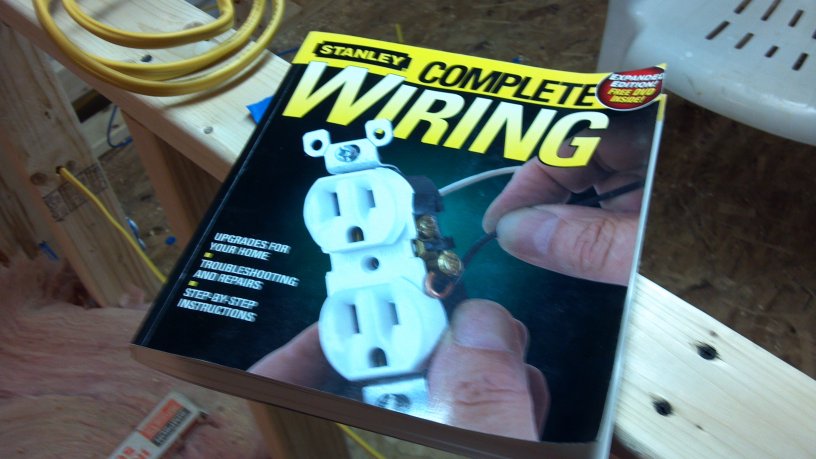
And this is the awesome book that taught me everything about running electrical lines, switches, subpanels. and anything you need to know about running voltage.
This is an awesome set of spade bits I bought to drill holes for lines through wall studs. That little screw-but on the end bites into the wood and actually pulls the bit through for you. I actually had to apply some negative pressure to keep it from running through too fast and binding up.

This is the switched wall outlet, and the black line is the HDMI. I tried to keep high voltage and low voltage well separated, but where I had no choice I made sure they crossed at as close to a 90 degree angle as I could, to reduce interference.
Orange box has my PC speaker cable RCA plug in position and ready to go. Switch is one of the 3-ways that control the outlet.
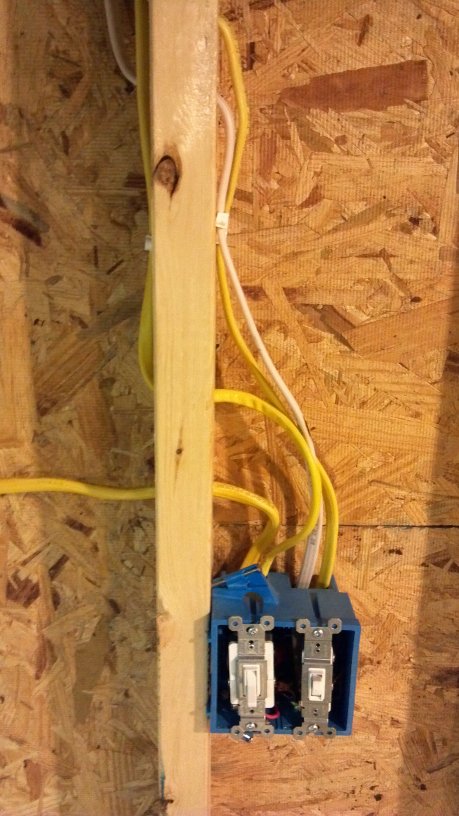
And this is the double switch at the entrance, on the left is the 3-way and on the right is the one that controls the recessed lights you saw in the previous picture. Above is the busy area where the lines are running in the floor joist and down the top plate. They are going down to those switches.
Electrician phase is 100% done. Next is drywall...... I HOPE to start that this week, but winter has ended prematurely and all these frikkin summer projects seem to be starting all by themselves. My goal, though, is to get the room drywalled and painted before Summer officially begins, so I can get my existing computer desk moved down there. I can put it in an out-of-the-way corner, and still build my permanent, custom desk, get shelves built, trim and stuff finished, and get the ceiling in.
Posted by Cakedaddy on Mar. 20 2012,18:18
When I redo my room(s), I'm installing switches like this:< http://www.homedepot.com/h_d1....2995030 >
I like the built in dimmer. That way, you can turn the lighting down, instead of 'off' if you want it darker for gaming/working/whatever.
Posted by Cakedaddy on Mar. 20 2012,18:20
Oh, also, make sure you have access to your splice boxes. Don't bury them under the drywall. One, it's against code, two, if you need to repair/add/upgrade/change, you won't have to try to remember where it was and cut your wall.
Posted by GORDON on Mar. 20 2012,18:33
(Cakedaddy @ Mar. 20 2012,21:20)
QUOTE
Oh, also, make sure you have access to your splice boxes. Don't bury them under the drywall. One, it's against code, two, if you need to repair/add/upgrade/change, you won't have to try to remember where it was and cut your wall.
Junction box is in the ceiling, where it will be drop-ceilinged. Any other splices are in the boxes attached to the recessed lighting. I have half a notion to attach another recessed-lighting fixture in the opposite corner of the room, but if I decide to do that I can just run a new line from the existing light at the end of that run. I can do that any time after the room is done.
No other splices.
Posted by GORDON on Mar. 22 2012,19:44
First 4 sheets of drywall went up today... pics later. Thanks to Unk for the extra hands.Had a sudden horrible thought today... I never tested that HDMI cable, and I have heard of some of them being bad out-of-the-box.
If I enclose it in drywall and it doesn't work, I won't have any way to run a new one on the path it goes in.
This bothers me.
Anyway, I haven't updated the running tally of costs, lately:
New drill bits and electrical odds-and-ends for finishing the electrical portion: $35.
Four sheet of drywall: $35.
Running tally: $1200.
Posted by GORDON on Mar. 23 2012,07:00
(GORDON @ Mar. 22 2012,22:44)
QUOTE
Had a sudden horrible thought today... I never tested that HDMI cable, and I have heard of some of them being bad out-of-the-box.
If I enclose it in drywall and it doesn't work, I won't have any way to run a new one on the path it goes in.
If I enclose it in drywall and it doesn't work, I won't have any way to run a new one on the path it goes in.
I wonder if I can retrofit some small conduit through the wall, just big enough for the cable.
Posted by GORDON on Mar. 23 2012,11:32
Here are the pics, as promised. Only hung 4 sheets, as I didn't have the energy for more, that day.East wall, looking east.
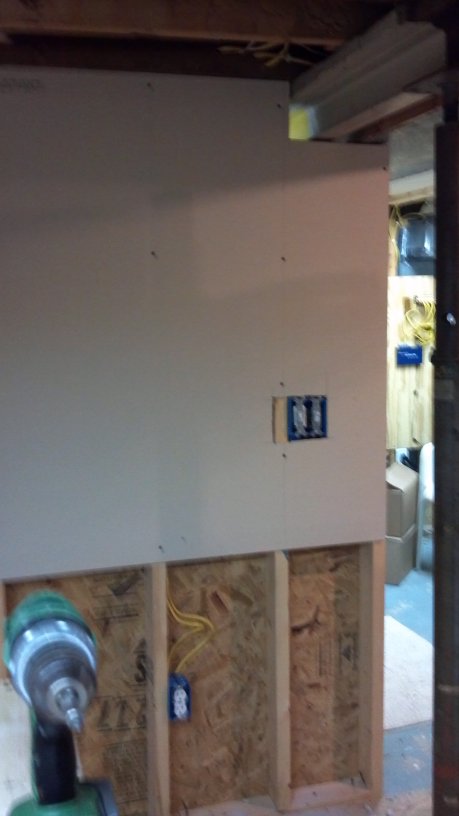
NE corner.
NW corner, where my desk will be.
Looking toward SW corner.
The more I think about it, the more I am thinking of running conduit for that HDMI line, in case of it needing replacement. I can get all the conduit for about $20.
Plus conduit is cool.
Posted by Cakedaddy on Mar. 23 2012,16:42
I would drill bigger holes so I could use the broken HDMI as a pull string and pull the new cable. It will be hard to find flex conduit big enough, and you pay a premium for larger diameters. And you are still looking at 1" at least conduit which won't work well if you are making any 90 degree turns around corners.It's gonna have to be thick because of the ends, and those little round black things that are near the ends. And when you bend conduit, the bend loses some diameter. So, if it's JUST big enough straight, it won't be big enough after you bend it. Even a prebent 90 has a thinner inner diameter.
I think redrilling the holes a little bigger, and angle the hole to follow the cable path (where the cable drops down, angle the hole so it's at a 45 degree angle) would allow you to pull the new cable with the old one.
Posted by Cakedaddy on Mar. 23 2012,16:45
OH, one thing I've learned about doing drywall. . . . there's no such thing as using too many screws. The more you use, the longer it will last without cracking/sagging. My first walls, I didn't use enough screws. The seams would separate and crack. I had to add screws and remud. It hasn't cracked again since. So, use more screws. Then add a few more. And don't skip the middle section. I may be over screwing now. . . but hey, who doesn't like to screw?I only mention this because counting the screws I can see in your pictures, that's about how many I used on my first rebuilt wall. And it cracked.
Posted by GORDON on Mar. 23 2012,18:15
(Cakedaddy @ Mar. 23 2012,19:45)
QUOTE
I only mention this because counting the screws I can see in your pictures, that's about how many I used on my first rebuilt wall. And it cracked.
What you see is just enough screws to keep it on the wall.... there will be lots more screws before I mud.
And I bet I can get 1.25" rigid conduit in those studs. They aren't load bearing, so it doesn't matter too much if there is a big weak point where I drill a hole for conduit.
Posted by Cakedaddy on Mar. 23 2012,19:44
You'll be paying a few dollars per foot for it though. If you find it cheaper, post the link. Also, make sure you secure the SHIT out of it. You probably know, flex ain't the easiest to fish, let alone when it's not secure and it bunches up. I am not a fan of flex.
Posted by GORDON on Mar. 23 2012,19:47
(Cakedaddy @ Mar. 23 2012,22:44)
QUOTE
You'll be paying a few dollars per foot for it though. If you find it cheaper, post the link. Also, make sure you secure the SHIT out of it. You probably know, flex ain't the easiest to fish, let alone when it's not secure and it bunches up. I am not a fan of flex.
Menard's has 8-10 foot sections for about $4 each.
Or maybe it was Home Depot.
Posted by GORDON on Mar. 23 2012,19:51
I didn't mean Rigid conduit, I meant rigid, not flexible.< http://www.homedepot.com/h_d1....d=10051 >
Posted by Cakedaddy on Mar. 23 2012,22:08
OOhhhh PVC. WAY not code. I was going to ask how you were going to fit a 10' stick of conduit between your studs. Same thing applies with the bends being more narrow than the straight pieces.And actually, as far as it being not code, I'm not really sure what rule you'd be breaking. You can't run high volt through PVC in the walls. But the rules for low volt are so. . . nonexistent that I don't know it's against code. You are just installing a cable chase. Not that it matters to you. :-)
Posted by GORDON on Apr. 10 2012,09:52
Welp, that wall/NE corner is done.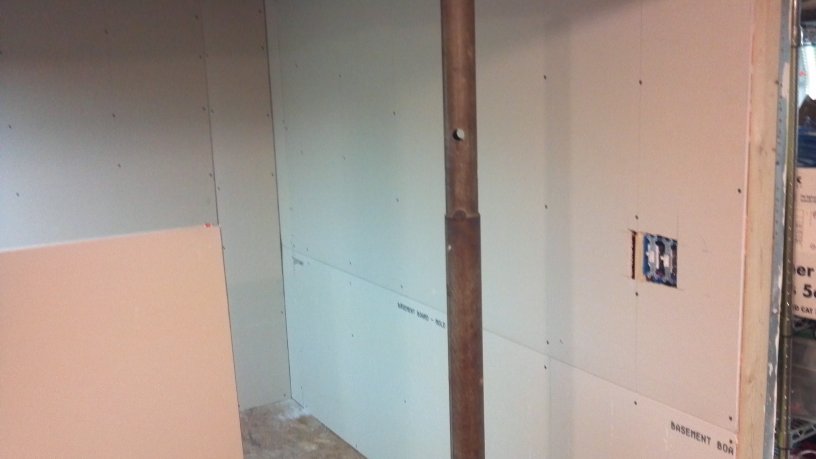
Drywall-is-up-done, I mean.
4 more sheets of drywall, $35.
Running tally: $1235
Posted by Cakedaddy on Apr. 10 2012,22:54
Now comes the 4 to 6 weeks of mudding. At least that's how long I spend doing it. It's just never perfect/smooth enough.
Posted by GORDON on Apr. 11 2012,04:31
Going to do do that mud/primer mixture idea and see how it works, to add more texture and cover up oopses.
Posted by GORDON on Apr. 23 2012,12:36
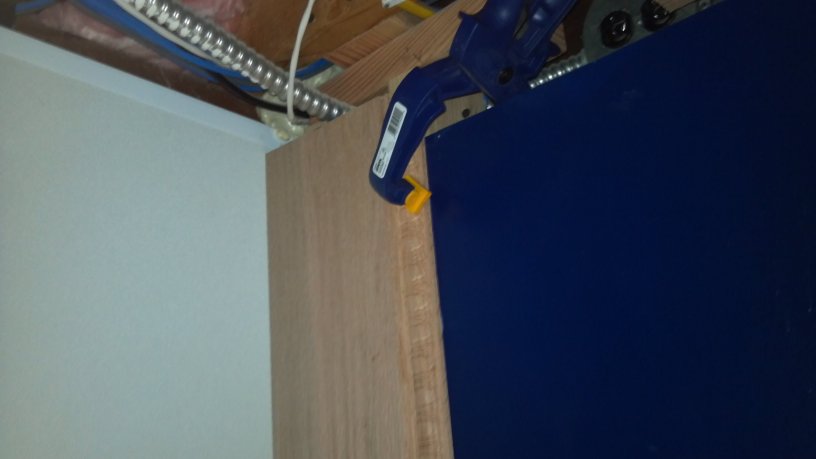
Ran some conduit through the half-wall as a cable chase. Had the length of PVC already, and just bought the elbow for the corner. No big whoop. If I ever need to replace that HDMI cable, I will at least have a nice, smooth pipe to get it around that corner. I should be fine, at that point.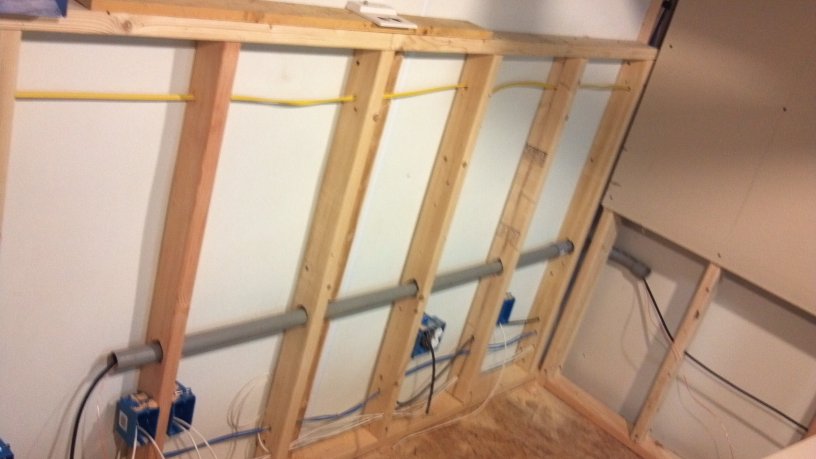
Now I just need help getting more drywall into the basement. Volunteers?
Posted by GORDON on Apr. 26 2012,12:40
Still don't have any more drywall so I decided to just finish running conduit to my 2 HDMI access points.The gap in the conduit is due to the metal wall-supporting beam being in the way. Can't run conduit right there, there's no room.
This is where the HDMI and live electrical used to cross. Now there's a nice conduit separator.
And this is where my desk will be. I decided to make the wall removable under my desk. One won't be able to see it unless they crawl under, and then I can have access to a lot or wiring and conduit and stuff in case I even need to add more lines.
Thinking I am going to bug Unk tomorrow to go pick up some drywall with me.
Posted by GORDON on Apr. 27 2012,11:12
Yay, 4 more sheets of drywall in the basement.Running tally: $1280.
Posted by GORDON on Aug. 22 2012,10:20
Yes! The thread is being updated!Those 4 sheets of drywall mentioned above have finally been touched. School is in, summer projects (the ones I had time to get to) are winding down, and I finally have time to get back in the basement. The plan is to have the walls finished before Christmas, and move my existing computer desk down there. This will free up space in our so-called "family room."
Anyway, did this:

Finished drywalling the west wall, where that longish conduit was installed to carry the HDMI cable. So that's done. Tomorrow I hope to finish the south wall, and then assess how much more drywall I will need to finish that phase. And then.... drywall mud and sanding. Then the paint. And I have the perfect color in mind...
Posted by GORDON on Aug. 23 2012,09:12
Got a single panel hung on the south wall, where the TV wall will be.
Only had time to hang one because of the 5 outlet cutouts I had to do. Those are time consuming and tedious.
Also, yes, there is a 3-inch gap at the bottom... originally it was a calculation mistake. I was going to have the wall be exactly as high as a single drywall sheet to minimize cutting, and I cut the wall studs to that length, but of course I forgot to factor in the thickness of the top and bottom plates. SO, I left the 3-inch gap at the bottom with the expectation of just covering it with the baseboard, and I will tell people I did that on purpose so I will have easy access behind the wall for future wire runs, and pretend I was brilliant for thinking of that ahead of time.
Posted by GORDON on Aug. 24 2012,14:04
Finished drywalling the SE corner wall, next to the room entrance.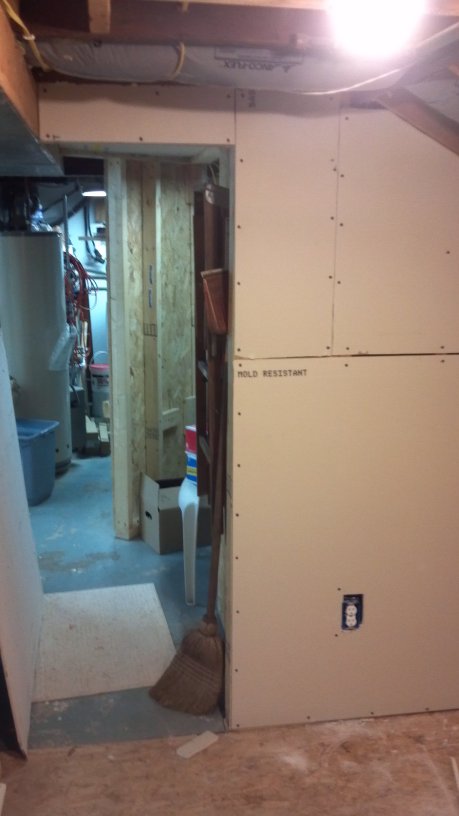
That was actually just 1 sheet of drywall, cunningly cut to fill the existing space.
Posted by Cakedaddy on Aug. 24 2012,14:25
Is it just me, or is that outlet opening really big?!
Posted by GORDON on Aug. 24 2012,14:39
You shut up.
Posted by GORDON on Aug. 26 2012,07:25
Purchased what should be the last 3 sheets of drywall, some more utility knife blades, screws, and a roll of insulation for wrapping the duct work before I enclose it.$50.
Running tally: $1330.
Posted by GORDON on Aug. 26 2012,17:08
Cut up those last 3 pieces of drywall. Finished everything that is getting a big sheet.... meaning everything except the small pieces around the duct work. That gets done tomorrow.This is the other side of the half wall, finally done.
And these 2 bits are just for cosmetics... not in my room, but I can see the walls when coming and going through the basement laundry room, so it will look just a little bit nicer whenever I pass through.
Posted by GORDON on Aug. 27 2012,12:21
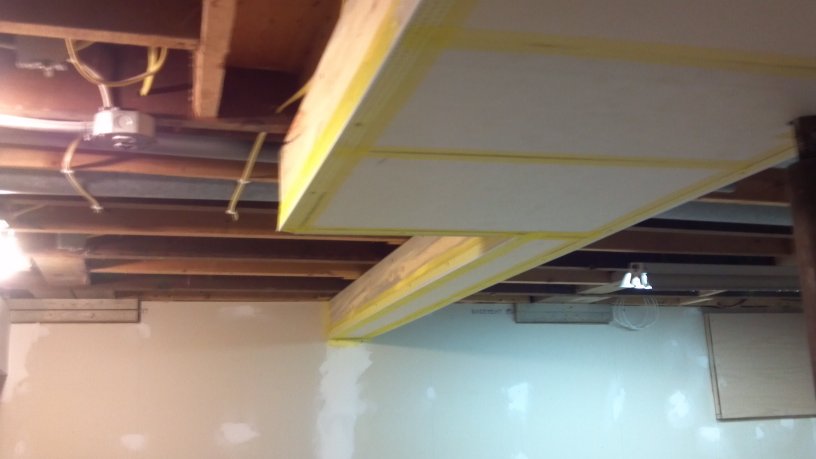
Started enclosing the duct work today.First I wrapped 2 sides of it with insulation. Don't need any on the bottom, really, since heat rises, and the back side of the duct work isn't getting "finished" with drywall, so if I feel like I am having too much heat escape from back there this winter, I will do something about it, then.
First this is a part of the south wall I did yesterday, but forgot to get a pic of.

Insulation tucked onto the top and one side.
Been saving all of my drywall scraps in anticipation of this part... I have so many that I can usually find a piece that is already the correct length in one of the dimensions, and I only need to make a single cut to make it fit.

It will obviously be prettier once I get it taped, mudded, and sanded.
I would have had it finished today, but I bought the wrong screws yesterday (requiring a square driver instead of the phillips that I have been using up to now), and I didn't have a square bit with which to drive them. Double dumbass on me.
SO I went and bought some square bits for the drill, some more tape, more mud, a cheap power sander, and some corners. Hope to have the last of the drywall screwed up tomorrow, and all of the scrap out of the basement. Then I can start taping, mudding, and sanding.
Spent $70.
Running total: $1400.
Posted by GORDON on Aug. 27 2012,17:57
I have momentum... I want to get this done... just did a little more after supper. Finished the duct work.It looks a little rough like this, but I think it'll look pretty cool once it is all finished out. I decided I wanted a weird modular-looking thing. I think it is coming out well.

Posted by GORDON on Aug. 29 2012,08:45
I think all the prep work is done prior to mudding. I have vinyl corners on the corners, and taped up all the seams.Cornered.
Taped.

Going to TRY to get the first application of mud on tonight, so I can sand and remud tomorrow.
Inertia. Can't lose it.
Posted by GORDON on Aug. 30 2012,12:16
MUD. Had a third of a gallon left from the outside wall, and had a new gallon for when that ran out, and I still only got about 40% of the room mudded. Went to buy a new gallon, hoping that would be enough. A gallon is about $7. A few feet away are the big contractor tubs of the stuff... 4.5 gallons of the exact same thing for $11. Yep, got the monster one.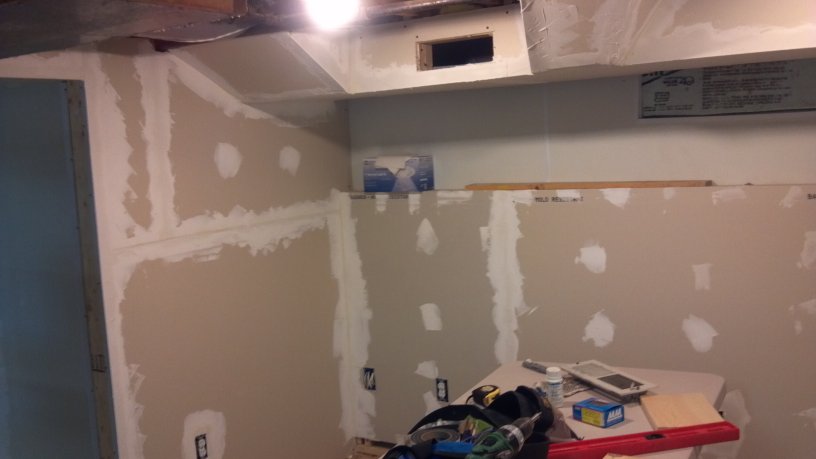
Tomorrow when it is dry I will sand it, and depending on how long that takes I might apply the 2nd layer. You go over and over it until smooth. I won't get subsequent pics of this process, they will pretty much all look the same from layer to layer.
See ya when I get the last crawl space hole covered...
Posted by GORDON on Aug. 30 2012,17:45
(GORDON @ Aug. 30 2012,15:16)
QUOTE
See ya when I get the last crawl space hole covered...
Posted by GORDON on Oct. 01 2012,13:30
I burned through my budget, and had to wait for the new budget cycle to start buying more materials.... namely, paint and primer.But, I kept looking at the unsightly I-beam and furnace air return that went through the middle of the room... and kept looking at my pile of wood and drywall scrap... and decided to enclose it instead of just cleaning it up and painting it.
Boxed up.
Taped and cornered.
Mudded.
$13 for 2 long 1x6's, and 2 sticks of corners, so I didn't need to cobble together a bunch of scraps.
Posted by GORDON on Oct. 27 2012,10:47
Big Project is all but done, and had a little money in the budget, so I went and bought paint and painting accessories. Spent $130 on 3 gallons of paint/primer blend, and rollers and another gallon of mud.... I decided I wanted a light texture to cover any oopses from my sanding. The chick at Menard's said to dilute some mud down to pancake batter consistency, and roll it on with a nappy roller. So I started doing that... did 2 walls, and decided I didn't like it.Then it dried and looked better, so now I might like it... so I don't know what to do.
Anyway, Menard's is having an 11% off everything sale, so I decided to borrow against future budget by buying half of my drop-ceiling stuff, too, while I can get it on sale. So I spent another $250 on that stuff. The majority of that cost was in the 2x2 panels I chose, which were $7 each. The cheapest ones were $1 each. These were a little more expensive than average, but they look good.
Painting this weekend.
Anyway, total cost: $1793.
Posted by GORDON on Oct. 27 2012,13:55
Was torn on whether or not to finish texturing the walls... so I checked on my nappy roller which sat in the refuse bin overnight, and it was still damp and usable, so I decided to go ahead and just do it all.So I did. Good decision, I think it will look good, now.
One unexpected benefit: Lots of dust still on the walls from all the sanding, so running a wet roller over them all took care of the dust. Unexpected bad result: there were a few spots where dust was perfectly disguising an imperfection in my sanding, and now what I thought was a perfect sanding job is showing a few imperfections. Oh well. Character!
Painting tomorrow.
Posted by GORDON on Oct. 28 2012,17:36
First coat today... it is the bluest blue since Blue came to Bluetown. It's dark paint on drywall, so no pics yet because it looks terrible. Will get some tomorrow if I have time to get the second coat on.In fact, once could say it is the color of...

I took my kid's TARDIS toy in to color match, in fact.
Posted by GORDON on Oct. 29 2012,10:46
Second coat is on... fixed 85% of the ugly of the 3rd coat. I still have an unopened 3rd gallon of paint, so there will be a 3rd coat. I am really wishing I had gone with flat instead of semigloss... the gloss is highlighting ever sanding mistake and I sort of hate it.Here's a pic that was taken when I was still sanding. The dust mask was a life saver, possibly literally. I wont ever sand again without an $8 mask.

Some gray, a lotta dust.
Here's the room thus far. One wall is still wet, but I can tell I need one more coat to be happy with it.
Posted by GORDON on Nov. 01 2012,18:08
Drop ceiling!This represents about 6 hours of work... but 1.5 hours of that was spent watching youtube videos, getting my head wrapped around the concept of installing a drop ceiling. There's lots of different pieces and I didn't even know wtf. And interestingly, the software on the internet that calculates what materials you will need was inaccurate, and I figured it out, and it made me second guess myself because THE COMPUTER SAID I NEEDED MORE STUFF.
But I was right. So the grid is installed, and I put up all the pieces that didn't need to be cut. The tiles I got are recessed and hang below the grid a bit, so I went tonight and bought a knife designed for cutting those coffered bits out of the tiles that I cut down to size.
So far I am very happy with it.
Posted by unkbill on Nov. 02 2012,06:21
You misled people when you said that Menards is having an 11% off sale. You get 11% back on your purchase in a card to buy more stuff at Menards. We did it on Wats bathroom. Because I know I was going to buy more stuff there.
Posted by GORDON on Nov. 02 2012,08:20
Well, yeah, I know I will be going there a lot, so it is still 11% off.
Posted by GORDON on Nov. 05 2012,09:44
Getting all my 11% off receipts in the mail today... I will be getting $40 back for the next round of materials.... probably some laminate flooring for the computer area.Anyway, drop ceiling is done, and I am very happy with it.
Cutting the panels to size around the border took the most time, each one about 15 minutes. Each panel is 3 cuts each: First cut to size, and the second and third cuts to get the coffered edge (the bit that allows it to hang 1/4" below the grid). Corner pieces are 6 cuts each. And each one has to be nice and slow and steady... fortunately the only fuckup in cutting I made was on a big piece, and I was able to repurpose it into a smaller piece in the corner.
My first subflooring install, first electrical wiring (and my house hasn't burned down yet), first drywalling, and now first drop ceiling. I think it came out pretty good, and I even had the foresight to build in accesses for when I need to get into the crawl spaces.
Here's some things I am not happy with:
I can't believe how shitty my walls look. As I mentioned before, I thought my sanding job was 99% of perfect, but once all the loose dust came off now I see nothing but places that need more sanding. The dust was filling in all the cracks and crevasses. Then I made the mistake of using semi-gloss paint, and now the imperfections are perfectly highlighted when the light reflects off the paint.
Also, some of my outlet fixtures are not at the correct depth, they are too far into the wall, and the covers look shitty when they aren't flush with the outlet.
So my walls are pretty much a disaster of Hurricane Sandy proportions. Yeah, I went there. So, I am quickly trying to get my mind switched over to, "Well, it's just a basement."
Sigh.
Too lazy to get another gallon of flat paint, of course, so how upset could I possibly be...
Posted by GORDON on Nov. 05 2012,18:02
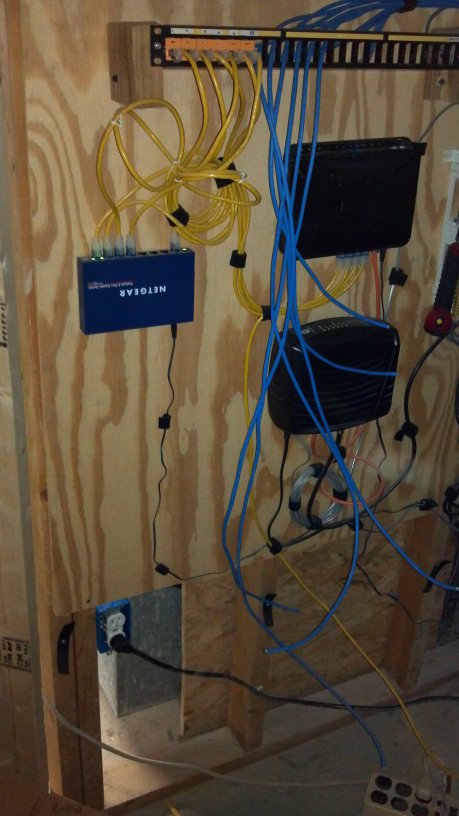
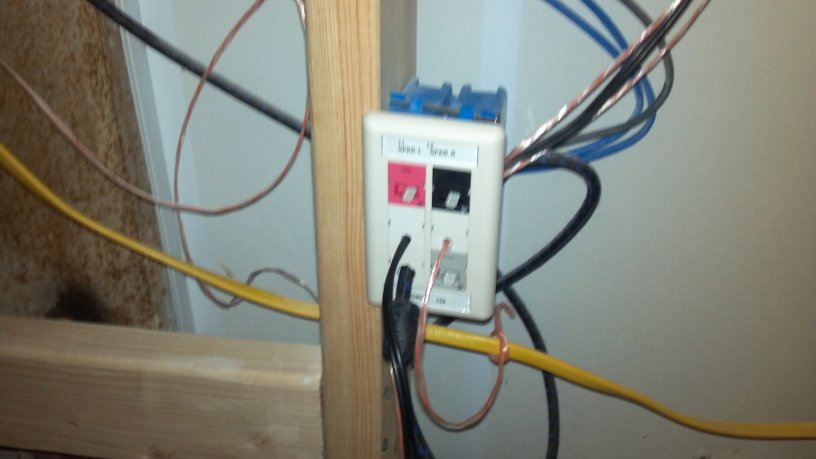
Did some jacking. Was just jacking it.Jacked the network lines in the room, and at the patch panel... no more dangling blue lines at the DMarc.
Have a lot of shit to do tomorrow but hopefully I will have time to solder the speaker wires to the jacks and then I can take a couple pics of all the lovely, finished, faceplated jacks.
Posted by TheCatt on Nov. 05 2012,19:24
Jacking in the man cave.
Posted by GORDON on Nov. 05 2012,19:29
I can't decide whether to call it "Jerkingham Palace," or the "Spanktradome.""The Jerkatorium" is old and needs to be retired.
I'm leaning toward Jerkingham Palace. Sounds British and classy.
Posted by TPRJones on Nov. 05 2012,20:54
Won't you take me toSpunkytown
Posted by GORDON on Nov. 07 2012,09:32
Shit is certainly jacked today.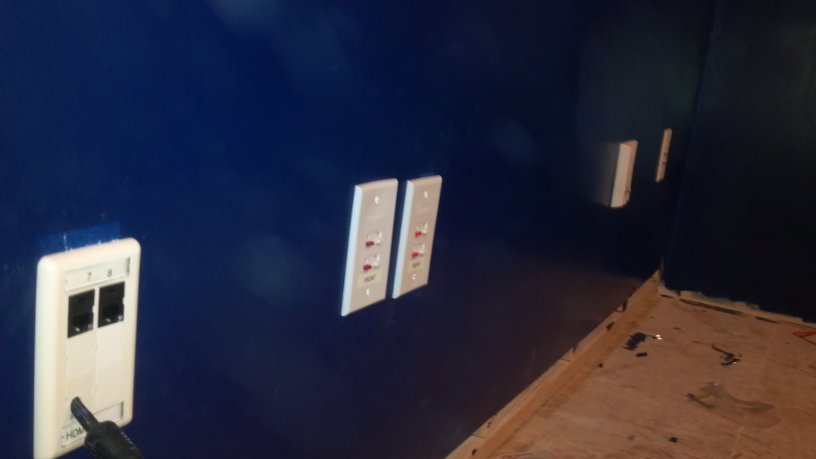
Posted by Troy on Nov. 07 2012,09:52
Hoping this was a post about your stocks of canned food for the coming apocalypse. Left disappointing (but jealous of your sweet wiring setup)
Posted by GORDON on Nov. 07 2012,10:25
Yeah it's gonna be pretty cool... about ready to move my system down there and free up room in the crowded dining room. Basement won't be done, but finished enough and I can just throw a sheet over everything when I am working.
Posted by Cakedaddy on Nov. 07 2012,13:12
I tried to warn you about the sanding when I saw it. But you said you weren't done and I didn't want to seem like I was picking. Drywall is hard.
Posted by GORDON on Nov. 07 2012,13:19
What would I do without that "I told you so?" I shudder to consider it.
Posted by Cakedaddy on Nov. 07 2012,18:01
If I point it out enough, I figure one day you'll listen to me!
Posted by GORDON on Nov. 07 2012,18:06
(Cakedaddy @ Nov. 07 2012,21:01)
QUOTE
If I point it out enough, I figure one day you'll listen to me!
Or I will divorce you.
Posted by GORDON on Nov. 21 2012,13:11
Bought some laminate flooring for the computer area.I spent about 3 days doing the first 2 rows over and over, trying to figure out how to do it. Directions on the little paper insert were pretty much too small to read, and there weren't any diagrams... very useful. Ultimately went to Youtube and looked up how to install this particular style of laminate and the only half way decent video was an exasperated couple saying, "We finally figured it out after 2 days, and I can't imagine trying to install it with fewer than 3 people."
But I got the information I needed, and I started running it.
Started running them diagonal... I did a couple test rows, and decided that I didn't want to do all the 45 degree angles. Also, my saw blade was generating a lot of smoke, and the inside edge where I was cutting was scorching from the heat. So, I went and picked up another blade, and none of them said, "Use this one for laminate flooring," so the guy told me to use a general purpose one with small teeth. Not as small as a finishing blade, but small.
So, now I am using that blade and I am still getting smoke but now I am also getting sparks, of all things, when I cut through this stuff. What the hell.
The pics look hazy... that's because after 8 cuts my basement is full of smoke and I will finish it later when the smoke dissipates.
Flooring: $175ish
Saw blade: $15
Posted by Leisher on Nov. 21 2012,13:40
I want to start a thread called "Finishing my basement 2012"...
Posted by GORDON on Nov. 21 2012,13:49
That doesn't even make sense.
Posted by TheCatt on Nov. 21 2012,15:35
(Leisher @ Nov. 21 2012,16:40)
QUOTE
I want to start a thread called "Finishing my basement 2012"...
lol
Posted by Leisher on Nov. 21 2012,16:36
(GORDON @ Nov. 21 2012,16:49)
QUOTE
That doesn't even make sense.
< So's your face! >
Posted by GORDON on Nov. 21 2012,16:44
No YOU are the one who has the < FACE. >
Posted by GORDON on Nov. 28 2012,12:18
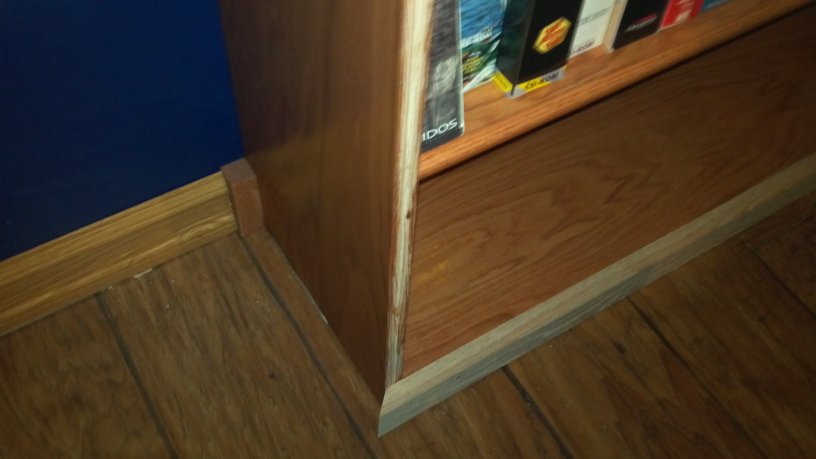
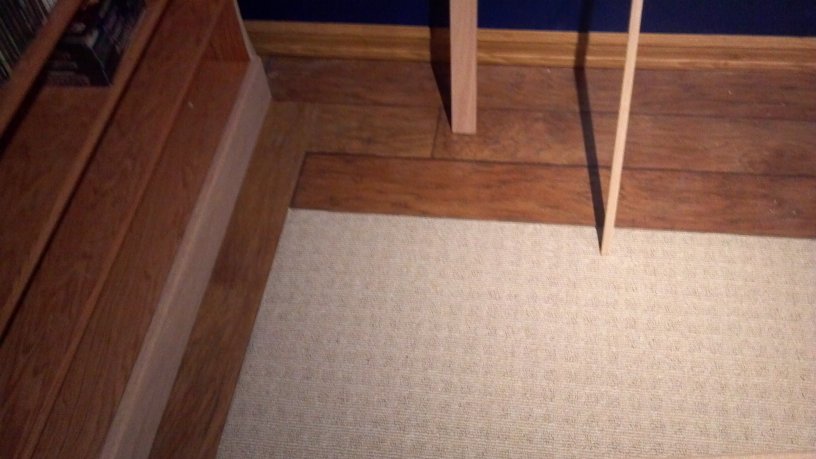
Been busy recently, so just getting the flooring finished up:Base trim on the left was a leftover piece from another project and I just wanted to see how it looked.
Last second design decision: I was planning on carpeting the other part of the room, but suddenly I had the idea of running a border around the room 2 panels deep, both because it would look neat and for the bookshelves to sit on. I will still be carpeting the bit in the middle.

I figured this way I don't need to put the shelves on carpet, which never seemed like a good idea to me.
Posted by GORDON on Nov. 29 2012,17:13
Today was kind of screwed up. In between getting little sleep, early-morning scramble to learn about the water heater and then fix it, going to the local community college annex to teach my "How To Be as Awesome as Me" class, and then going to pick up my kid from school early to do some things, I also managed to make a run for trim, and framed this in. A Man can do such things; specialization is for insects.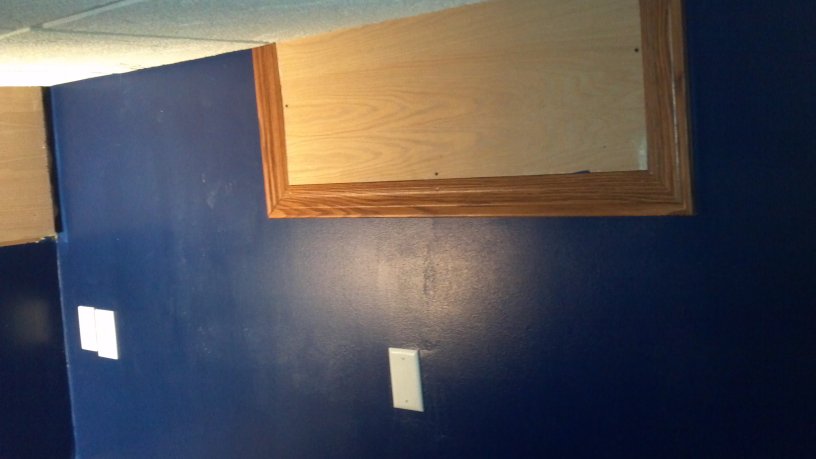
3 sticks of casing trim: $32
Running total: $2015
Posted by GORDON on Dec. 04 2012,13:22
Went on another run... bought some pre-finished oak to box in the remaining crawl space access, and bought the rough wood that I will use to frame up the built-in desk.But today was all about the crawl space access:
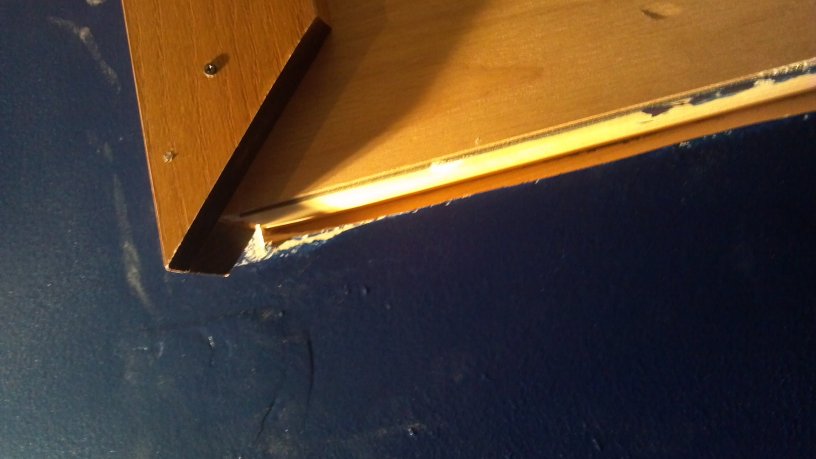
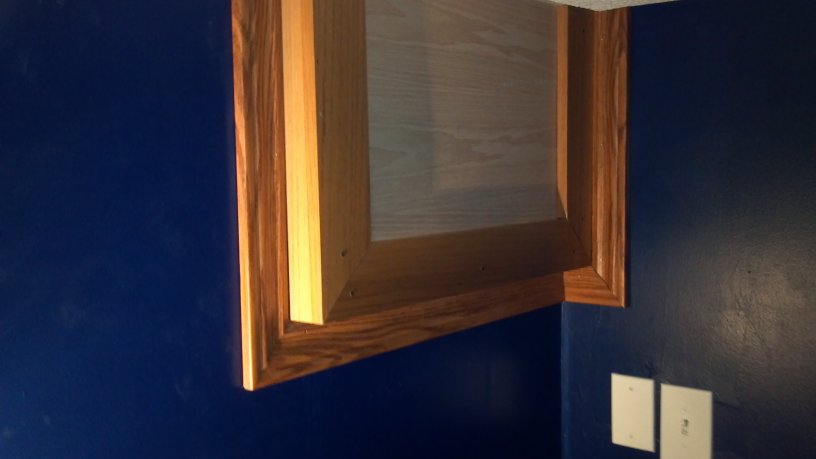
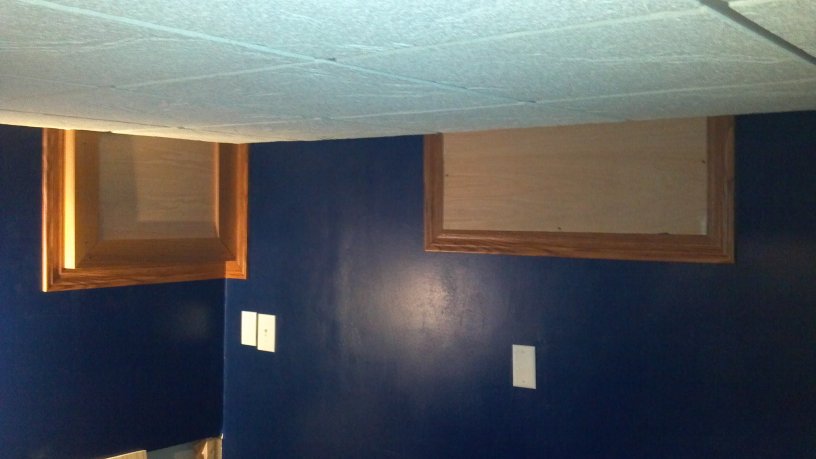
Pretty happy with how that came out. Whenever I need to get into that crawl space, I just move 2 ceiling tiles and remove the screws. Easy.
More wood: $60.
Running total: $2075
Posted by GORDON on Dec. 07 2012,10:05
Designed the desk with my carpenter buddy last weekend, and I just finished the frame of it so hopefully he and I can get it hung on the wall this weekend.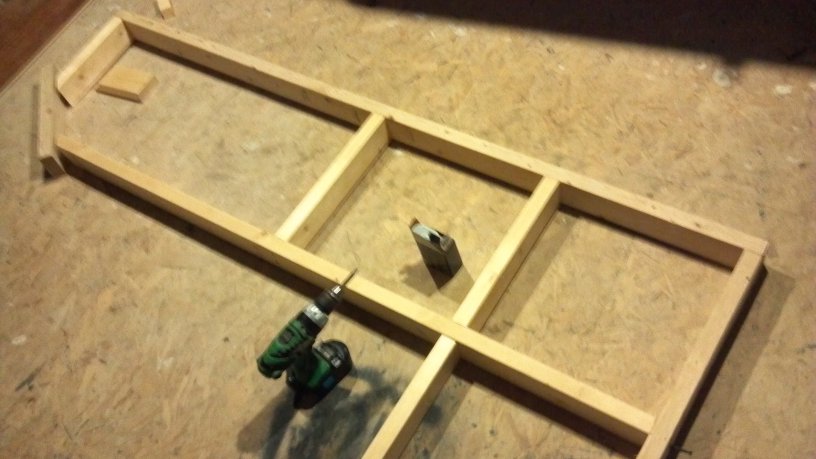
Posted by GORDON on Dec. 08 2012,13:38
Carpenter may or may not make it this weekend, so went and bought $147 of ceiling tile accoutrement to keep the project going.Running total: $2222
Posted by GORDON on Dec. 11 2012,16:39
I printed out a grid and made a plan, and went and bought materials according to the plan.Then I threw the plan away and sort of winged it. Originally I had planned the ceiling grid to make the most efficient use of whole tiles.... then I realized how stupid and off-center that would look, and decided on a centered approach... that, incidentally, also ensured that the grid lined up with the other half of the ceiling. That is, of course, how I should have planned it to begin with, but I hadn't thought of it until after I revised the plan and noticed how everything lined up. Whew... I would have hated it if it ended up offset.
So, grid went up, and with the revised plan I was 3 short pieces... short. SO here's that.
You can see in the top left of the pic there is a cross-strut missing. I put the only 2 whole tiles in place, to make sure errything was square.
I had a few minutes so I ran to Menard's to get my missing 3 pieces... insignificant cost (the tiles are where it gets expensive at $7.50 per for the nice ones).
Slapped them in, started cutting tiles until I got tired of cutting tiles.

And due to the wacky, clever way I framed in the duct work, I ended up cutting this fun piece. It is the hardest one of the project, so I am glad it is cut and in place.

Posted by GORDON on Dec. 15 2012,20:23
Finished the ceiling a couple days ago, never got to posting pics. I especially like how good the eyeball spotlights look when they have the appropriate bulbs and are all mounted and shit.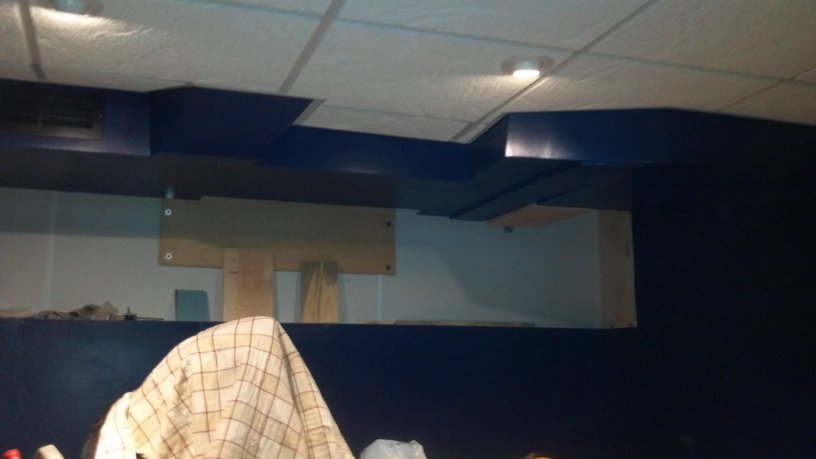
Also the carpenter came over tonight and we spent about 4 hours doing this.
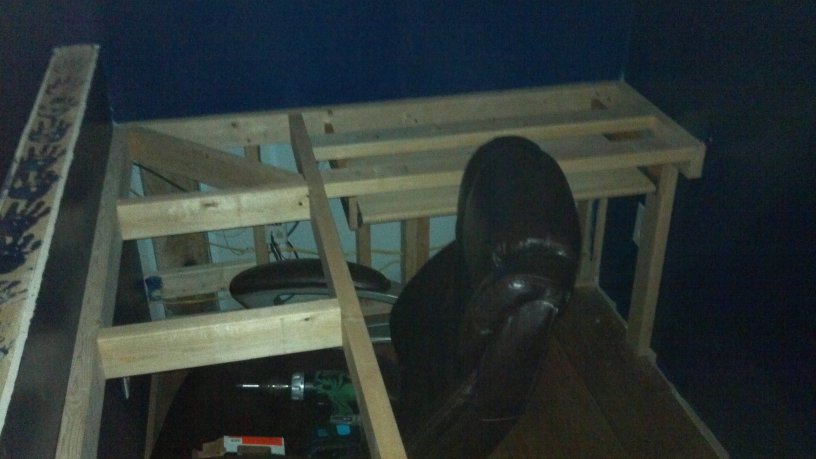
Doesn't look like much, but besides actually mounting the frame to the wall and getting it leveled, there is also a leg that you can't see that we modified from a stairway baluster, we built/installed the sliding keyboard/mouse deck that you can sorta see, and we made the initial cuts on the oak desktop. He is coming over tomorrow to finish those up with me so I can get the trim on and get to the staining process for the upcoming week's milestone. I hope to have my custom desk officially in use by next weekend... I hope the polyurethane doesn't take stupid-long to dry between coats. Staining wood is also going to be a first for me.
Posted by GORDON on Dec. 17 2012,13:13
Did this yesterday.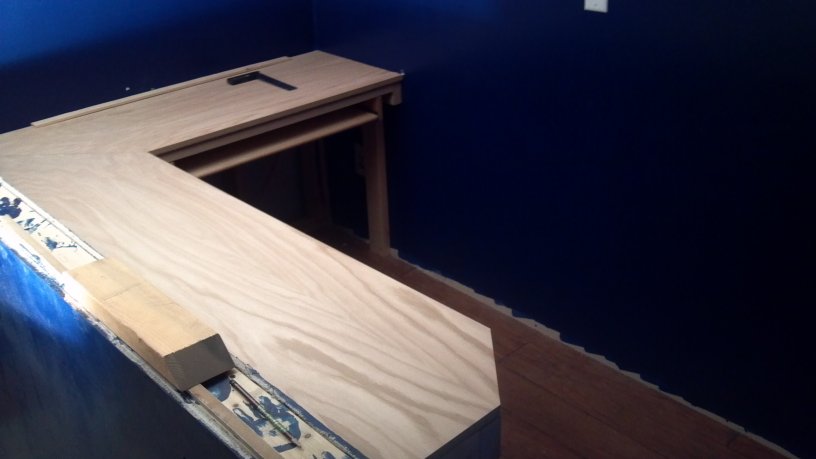
Started getting the trim on today.
I hope to be able to start staining tonight... the goal is to be using the desk by this coming weekend.
Posted by GORDON on Dec. 18 2012,08:45
I have to go out and get more trim and shit before I start staining but UGH I just don't feel like it.
Posted by GORDON on Dec. 18 2012,13:39
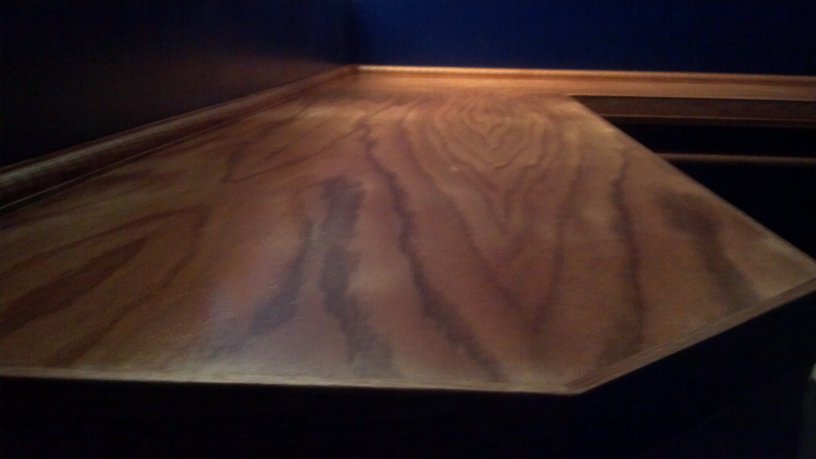
Went and did shit anyway and now the desk is 100% done and i have no more excuses for procrastination on the staining/finishing portion. Frame was pine, but the top is oak.
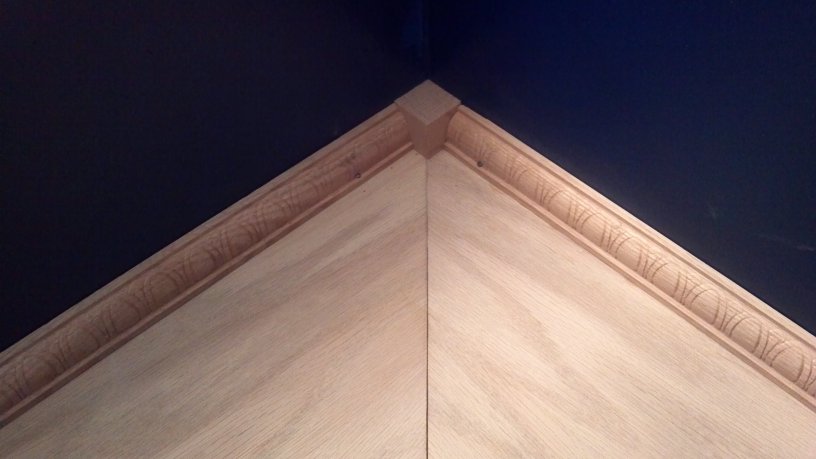
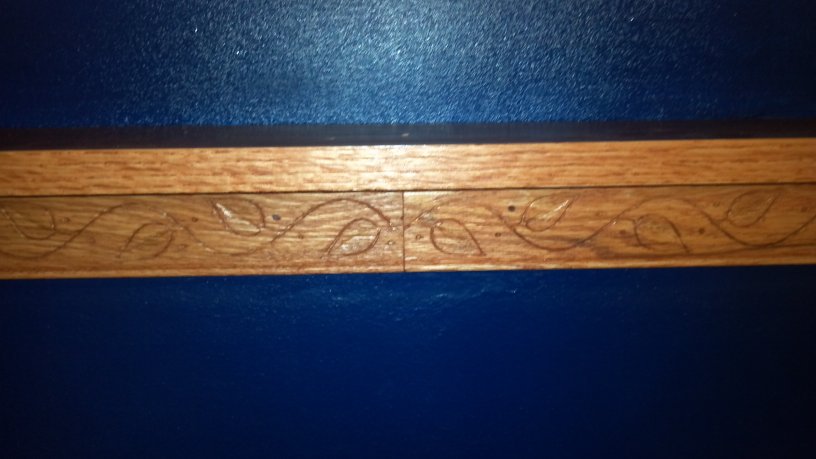
This is my kickass oak trim.
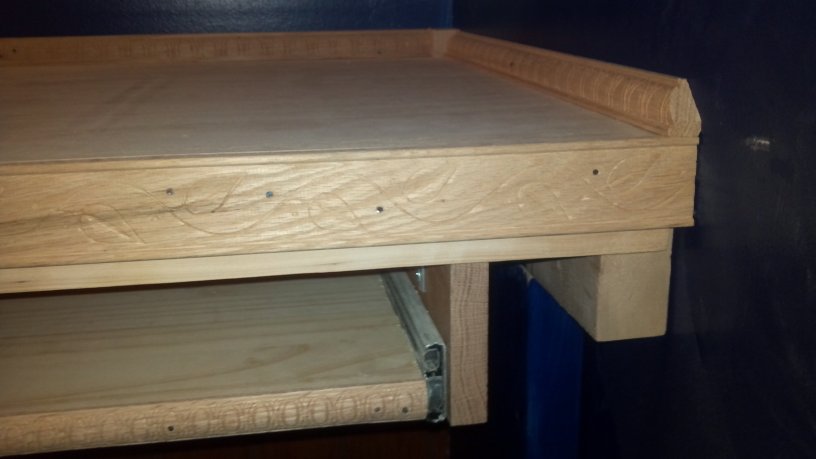
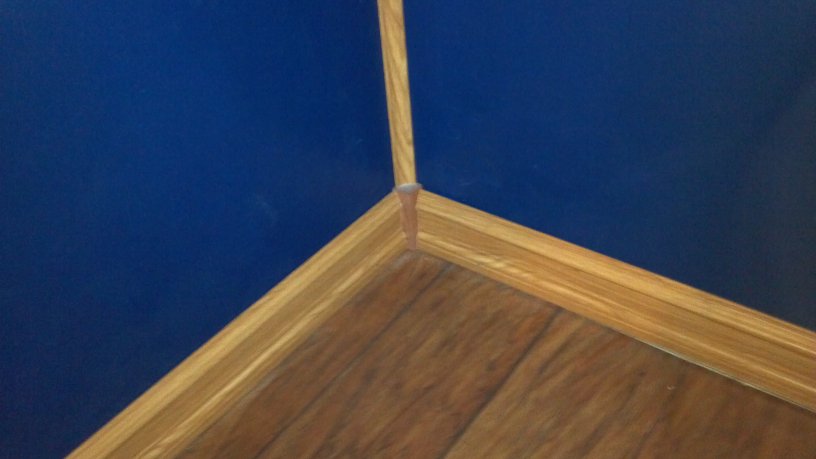
This is my kickass corner. A 3rd piece of corner cove trim is going to be coming down the wall there, so now it will look awesome when they meet at that junction. I bought a stairway bannister rail for $3.50 and repurposed it into a source of 1"x1"x1" oak blocks.
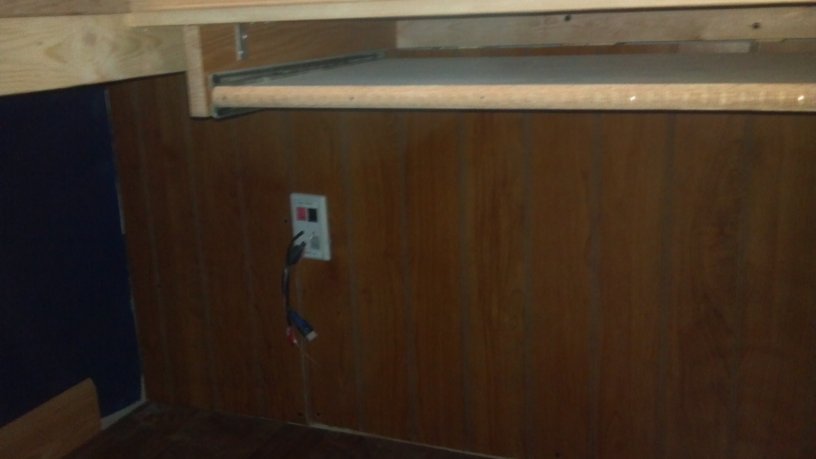
And I finally got the under-bit of the wall covered. It is removable for when I need to gain access to the wiring... and I will do so the way I set up my PC. The rear speakers run through the wall, and I have cord extensions already in place, but they weren't quite long enough to completely run point to point with enough place to have them come out at each end. So I have a long pull string attached to it. But I will still need to get into the wall on install day when I need to plug them in.
That probably makes no sense to anyone.
It will be trimmed up to hide the ugly cuts... it is just a couple sheets of $9 wainscoting, and it didn't cut very nice even with my new finishing saw blade. But it isn't nothing that won't be hidden by the trim.
Final trim for that area is going in after the staining is done.
Posted by GORDON on Dec. 18 2012,14:15
BAM.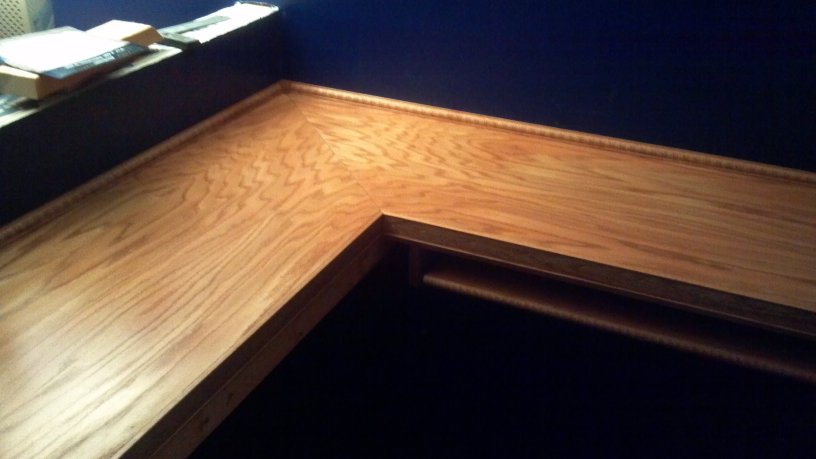
Pics are before I wiped off the excess. Color is a skosh more uniform, now.
And I am sitting here getting high off the fumes.
Posted by GORDON on Dec. 18 2012,14:18
Oh, all the trim, sandpaper, stain, woodglue, finishing nails, etc I have purchased cost about $200, total.Running total: $2422
Posted by GORDON on Dec. 19 2012,13:24
For the record, winter is NOT a good time to do a staining project inside your house. Either you die of fumes or hypothermia from having all the windows open for days.
Posted by GORDON on Jan. 11 2013,15:30
(GORDON @ Dec. 18 2012,17:18)
QUOTE
Oh, all the trim, sandpaper, stain, woodglue, finishing nails, etc I have purchased cost about $200, total.
Running total: $2422
Running total: $2422
Desk was finished and in use by the end of that weekend, just haven't gotten around to posting the pics.
In the meantime I have spent about $110 more on more oak trim. Pics later. Just updating the score.
Running total: $2532
Getting pretty close to everything being done, except for the shelves. Whole house carpeting is coming soon,including the basement, as long as Obama's retroactive tax increases don't hurt too much.
Posted by Cakedaddy on Jan. 11 2013,18:52
Is there an easy place to host pictures for posting? I'm going to be building a competing "remodeling" thread, but don't have an easy place to host pictures.
Posted by GORDON on Jan. 11 2013,18:57
(Cakedaddy @ Jan. 11 2013,21:52)
QUOTE
Is there an easy place to host pictures for posting? I'm going to be building a competing "remodeling" thread, but don't have an easy place to host pictures.
I can probably set you up a dtman.com ftp account. Just don't fill it up.
Posted by GORDON on Jan. 17 2013,08:34
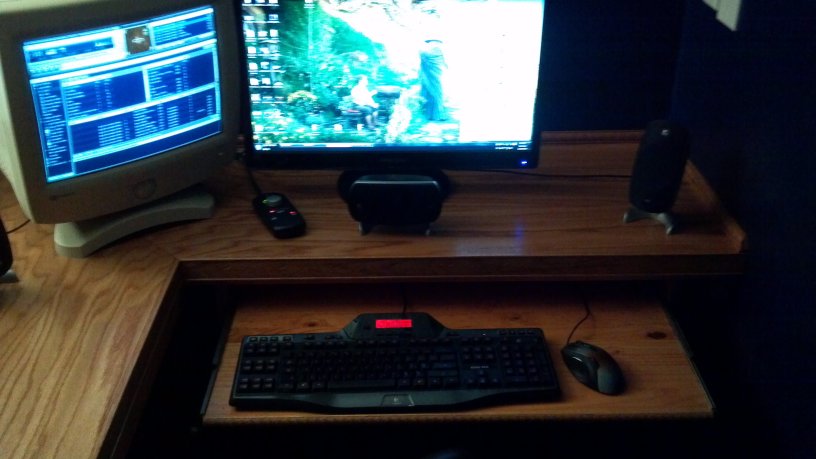
Here's the desk pics. I've been using it since that weekend.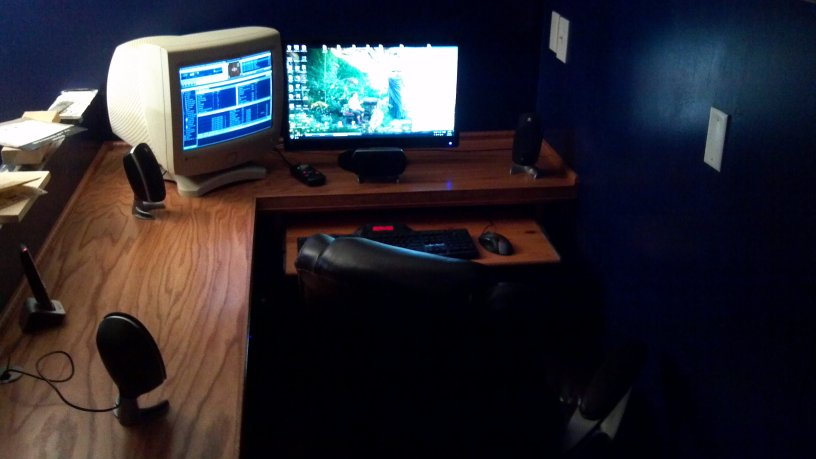
The keyboard/mouse deck retracts under the main desk, which is really awesome.
Posted by GORDON on Jan. 17 2013,08:44
And I have finished doing all the hardwood trim, and am about to stain it, so here are pics of that.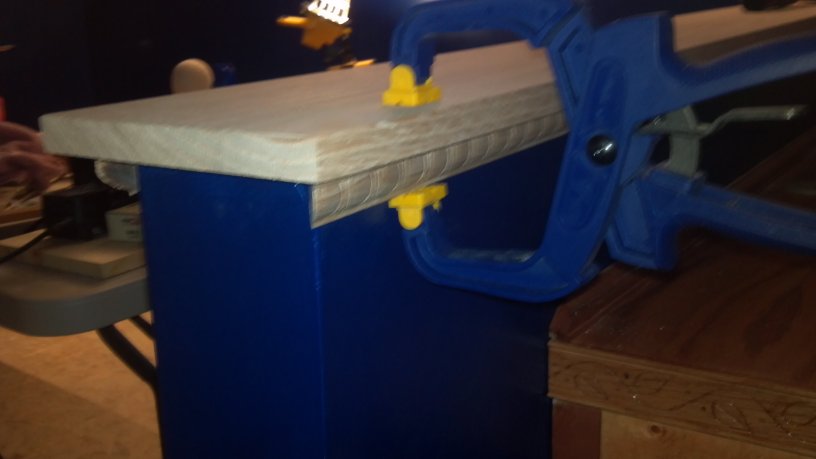
Bought another $90 in trim pieces yesterday.
Running total: $2622
Carpet is next, and then shelving starts. I can do some of it now but I need to figure out what furniture I am going to have to plan the shelving on that wall. I can't put the baseboards up until the shelving is built, but besides that stuff, this room is pretty much done with major construction.
Posted by TheCatt on Jan. 17 2013,09:41
The hell is that big ugly thing on the left?
Posted by GORDON on Jan. 17 2013,09:44
Left of what?
Posted by TheCatt on Jan. 17 2013,10:12
Left of your monitor.
Posted by GORDON on Jan. 17 2013,11:50
Ahhhh yes.I dont like replacing hardware until it dies.... and that goddam thing still works perfectly 15 years later.
Posted by GORDON on Jan. 22 2013,09:19
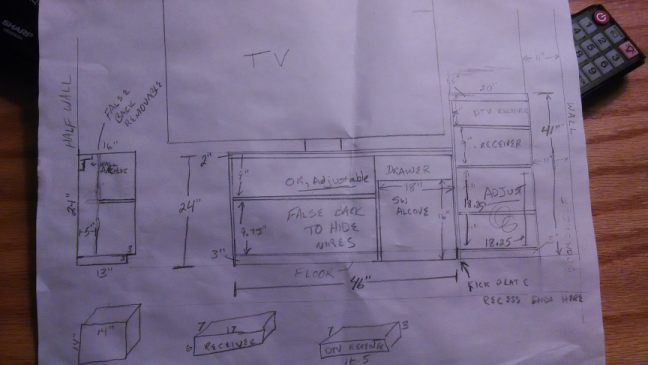
CD shelving plan.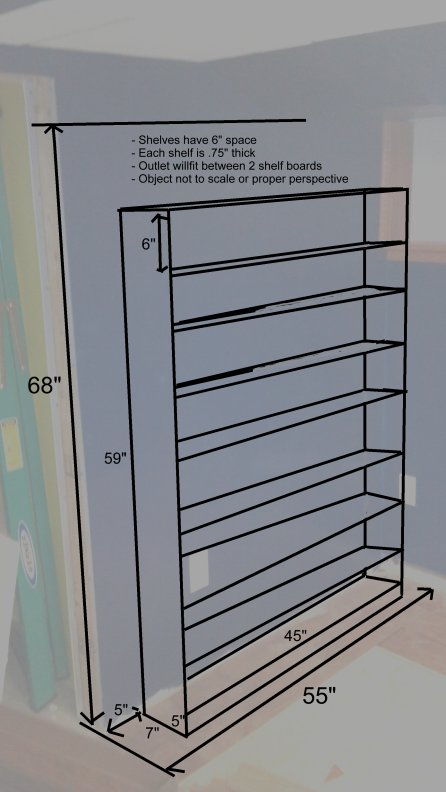
Yeah, the 3rd shelf up looks goofy. I was trying to show that the way I measured it the outlet would be between shelves, but my picture scale didn't show it properly and yeah it looks dumb and screw you for judging me.
Posted by Malcolm on Jan. 22 2013,09:37
You're shelving your CDs?
Posted by TPRJones on Jan. 24 2013,08:27
(GORDON @ Jan. 22 2013,11:19)
QUOTE
CD shelving plan.
Don't forget to leave space for your VHS collection and all those 8-track tapes, too.
Posted by GORDON on Jan. 24 2013,09:04
And also I will need to leave a shelf for all the shit your moms leave at my house when I kick them out early in the morning.
Posted by GORDON on Jan. 29 2013,12:04
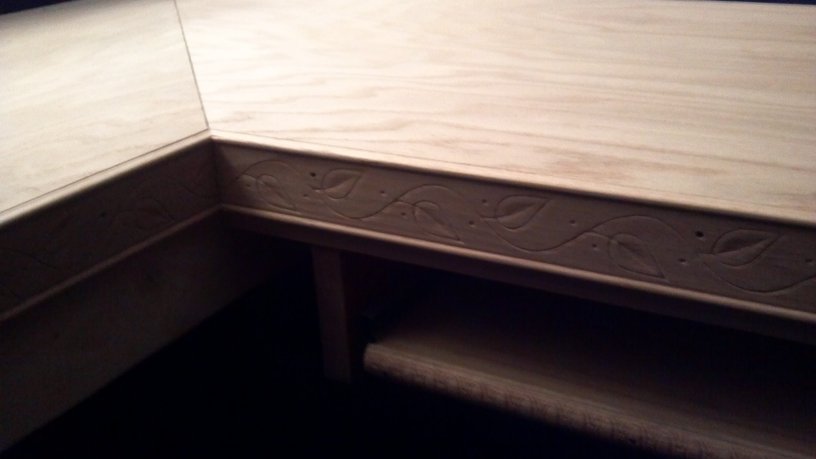
Finished most, if not all, of the oak trim work.Here's the cap on the half-wall behins my desk... which I realized pretty much makes it part of my desk, which is kind of neat.
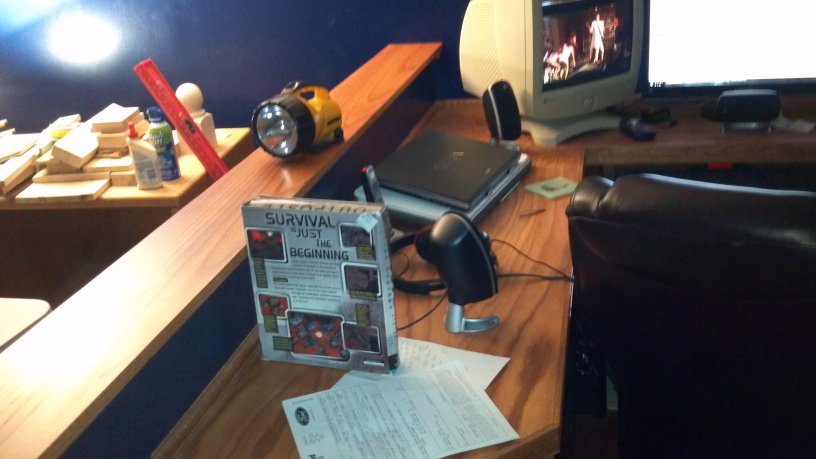
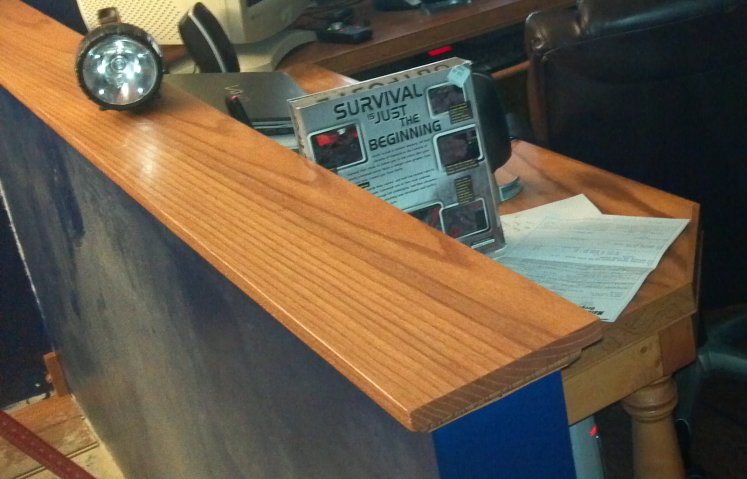
Now that I think about it, I still have to put a little cove trim in the corners... I will get pics of that after I next go to Menard's.
Here's my half wall. Finally pulled the trigger and made a decision on what to do with it... I chose the easiest path, since I still had blue paint left. Three coats later, I like how it looks... it diminishes the shadow from the duct work on what was the white wall, and now it all looks more integrated and less disconjunct.

Also threw some stain on the crawl space cover to tie it all together. I like how it all looks now.
Also, notice the baseboard trim... no more exposed wall studs. Also nice.
++++
Went and purchased the wood for 3 of the shelving units (4th shelving unit can't be planned until the couch is in place, and I see how much room I have left). Wood is at the carpenter's house and we already have it planked out into the sizes we need. Stand by.
Wood for shelves: $250
Running total: $2872
Posted by GORDON on Feb. 03 2013,18:49
Spent this weekend and last building shelves with my carpenter buddy.Three 4x8 3/4" thick sheets of furniture-grade oak plywood (shelves and uprights), 2 4x8 1/4" inch sheets of oak plywood (backings), turned into shelves.

Spent another $30 for some solid oak to turn into trim.
Shelves are currently in my basement awaiting stain/poly. Tomorrow.
Running total: $2902
Posted by GORDON on Feb. 08 2013,10:00
CD shelf (shut up) is stained, polied, and attached to the wall.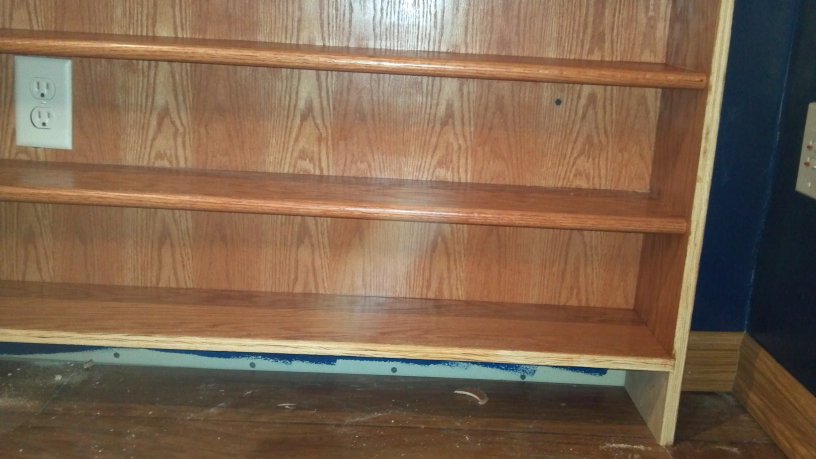
Yes, there will be a kickplate and trim. When the next round of 11% off rebates comes in the mail I will get to it. Also, notice the outlet. I planned the shelf spacing exactly right.
Here's one of the other shelves, in the process of staining/polying. Wife asked me to take a day off the staining process because there were so many fumes in the basement it was making the laundry stink.
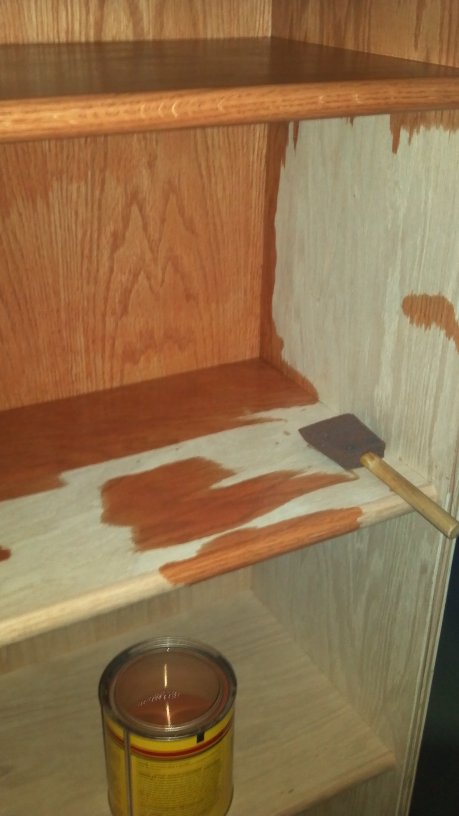
Spent another $60 for more trim and stain and polyurethane. The most expensive part of the process has been the finishing pieces. I think you could frame up a 3,000 square foot house for X amount of money, but all the small finishing stuff will cost you 6x.
Running total: $2962
Posted by TheCatt on Feb. 08 2013,15:59

Posted by GORDON on Feb. 08 2013,16:58
Yeah I get to be designated driver tonight.
Posted by GORDON on Feb. 13 2013,11:54
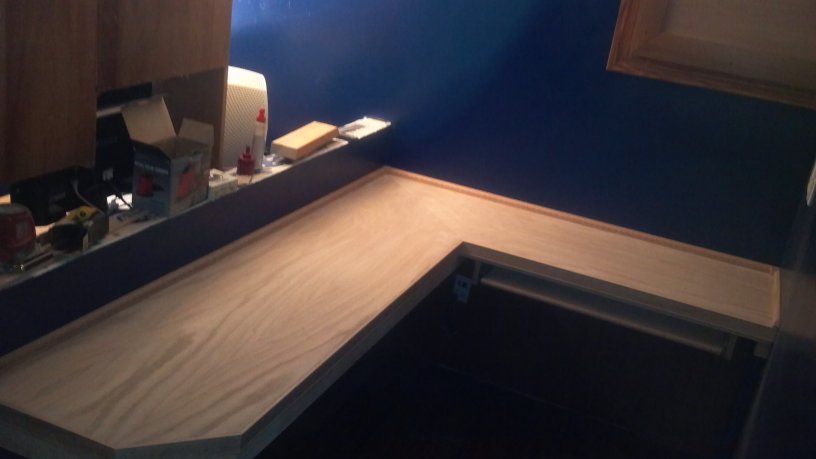
Base trim, and floating corner shelves.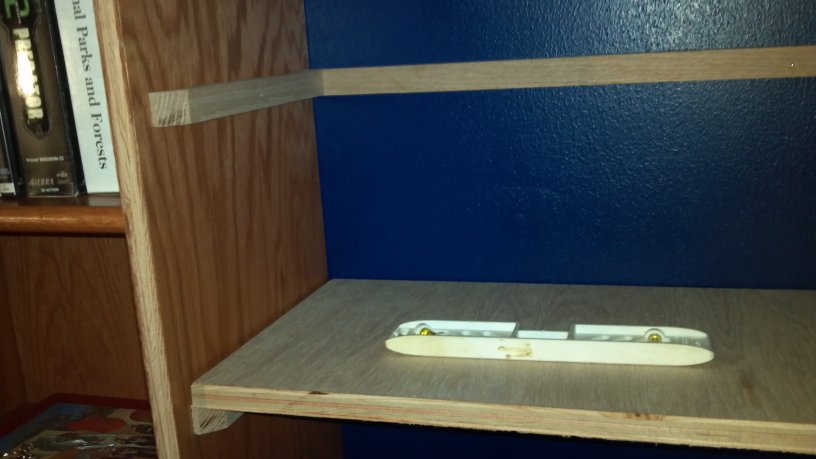
Posted by GORDON on Mar. 28 2013,20:02
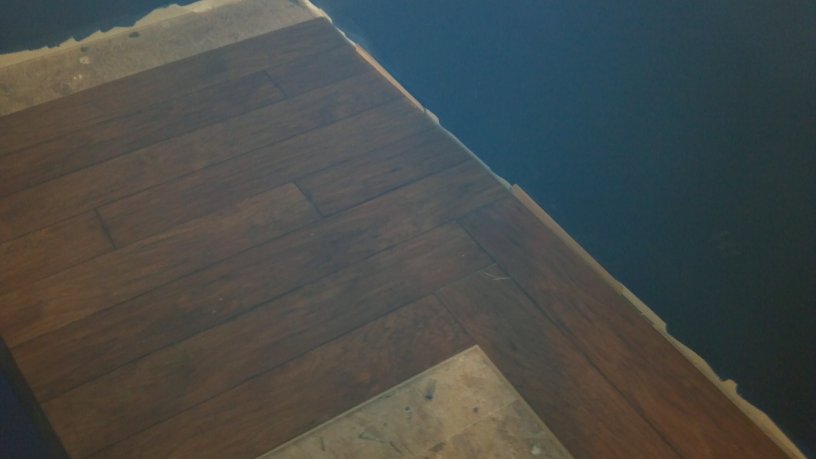
Carpet, bitches.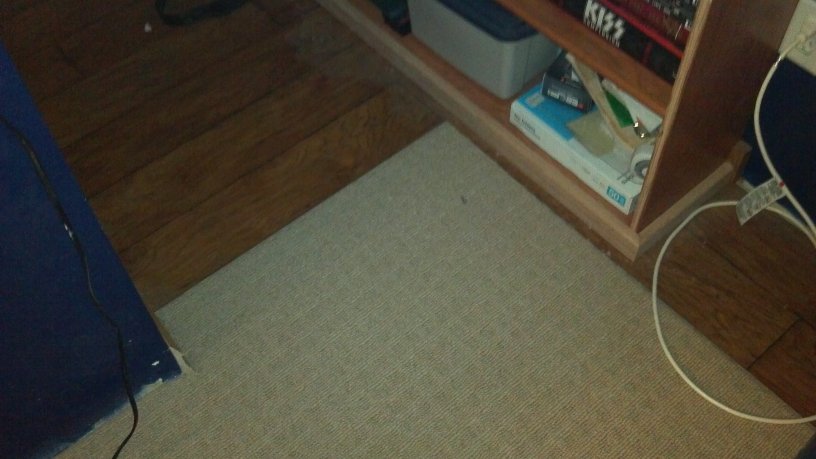
I still have some shelving trim pieces and baseboards in the room, so the laminate is a bit dusty. Basically I have ALL the trim I need to finish the existing shelves, just need to get motivated to put it on and get it stained. Then I can show off the shelves.
We had carpet replaced in other parts of the house, and they threw in the basement for "free," so there was no direct credit added to the Basement Account in the T-Ledger.
Posted by GORDON on Apr. 13 2013,14:59
Shelf trim is on, stained, and first coat of poly. Detailed pics when it is 100% done.Like many things I have designed and built, I was on my way to Menard's for materials when I conceived of and mentally designed a corner desk. I was surprised how little real estate I ended up with on the main desk... I had planned on their being enough room for my kid to have a system right next to me for gaming... but in reality, my hardware and chair and stuff takes up too much room. So I decided to put in another desk "behind" me.
Once he sat there playing a few rounds of League of Legends with me, I saw that it was kind of hard for him having the mouse on the same surface as the laptop... it didn't look comfortable... so I went and bought $40 worth of materials and built him a retracting keyboard/mouse deck, just like mine, the same day. I'm getting good at this stuff.
So here it all is.
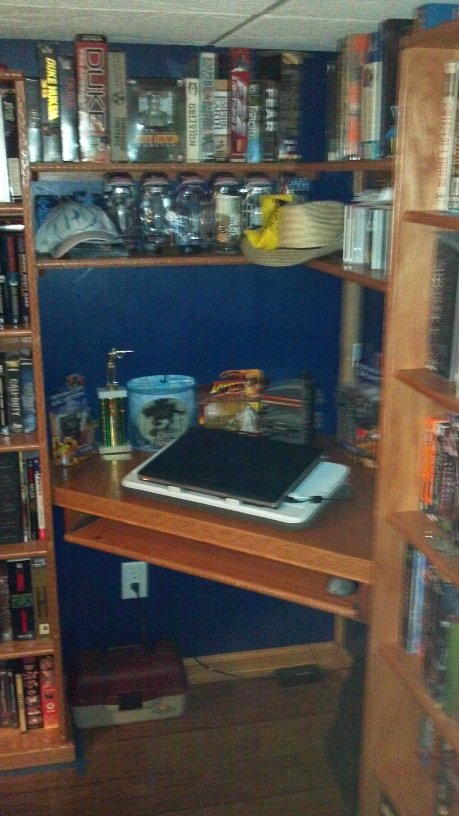
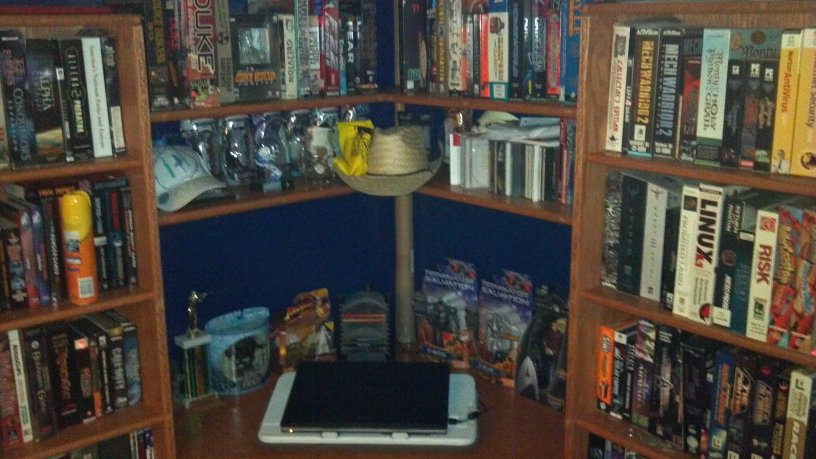
All the shelving isn't built yet, and my toys and stuff keep getting moved down here, so it is a little cluttered at the moment. That will change by project termination.
+++
But today's project has been installing the wall mount for my new desk TV! Found a stud/drilled the pilot holes/screwed that sucker on there with some big lag screws.
Then I decided it was 4 inches higher than I wanted it and undid all that, and redid it 4 inches lower.
The red thing on the right is the new PS3, for the Netflix and playing of blu rays and whatnot. Bonus points if you can identify the test BD playing in this picture:
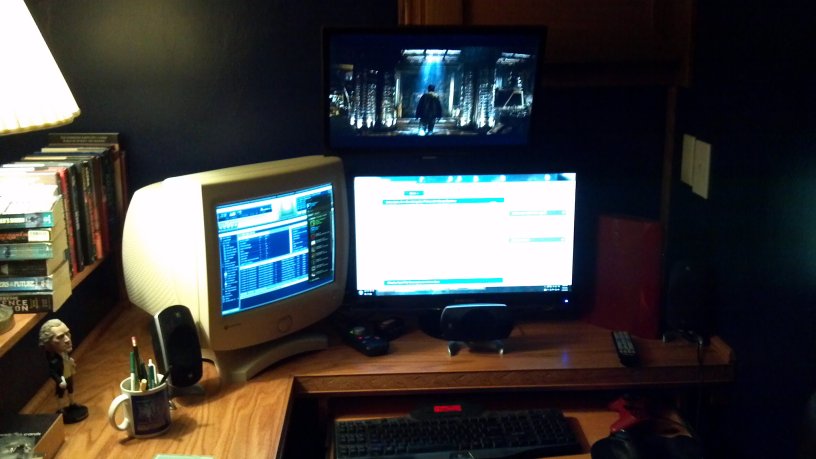
I don't really consider the TV and stuff as part of "finishing the basement" project, so I won't include that in the running total, but obviously I will add the stuff for the retracting shelf under the secondary desk.
Running total: $3002
Posted by Malcolm on Apr. 13 2013,17:14
What the fuck is that ancient looking, cubic, off-white plastic thingy to the right of the bobblehead?
Posted by GORDON on Apr. 13 2013,17:36
Catt already covered that.
Posted by TPRJones on Apr. 14 2013,10:17
It looks very nice. Like a museum display of ancient technology and data storage formats.
Posted by GORDON on Apr. 14 2013,10:18
That's a weird way to say "Library of Awesomeness."
Posted by GORDON on Mar. 05 2014,20:27
Have designed the final shelves and entertainment center. Purchased the trim ahead of time just to make sure Menard's had what I wanted... last time I bought them out of my style of trim and had to wait 10 days to get more. Money is in the budget to buy the final oak plywood, and I just need to get them built.Trim and stain: $100.
Running total: $3102.
Posted by GORDON on Mar. 06 2014,06:03
Posted by Leisher on Mar. 06 2014,07:21
(Leisher @ Nov. 21 2012,16:40)
QUOTE
I want to start a thread called "Finishing my basement 2012"...
I just remembered this...
2014!
Gordon, do you work for the government?
Posted by Vince on Mar. 06 2014,07:29
(Leisher @ Mar. 06 2014,09:21)
QUOTE
I just remembered this...
2014!
Gordon, do you work for the government?
2014!
Gordon, do you work for the government?
So he's trying to get you to pay for it too?
Posted by GORDON on Mar. 06 2014,07:41
(Leisher @ Mar. 06 2014,10:21)
QUOTE
(Leisher @ Nov. 21 2012,16:40)
QUOTE
I want to start a thread called "Finishing my basement 2012"...
I just remembered this...
2014!
Gordon, do you work for the government?
Yeah, yeah, yeah.
Been playing for it as the money has been available... that means the room is about done, AND paid for. :-D
Posted by GORDON on Mar. 06 2014,11:49
The lack of construction progress for the last year... aside from the times when I was on an extended project... was because, for the most part, this space station is fully armed and operational. 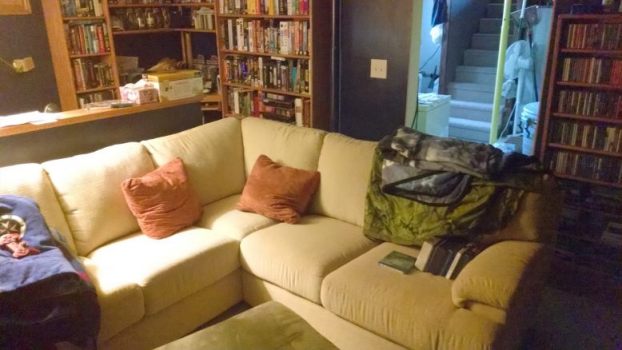
Got the big TV, the surround sound speakers, and the couch where "my spot" has my eyeballs are centered exactly 8'6" from a 60" screen. It is perfect. The TV was recycled from upstairs but the receiver and speakers cost a few shekels, as did the big couch, so that was the construction budget, for a while.
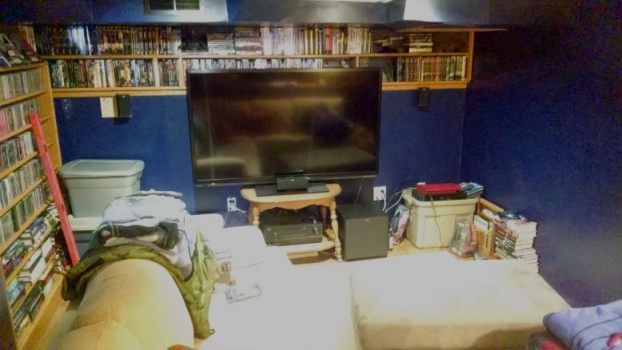
So, it is functioning as a complete media room, it just aint 100% yet. The bins and shit are full of books that are going on the final shelves, and there will be a proper area for the electronics.
Posted by Vince on Mar. 06 2014,12:20
Looks good!
Posted by GORDON on Mar. 10 2014,17:49
(GORDON @ Mar. 06 2014,09:03)
QUOTE
Bought the wood for this and the bookshelves.
Spent: $200
Running total: $3202.
Seems that the high-end furniture you buy in the store has you paying about 15% for actual materials and 85% for labor/overhead.
Posted by GORDON on Mar. 11 2014,08:13
This is 95% of the wood that is going to build the above sketch, only the backing and trim is not shown. Cut and ready to assemble. The wood for the other shelves as partially cut to size - my wall is a little goofy so we need to scribe some things so it fits correctly. We will be putting it all together this weekend, most likely. 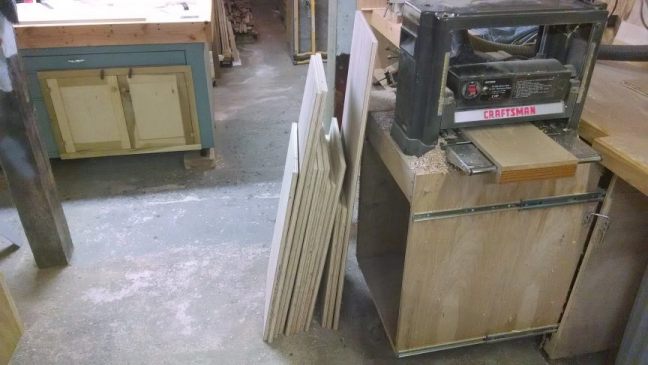
Posted by GORDON on Mar. 15 2014,17:40
Here's what I was doing today.Entertainment center, this is the bit to the side that will house the components. Bottom shelf is adjustable, thus the holes. I may put some vinyl albums there. Maybe not. We'll see.
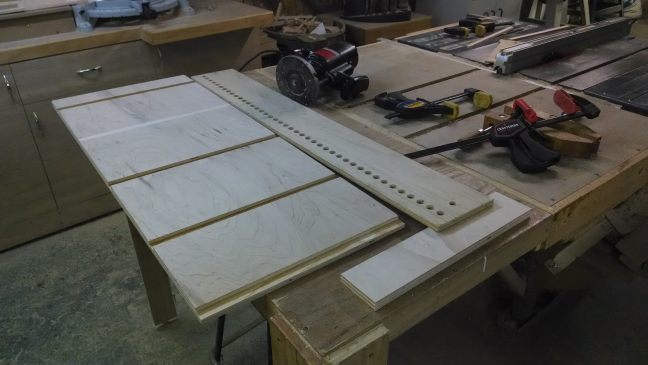
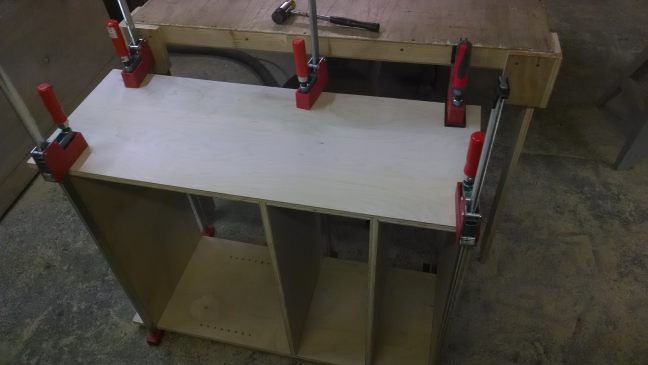
This is the bit the TV will sit on. It is getting another layer of 3/4" wood on top, so it will be sturdier than it looks here. Adjustable shelf in the middle.
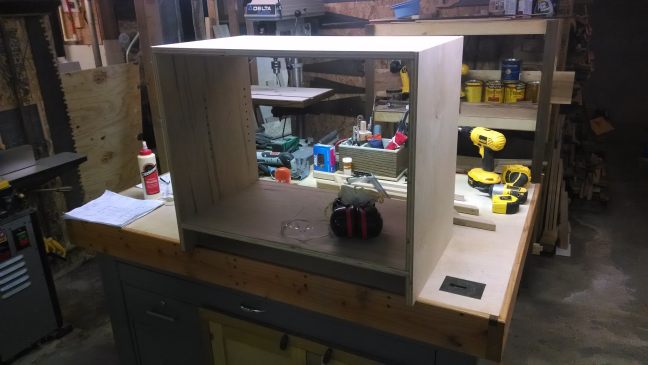
This is showing a false back to that cabinet... I can tie up all the cables from all the entertainment center back there, then have a nice panel to hide all of them. Should see zero wiring from the front.
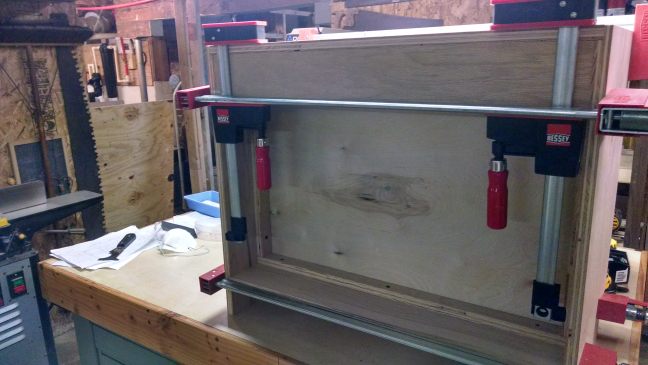
Will spend a good chunk of tomorrow doing more.
Posted by TheCatt on Mar. 15 2014,17:52
Where do the 8 tracks fit?
Posted by GORDON on Mar. 15 2014,18:05
Two answers, pick one:1. Adjustable shelves... I can make them fit. Also, I have an 8-track to go on the shelves...
2. Up your butt.
Posted by TPRJones on Mar. 16 2014,00:04
Given your predilection towards outdated media, I'm guessing #1.
Posted by Cakedaddy on Mar. 16 2014,03:05
I have Beta vcr if you want it.
Posted by GORDON on Mar. 16 2014,16:57
Today's progress:From my imagination to paper to an actual thing. Neat. The bit in the middle with no bottom shelf is where the subwoofer will sit.
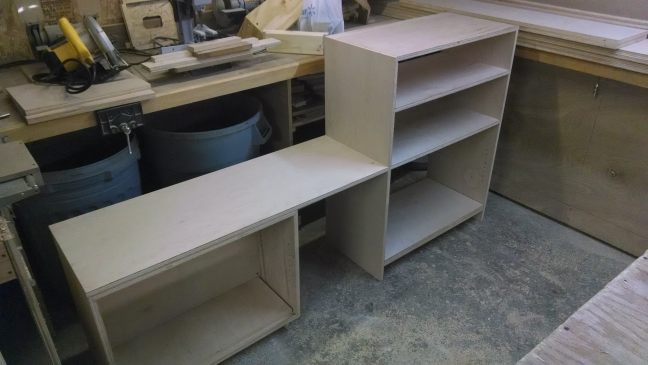
Preparing the dadoes for the bookshelf uprights.
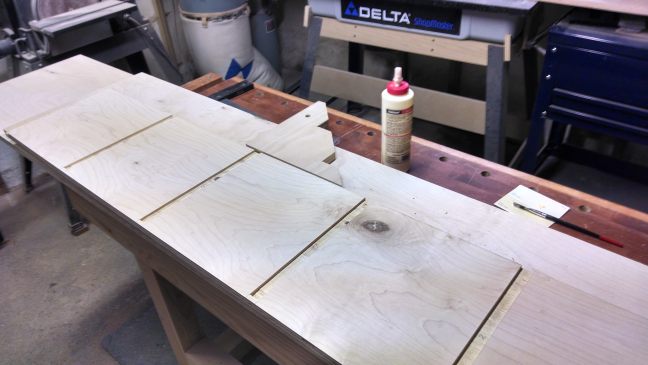
Our joints, dry fitted, pre-glued.
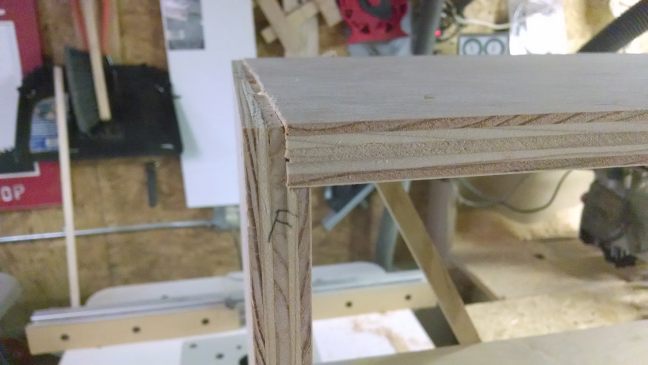
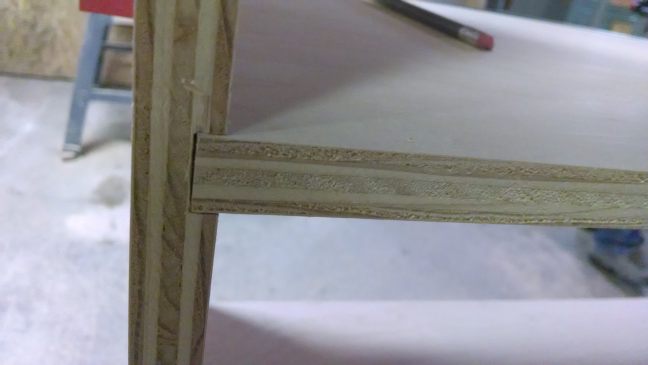
Here's what they look like all glued and clamped and drying. I designed these with open backs because too much of my awesome blue walls were getting covered up. Now you can see my walls through the shelves.
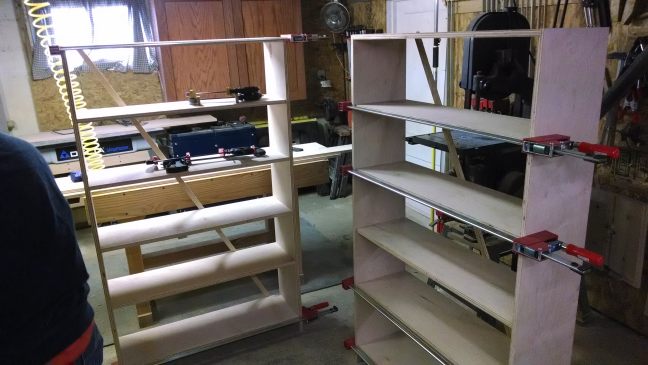
Bought some more trim and odds and ends. SHOULD be the final cash outlay.... but it seems like there is always something I forgot.
Spent: $65
Running total: $3267.
I actually have a few boards to return.... I'll adjust the running total when I actually return them.
Posted by GORDON on Mar. 23 2014,18:43
Quick update:Everything is built and I am in the process of applying stain and poly. I realized that unlike last time, the basement is now full of cushiony furniture, and doing stain and poly is a very stinky process. As I don't want that smell soaking into the furniture, I am doing the finishing out in my frozen, wet-ass garage. It isn't pleasant, but at least I aint stinking the house up. Should have shit moved into the basement sometime this week.
Posted by GORDON on Mar. 24 2014,16:33
Just returned some stuff I bought and didn't need.Spent: $-35
Running total: $3232.
Hoping to have an install day this weekend when everything gets moved from the garage and nailed to the walls of the basement. Then there are a few touch ups of stain here and there, and a few pieces of baseboard to cut and place, then the basement is fucking done, man.
Posted by GORDON on Mar. 29 2014,13:04
Got some catching up to do with my pics.Here's when we finished the final shelves in the workshop a couple weeks ago.
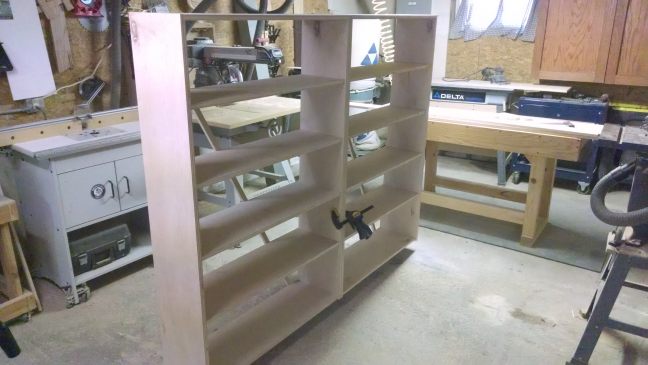
Posted by GORDON on Mar. 29 2014,13:05
Here's where I was pre-staining the trim prior to nailing it to the furniture. I decided to go with 2 colors, so I did the trim separately from the rest so it could be nailed together already 2 different colors.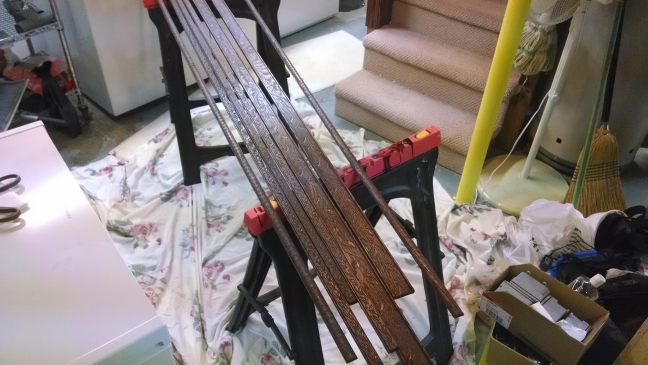
Posted by GORDON on Mar. 29 2014,13:08
This is when I was transporting the cabinets from my buddy's house to home, and had to stop for gas, and realized I left the drawer rails sitting up on the side of the truck. Good thing I was going slow to minimize jostling.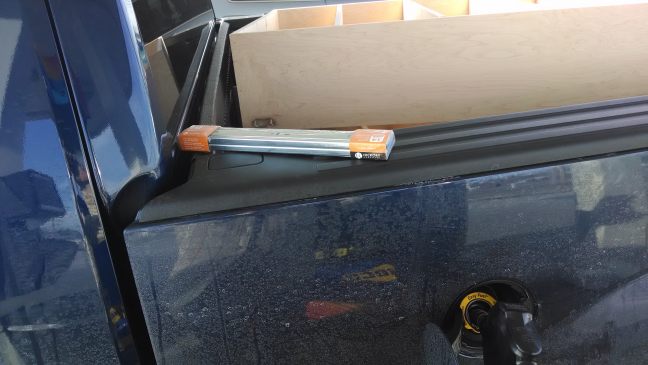
Posted by GORDON on Mar. 29 2014,13:14
Spent about 10 days staining everything in my cold, wet, flooded, frozen-ass garage, and started bringing stuff down to the basement.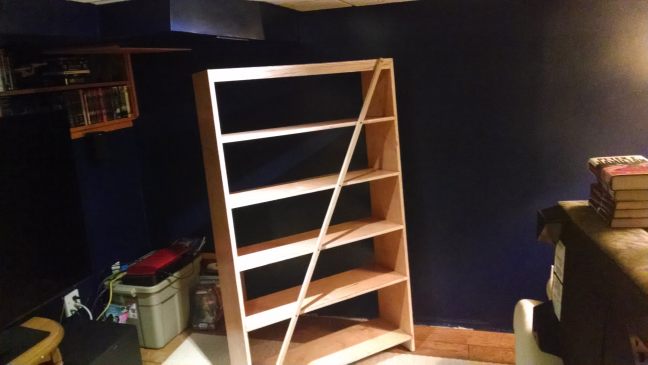
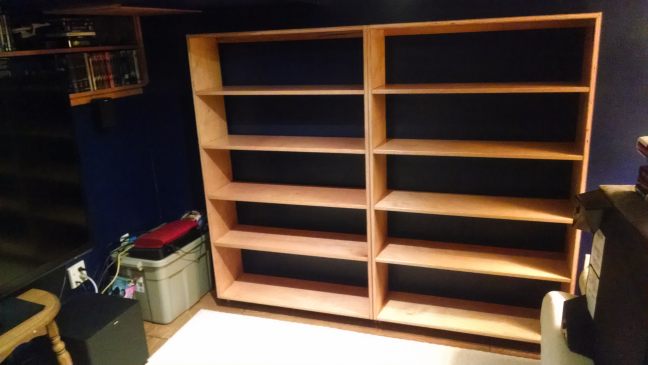
What's interesting is that I built that wall all fucked up. There is a negative slope of about 2 inches from ceiling to floor, and the slope isn't even consistent from right to left. There's less slope the farther left you go. So, I measured the rate of slope, and my carpenter buddy built everything so even after it was flush against the wall, the facing side would still be level up and down. The bottom of those shelves are about 12.5" deep, and the tops are about 11" deep. And the front face....
Perfect.
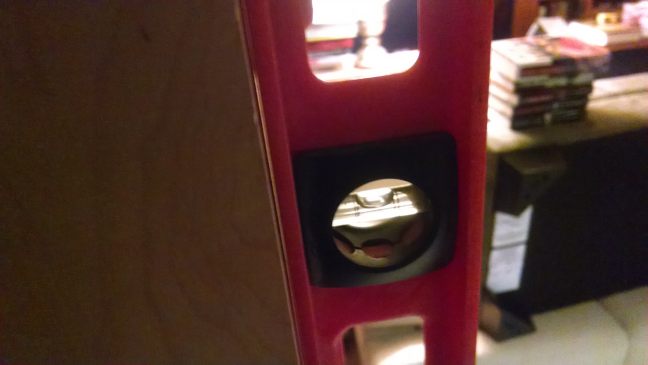
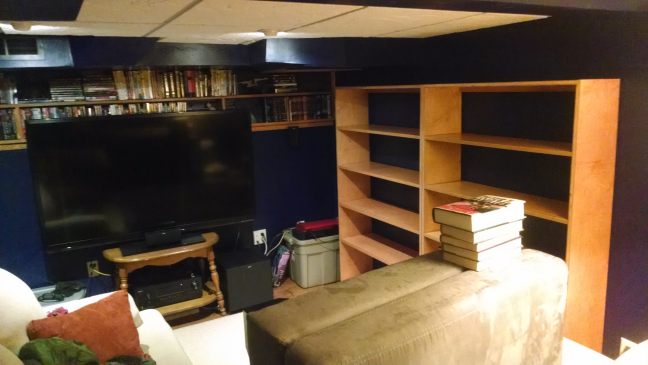
Posted by GORDON on Mar. 29 2014,13:21
And I started putting together the entertainment center part. Was a real bitch getting all the pieces level when the floor has a subtle slope.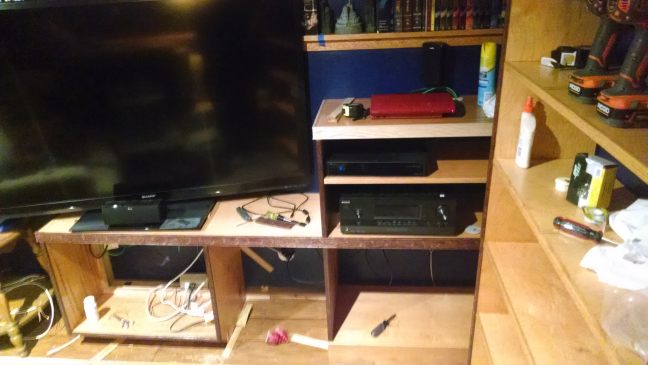
Trim pieces glued and nailed. Buddy brought over his pneumatic nailer... MUCH easier that hammer and nails when working with trim.
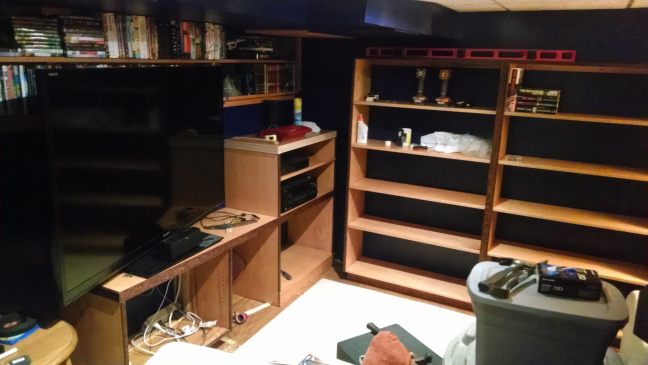
Shims everywhere in that part.
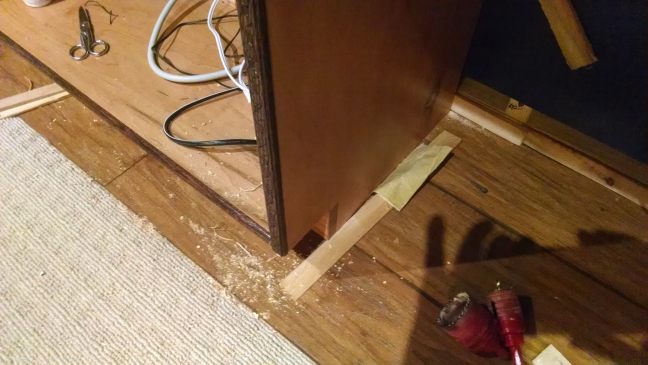
A little touch-up stain where I had to cut things to measure, one more coat of poly, a day to dry, and shit will be on the shelves.
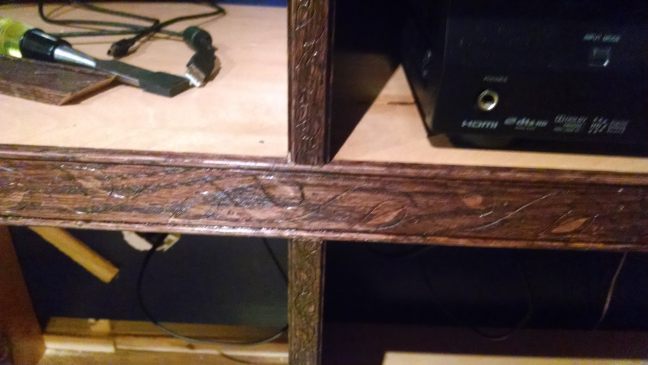
There is still a drawer to be built, a few pieces of baseboard now that the cabinets are in place, and a door to the room. I'd call this project 92% done.
Posted by GORDON on Mar. 30 2014,20:03
This is under the TV, the cabinet with the false back to hide all the wires. Got them tied up all nice and neat, separating the low voltage from the high in order to reduce interference.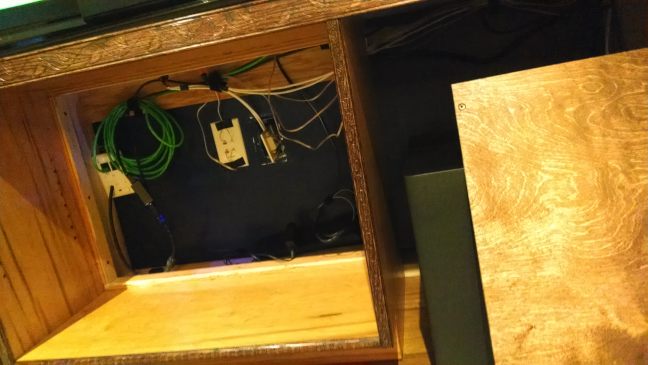
The false back.
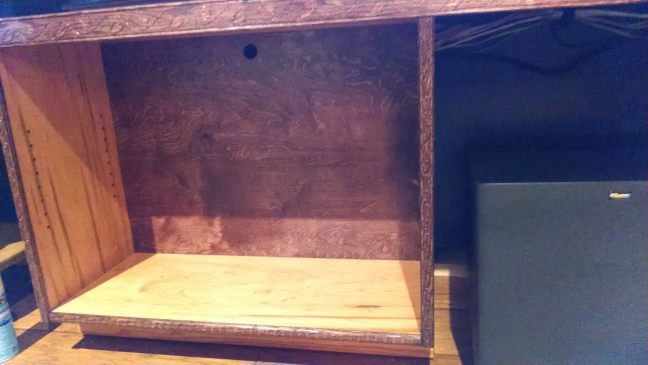
And the adjustable shelf.
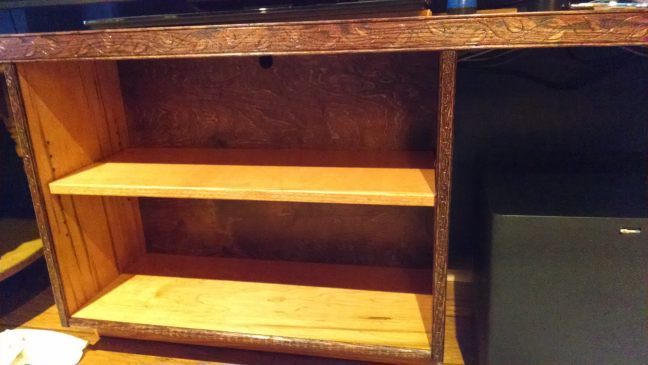
This is the subwoofer alcove, there's going to be a shelf that hides those wires.
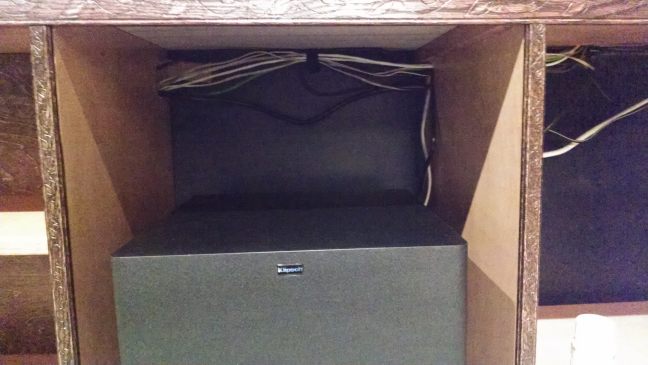
This is the component cabinet on the right, where there isn't a false back. I probably should have built one in, I didn't anticipate as many power lines running through there.
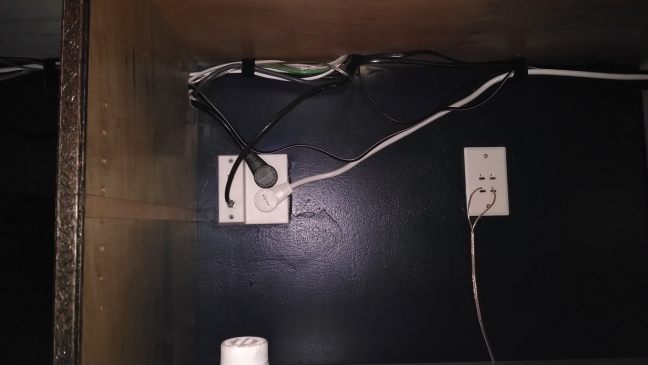
With the adjustable shelf... currently set to make room for LPs down there. That may not be permanent. Don't know.
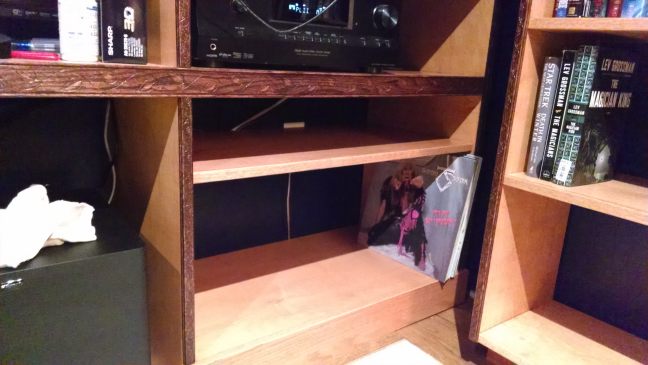
So I went from this:
To this. Neat.
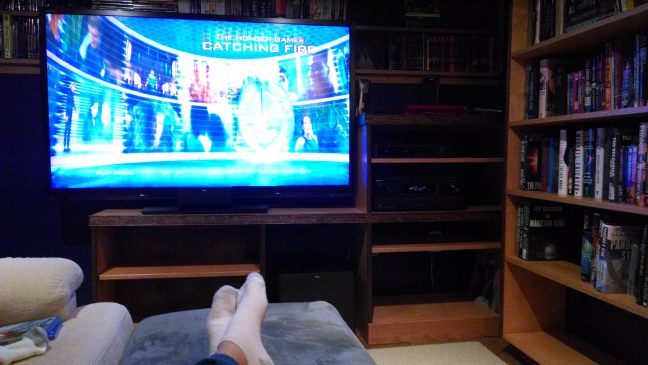
Posted by Malcolm on Mar. 31 2014,07:24
You have a massive streak of shit all over your TV in that last shot.